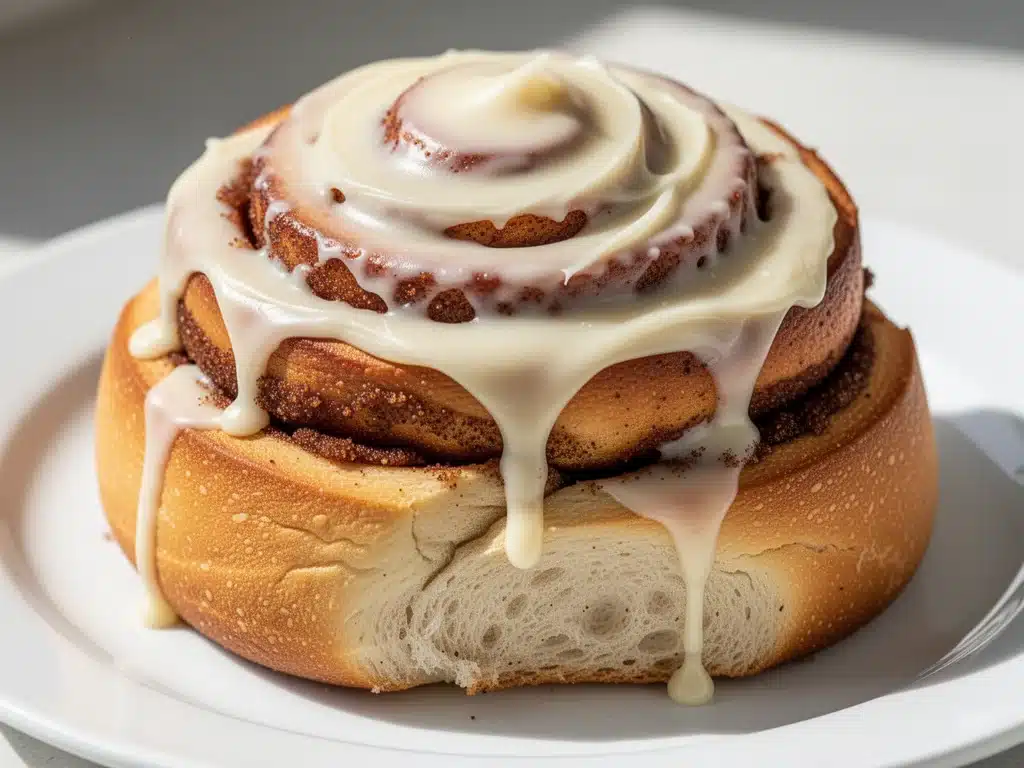
There is a specific kind of magic that happens at 6:00 AM on a Saturday when your kitchen smells like warm cinnamon, butter, and fermented dough. It’s the smell of permission. Permission to sleep in. Permission to ignore the inbox. Permission to just be for a few hours before the real world crashes back in.
For years, I treated sourdough like a chore. I’d wake up at 5:00 AM, wrestle with sticky dough, and spend half the day watching a loaf rise. It felt like a part-time job I didn’t get paid for. But then I realized something: I wasn’t baking sourdough for the bread. I was baking it because I loved the process. And once I discovered that I could use my discard—or even my active starter—to make something as decadent as these sourdough cinnamon rolls, my weekend mornings changed forever.
I’ve made these sourdough cinnamon rolls dozens of times over the last three years. Some batches were flat. Some were too tangy. One time I forgot the yeast entirely and ended up with dense, sour hockey pucks (don’t ask). But through all the trial and error, I’ve landed on a method that is genuinely easy, deeply flavorful, and absolutely worth the wait. These aren’t just breakfast; they’re an experience. They’re the reason my family actually looks forward to Saturdays.
If you’ve been intimidated by sourdough baking, let me be the one to tell you: you already have the hardest part figured out. You have a jar of starter in your fridge. Now you just need some flour, sugar, and patience. Let’s make something beautiful together.
Why You’ll Love This Sourdough Cinnamon Rolls Recipe
Look, I know there are a million cinnamon roll recipes out there. Some are quick. Some use buttermilk. Some require a stand mixer and a degree in engineering. This one is different because it leans into the sourdough advantage without making it complicated. Here’s why this recipe has earned a permanent spot in my weekend rotation:
- Complex Flavor Profile — Most cinnamon rolls taste sweet and buttery. These taste sweet, buttery, and subtly tangy. The sourdough adds a depth of flavor that regular yeast dough just can’t match. It’s sophisticated without trying too hard.
- Uses Your Discard — If you’ve been keeping a sourdough starter, you know the guilt of throwing away discard. This recipe uses it up, saving you money and reducing waste. It’s the perfect way to keep your starter happy without feeding it a dozen times a day.
- Make-Ahead Friendly — Here’s the best part: you can assemble these the night before and bake them in the morning. Or, you can bake them, let them cool, and freeze them for a rainy day. I’ve made these on Friday night for Saturday breakfast, and they come out just as fluffy as if I’d started fresh.
- Perfectly Chewy Texture — Because of the fermentation, these rolls have a chew that’s addictive. They’re not dense like bread, but they’re not airy like a brioche. They’re in that perfect, pillowy middle ground that makes you want to eat three instead of one.
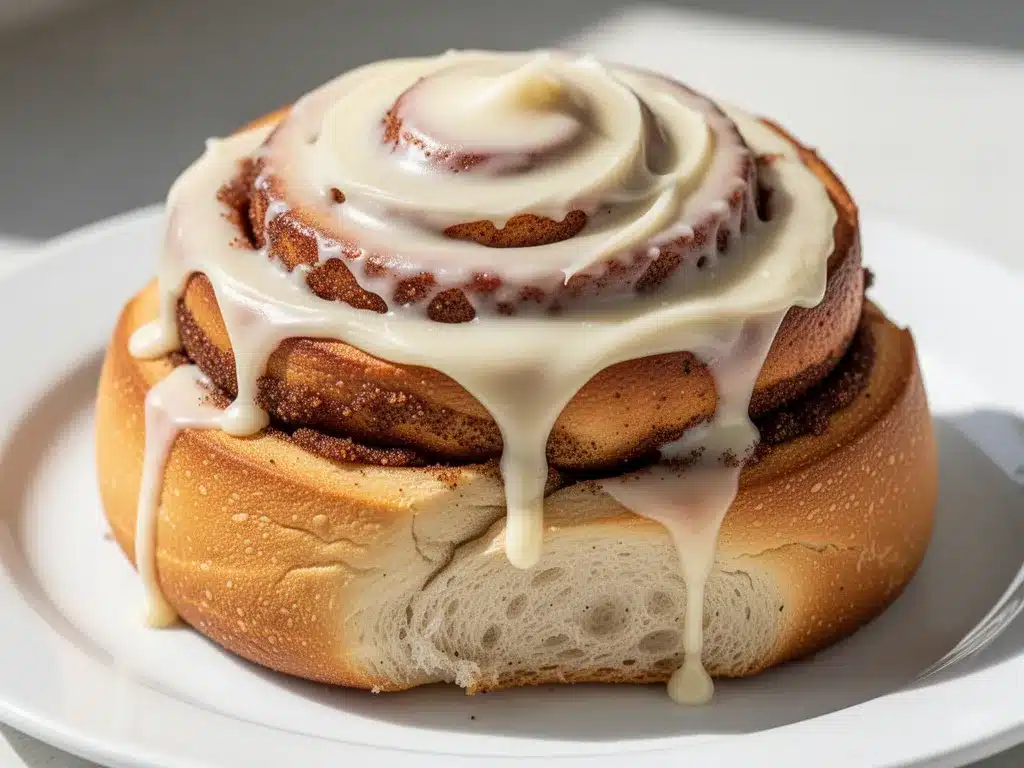
- Glaze That Actually Sticks — I’ve tried recipes where the glaze slides right off. Not here. The warm rolls absorb just enough of the cream cheese glaze to make every bite moist and rich. It’s not too sweet, just right.
This is my go-to when I want to impress guests without spending all day in the kitchen. It smells incredible, it tastes amazing, and it makes you look like a baking wizard. Even if you’re a total beginner, this recipe will work for you.
Ingredients You’ll Need
Before we get started, let’s talk about what’s going into the bowl. I’m particular about a few things here, mostly because I’ve learned the hard way what goes wrong. But don’t worry—most of this is pantry staples.
For the Dough
Active Sourdough Starter (1 cup / 240g) — This needs to be bubbly and fed within 12 hours of using it. If your starter is sluggish, feed it a few hours before you start. I prefer using discard for a tangier flavor, but active starter works too if you want a milder taste. Just make sure it’s alive and kicking.
Warm Milk (1 cup / 240ml) — I use whole milk for richness. Warm it until it’s about 110°F (43°C)—think bathwater temperature, not hot. If it’s too hot, it’ll kill the yeast. If it’s too cold, the dough won’t rise properly.
Unsalted Butter (4 tablespoons / 56g) — Melted. Room temperature is fine, but melted makes it easier to mix. I use high-quality butter here because it really shines in the dough.
Eggs (2 large) — Room temperature eggs incorporate better into the dough. I take them out of the fridge 30 minutes before I start. If I forget, I warm them in a bowl of warm water for 5 minutes.
Sugar (½ cup / 100g) — I use granulated white sugar. It feeds the yeast and adds sweetness. You can use brown sugar for a deeper molasses flavor, but white gives a cleaner taste that pairs well with the glaze.
Salt (1 teaspoon) — Essential for flavor and to control yeast activity. Don’t skip it, even if you’re watching sodium.
All-Purpose Flour (3 to 3½ cups / 375-437g) — This is where technique matters. Start with 3 cups and add more only if needed. Different flours absorb water differently, so don’t be afraid to adjust. I use King Arthur All-Purpose because it has a good protein content for structure.
Instant Yeast (2 teaspoons) — Yes, even though we’re using sourdough, a little bit of instant yeast helps ensure the rolls rise properly and have that fluffy texture. It’s not cheating; it’s smart baking.
For the Filling
Unsalted Butter (½ cup / 113g, softened) — This needs to be softened to room temperature. If it’s cold, it’ll tear the dough. If it’s melted, it’ll soak in and not create layers. Softened is key.
Brown Sugar (1 cup / 200g) — Dark brown sugar has more molasses and gives a deeper, caramel-like flavor. I prefer dark over light for this recipe.
Cinnamon (2 tablespoons) — Use good-quality cinnamon. If your spice jar has been sitting since 2019, toss it and buy new. Fresh cinnamon makes a world of difference.
Nutmeg (½ teaspoon) — Optional, but it adds warmth. I always add a pinch because it makes the filling taste like a pie.
For the Cream Cheese Glaze
Softened Cream Cheese (4 ounces / 113g) — Full-fat block cream cheese. Not the spreadable kind in a tub. Block cream cheese has less water and gives a thicker, richer glaze. Let it soften on the counter for 30 minutes.
Powdered Sugar (1 cup / 120g) — Sifted to avoid lumps. I hate lumpy glaze, so I always sift mine.
Milk or Cream (2-3 tablespoons) — Adjust to get your desired consistency. I like it thick enough to drizzle but thin enough to spread.
Vanilla Extract (1 teaspoon) — Pure vanilla, not imitation. It makes the glaze taste expensive.
Equipment Needed
You don’t need fancy gear for this. Here’s what I actually use:
Large Mixing Bowl — I use a 6-quart bowl. It needs to be big enough to knead the dough without making a mess.
Dough Whisk or Wooden Spoon — For mixing the initial ingredients. A dough whisk is faster, but a wooden spoon works fine.
Clean Kitchen Towel or Plastic Wrap — For covering the dough while it rises. I use a damp towel because it doesn’t stick to the dough like plastic wrap sometimes does.
Rolling Pin — A standard 14-inch rolling pin is perfect. I prefer wood over silicone because it has more weight and rolls smoother.
9×13 Inch Baking Pan — I use a glass pan because it heats evenly. Metal pans can brown the bottoms too quickly. If you use a metal pan, reduce the baking time by 5 minutes.
Parchment Paper — Not strictly necessary if you grease the pan well, but it makes cleanup easier. I line the pan just in case.
Mixer (Optional) — I often make this by hand, but a stand mixer with a dough hook works if you have one. I wouldn’t recommend a hand mixer—it’s too tough for this dough.
How to Make It: Step-by-Step
Alright, let’s make these sourdough cinnamon rolls! I’m walking you through exactly how I do it, including the little tricks I’ve picked up over the years.
Step 1: Make the Dough (10 minutes active)
In a large bowl, combine the warm milk, melted butter, eggs, sugar, salt, sourdough starter, and instant yeast. Whisk everything together until smooth. The mixture might look a bit curdled—that’s normal. The eggs and acid from the starter can sometimes separate slightly, but it’ll come together.
Gradually add the flour, about ½ cup at a time, stirring with a wooden spoon or dough whisk. Once the dough becomes too thick to stir, turn it out onto a lightly floured surface. Knead for 8-10 minutes until the dough is smooth, elastic, and slightly tacky but not sticky. If it’s too sticky, add a sprinkle of flour. If it’s too dry, add a teaspoon of water. The dough should pass the “windowpane test”—stretch a small piece thin enough to see light through it without tearing.
Place the dough in a lightly oiled bowl, cover with a damp towel, and let it rise in a warm spot for 1-2 hours, or until it has doubled in size. Since we’re using sourdough, this might take a bit longer than regular yeast dough. Be patient.
Step 2: Prepare the Filling (5 minutes)
While the dough rises, mix the softened butter, brown sugar, cinnamon, and nutmeg in a small bowl. It should look like wet sand. If the butter is too hard, microwave it for 10 seconds to soften it up. Set aside.
Step 3: Shape the Rolls (10 minutes)
Once the dough has doubled, punch it down gently to release air. Turn it out onto a lightly floured surface and roll it into a 12×16 inch rectangle. The edges don’t need to be perfect, but try to keep the thickness even.
Spread the butter-sugar mixture evenly over the dough, leaving a ½-inch border at the top edge. Starting from the long edge closest to you, roll the dough up tightly into a log. Pinch the seam to seal it. If the dough starts to unravel, stop and press it firmly.
Using a sharp knife or dental floss, cut the log into 12 equal rolls. I prefer dental floss—it cuts cleanly without squishing the rolls. Place them seam-side down in the prepared 9×13 inch baking pan. Leave a little space between them so they can expand.
Step 4: Second Rise (1-2 hours)
Cover the pan with a damp towel or plastic wrap and let the rolls rise again for 1-2 hours, or until they’ve puffed up and are nearly touching. This step is crucial for fluffy rolls. If you rush this, they’ll be dense. I usually let them rise while I preheat the oven.
Step 5: Bake (25-30 minutes)
Preheat your oven to 350°F (175°C). Once the rolls have risen, bake them for 25-30 minutes, or until they are golden brown on top and cooked through. If the tops start browning too quickly, cover them loosely with foil for the last 10 minutes.
To test if they’re done, insert a toothpick into the center of a roll. It should come out clean or with just a few moist crumbs. The internal temperature should be around 190°F (88°C).
Step 6: Make the Glaze and Finish (10 minutes)
While the rolls bake, make the glaze. In a medium bowl, beat the softened cream cheese until smooth. Add the powdered sugar, vanilla, and milk/cream. Beat until creamy and smooth. If it’s too thick, add more milk. If it’s too thin, add more powdered sugar.
Once the rolls are out of the oven, let them cool in the pan for 5-10 minutes. Then, drizzle or spread the glaze over the warm rolls. The warmth helps the glaze melt slightly and soak in. Serve immediately while they’re warm and gooey.
Expert Tips & Tricks
Here’s everything I’ve learned from making this dozens of times. These tips will save you from my mistakes.
- Temperature Matters — Your milk should be warm, not hot. If you don’t have a thermometer, test it on your wrist. It should feel warm, not hot. Hot milk kills yeast. Cold milk slows it down.
- Don’t Over-Knead — Sourdough dough is sticky and tough. It’s tempting to add more flour, but this will make dense rolls. Knead just until smooth. If it’s sticky, wet your hands instead of adding flour.
- Roll Tight — When rolling the dough, keep it tight. Loose rolls will unravel in the oven. Pinch the seam firmly.
- Use Dental Floss — I know it sounds weird, but dental floss cuts through the dough without compressing it. A knife can squish the layers. Just tie a loop around the roll and pull the ends to cut.
- Patience with the Rise — Sourdough is slower than commercial yeast. Don’t rush the second rise. The rolls need to puff up before baking. If they look small, give them more time.
Common Mistakes:
Mistake: Rolls are flat. Fix: Your yeast might be dead, or the dough didn’t rise long enough. Check your yeast expiration date and ensure your kitchen is warm enough for rising.
Mistake: Glaze is too runny. Fix: Your cream cheese might have been too warm, or you added too much milk. Chill the glaze for 15 minutes before using, or add more powdered sugar.
Mistake: Rolls are dry. Fix: You overbaked them. Start checking at 25 minutes. The tops should be golden, not dark brown.
Variations & Substitutions
Once you’ve nailed the basic version, here’s how you can mix it up. I’ve tried all of these.
Classic Cinnamon Roll — Add ½ cup of chopped pecans or walnuts to the filling for crunch. It adds a nice texture contrast.
Maple Bacon Rolls — This is a game-changer. Sprinkle crispy cooked bacon bits over the filling before rolling. The salty-sweet combo is incredible. I served these to my husband, and he hasn’t stopped talking about them.
Orange Glaze — Swap the milk in the glaze for orange juice and add the zest of one orange. It brightens up the richness and tastes like a morning in Florida.
Cardamom Twist — Swap half the cinnamon for ground cardamom. It gives a floral, Scandinavian vibe that’s fancy but easy.
Gluten-Free — Use a 1:1 gluten-free flour blend. The texture will be slightly different, but they still taste great. I’ve used Bob’s Red Mill 1:1 and it works well.
Dairy-Free — Use coconut oil instead of butter and oat milk instead of dairy milk. For the glaze, use coconut cream and maple syrup instead of powdered sugar. It’s richer but still delicious.
Serving & Storage
How to Serve: I usually serve these straight from the pan, right out of the oven. They’re best when they’re warm and gooey. Pair them with a cup of coffee or tea. I also like to serve them with vegan mango turmeric smoothie bowls on the side for a balanced breakfast.
Refrigerator: Store leftovers in an airtight container for up to 3 days. The glaze will soften, but the rolls stay moist. Reheat in the microwave for 30 seconds before eating.
Freezing: You can freeze unbaked rolls. Assemble them in the pan, cover tightly with plastic wrap and foil, and freeze. When ready to bake, let them thaw and rise at room temperature for 4-6 hours, then bake as directed. Baked rolls can also be frozen for up to 2 months. Thaw and reheat in the oven at 300°F for 10 minutes.
Reheating: Avoid the microwave if you can. It makes the rolls chewy. Reheat in the oven at 300°F for 10-15 minutes to restore the soft texture.
Nutrition Information
I’m not a nutritionist, but here’s the breakdown if you’re tracking. This is per roll (based on 12 rolls), including the glaze.
- Calories: 380
- Protein: 6g
- Carbs: 52g
- Fiber: 1g
- Sugar: 28g
- Fat: 16g
- Saturated Fat: 9g
- Cholesterol: 45mg
- Sodium: 180mg
What’s Good: Decent protein from the eggs and flour. Calcium from the cheese and milk.
What to Know: High in sugar and carbs. It’s a treat, so enjoy it in moderation. If you’re watching sugar, reduce the glaze or skip it entirely.
Final Thoughts
So that’s my go-to sourdough cinnamon roll recipe! I’ve probably talked your ear off at this point, but when you make a recipe this often, you have a lot to say about it.
This has saved weekend mornings more times than I can count. It’s my answer to “what’s for breakfast” when I want to feel fancy but don’t want to stress. My kids are happy, my husband’s happy, and I’m happy because I’m not stressed about cooking.
Make it yours! Try different add-ins, swap in your favorite spices, or adjust the sweetness. The best recipes are the ones you adapt to your family’s tastes.
If you make this, drop a comment and let me know what you think! I love hearing how recipes turn out in your kitchen. And if something doesn’t work, tell me that too—I’m here to help troubleshoot.
Happy baking! And I hope your kitchen smells half as good as mine does right now.
Frequently Asked Questions
Can I use discard instead of active starter?
Yes! In fact, I prefer discard because it gives a tangier flavor. Just make sure your discard is fed within 24 hours. If it’s been sitting in the fridge for weeks, feed it and let it bubble up for a few hours before using. The yeast in the fresh feed will help the dough rise.
Why did my rolls turn out dense?
This usually happens if the dough didn’t rise long enough, or if you added too much flour during kneading. Sourdough dough is naturally stickier than regular bread dough. Wet your hands to handle it instead of adding more flour. Also, ensure your kitchen is warm (75-80°F) for the best rise.
Can I make these ahead of time?
Absolutely. Assemble the rolls in the pan, cover tightly with plastic wrap, and refrigerate overnight. In the morning, let them sit at room temperature for 30 minutes while the oven preheats, then bake as directed. They’ll rise nicely in the fridge and bake up perfectly.
Why is my dough too sticky to knead?
Sourdough dough is supposed to be sticky! Don’t add more flour unless it’s impossible to handle. Wet your hands and keep working the dough. It will become smoother and less sticky as you knead. Adding too much flour will make the rolls tough.
Can I freeze the glaze?
I don’t recommend freezing the glaze. It can separate and become grainy when thawed. It’s best to make the glaze fresh when you’re ready to serve the rolls. If you must, you can freeze the baked rolls without glaze, then make fresh glaze when reheating.
What if my starter isn’t bubbling?
If your starter is sluggish, it might be hungry. Feed it a small amount of flour and water and let it sit in a warm spot for a few hours until it doubles in size. You can also add a bit more instant yeast to compensate for the weak starter.
Can I use bread flour instead of all-purpose flour?
Yes, but the rolls will be chewier and denser. All-purpose flour gives a softer, more tender crumb, which is what we want for cinnamon rolls. If you use bread flour, reduce the kneading time slightly to avoid over-developing the gluten.
Pin This Recipe!


Sourdough Cinnamon Rolls: Easy Weekend Breakfast
- Total Time: 65 minutes
- Yield: 12 servings 1x
Description
These sourdough cinnamon rolls offer a complex, tangy flavor and perfectly chewy texture. They are make-ahead friendly, use sourdough discard or active starter, and are topped with a rich cream cheese glaze for an indulgent weekend breakfast.
Ingredients
- 1 cup (240g) active sourdough starter or discard
- 1 cup (240ml) warm whole milk (110°F/43°C)
- 4 tablespoons (56g) unsalted butter, melted
- 2 large eggs, room temperature
- ½ cup (100g) granulated white sugar
- 1 teaspoon salt
- 3 to 3½ cups (375-437g) all-purpose flour
- 2 teaspoons instant yeast
- ½ cup (113g) unsalted butter, softened (for filling)
- 1 cup (200g) dark brown sugar
- 2 tablespoons ground cinnamon
- ½ teaspoon ground nutmeg
- 4 ounces (113g) full-fat block cream cheese, softened (for glaze)
- 1 cup (120g) powdered sugar, sifted (for glaze)
- 2–3 tablespoons milk or cream (for glaze)
- 1 teaspoon pure vanilla extract (for glaze)
Instructions
- In a large bowl, whisk together warm milk, melted butter, eggs, sugar, salt, sourdough starter, and instant yeast until smooth.
- Gradually add flour, about ½ cup at a time, stirring until the dough becomes too thick to stir. Turn out onto a lightly floured surface and knead for 8-10 minutes until smooth, elastic, and slightly tacky.
- Place dough in a lightly oiled bowl, cover with a damp towel, and let rise in a warm spot for 1-2 hours until doubled in size.
- While dough rises, mix softened butter, brown sugar, cinnamon, and nutmeg in a small bowl to create the filling.
- Punch down the risen dough and roll it into a 12×16 inch rectangle on a floured surface.
- Spread the filling evenly over the dough, leaving a ½-inch border at the top. Roll the dough tightly into a log and pinch the seam to seal.
- Cut the log into 12 equal rolls using dental floss or a sharp knife. Place them seam-side down in a greased 9×13 inch baking pan.
- Cover the pan and let rolls rise again for 1-2 hours until puffed up and nearly touching.
- Preheat oven to 350°F (175°C). Bake rolls for 25-30 minutes until golden brown and cooked through (internal temp 190°F/88°C).
- While rolls bake, beat cream cheese until smooth. Add powdered sugar, vanilla, and milk/cream, beating until creamy.
- Let baked rolls cool in the pan for 5-10 minutes, then drizzle or spread the glaze over the warm rolls. Serve immediately.
Notes
Ensure milk is warm (110°F) but not hot to avoid killing yeast. Sourdough dough is naturally sticky; wet your hands instead of adding extra flour. For make-ahead, assemble rolls and refrigerate overnight, then let sit at room temperature for 30 minutes before baking. Rolls can be frozen unbaked or baked and frozen for up to 2 months.
- Prep Time: 35 minutes
- Cook Time: 30 minutes
- Category: Breakfast
- Cuisine: American
Nutrition
- Serving Size: 1 roll
- Calories: 380
- Sugar: 28
- Sodium: 180
- Fat: 16
- Saturated Fat: 9
- Carbohydrates: 52
- Fiber: 1
- Protein: 6
Keywords: sourdough cinnamon rolls, weekend breakfast, sourdough discard recipe, cream cheese glaze, make-ahead breakfast, easy sourdough


