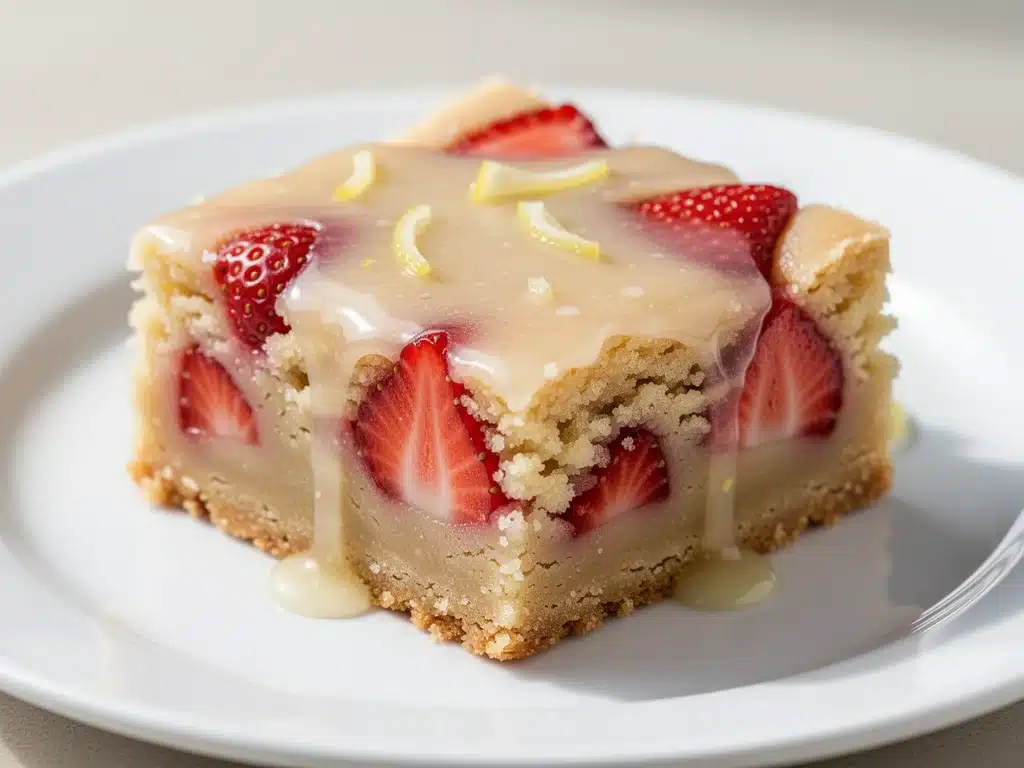
I was standing in my kitchen, staring at a box of shortbread cookies that had gone soft in the humidity, when I decided I was done with trying to bake delicate, individual cookies that required twenty minutes of chilling and perfect timing. It was July, the kind of hot, sticky July where the air feels like a warm blanket you didn’t ask for, and I just wanted something cold, sweet, and easy. No rolling pins. No cookie cutters. No stress.
So I did what any desperate, heat-struck baker does: I crushed those sad cookies into a pan, threw in some frozen strawberries I’d saved from last winter, and drizzled them with a lemon glaze that tasted like sunshine. I expected a mess. I expected a dense, soggy bar that would fall apart the moment I tried to cut it.
Instead, I got magic.
Those Easy Strawberry Shortbread Bars turned out crisp on the bottom, jammy and fruity in the middle, and tangy on top. They were the perfect balance of sweet and tart, and they tasted like a high-end bakery dessert but cost pennies to make. My kids ate three before I even finished slicing them. I’ve made them now at every family gathering, picnic, and random Tuesday night craving since that humid afternoon in July. They are hands-down the best lemon glazed dessert I’ve ever created.
What started as a lazy hack has become my go-to recipe for when I need to impress guests without spending hours in the kitchen. There’s something about the crunch of the shortbread crust meeting the soft, warm strawberry filling that just hits different. It’s nostalgic but fresh, classic but with a bright twist. And the best part? You don’t need any special skills to make them. If you can mix batter and press it into a pan, you can master these bars.
Why You’ll Love These Strawberry Shortbread Bars
I’ve tried dozens of strawberry bar recipes over the years, and most of them are either too complicated, too dry, or just… meh. These bars are different. Here’s why they’ve earned a permanent spot in my dessert rotation:
Stupid Simple Ingredients — Seriously, you probably have everything in your pantry already. Flour, butter, sugar, strawberries, lemon, and a little cream cheese for the glaze. No weird extracts or hard-to-find items. I keep these ingredients stocked specifically for this recipe because it saves me when I need a quick win.
One-Bowl Crust — The shortbread crust comes together in literally one bowl. No fancy mixer required. Just mix, press, and bake. I’ve made this with a fork, a spoon, and even my hands when I was feeling particularly lazy. It all works.
Bright, Tangy Finish — Many strawberry desserts are cloyingly sweet. The lemon glaze cuts through that richness perfectly. It adds a zesty kick that keeps you coming back for more. It’s the kind of flavor profile that feels sophisticated but is actually very approachable.
Make-Ahead Friendly — These bars actually taste better the next day. The flavors meld together, the crust sets up nicely, and they hold their shape perfectly for transport. I’ve brought them to potlucks, church socials, and office parties, and they always travel well. No crumbling disaster.
Seasonal Flexibility — While strawberries are best in summer, you can use frozen berries year-round. I’ve made these in December with frozen strawberries, and they taste just as good. The key is thawing them properly so they don’t make the bars too watery.
This is my go-to dessert when I want something that feels homemade and special but doesn’t require a degree in pastry arts. It’s reliable, delicious, and always a crowd-pleaser. Whether you’re feeding a hungry family or bringing a treat to share, these bars deliver every single time.
Ingredients You’ll Need
Here’s the best part: this recipe is incredibly pantry-friendly. You don’t need to run to the store for anything exotic. Here’s what you need to make the perfect batch of shortbread bars.
For the Shortbread Crust
Unsalted butter (1 cup / 226g, softened) — This is the foundation of the shortbread. Use real butter, not margarine. The flavor difference is huge. I like to take it out of the fridge 30 minutes before starting so it’s easy to mix.
Granulated sugar (½ cup / 100g) — Adds sweetness and helps the crust crisp up. You can use brown sugar for a chewier, more caramel-like crust, but white sugar gives that classic shortbread texture.
All-purpose flour (2 cups / 250g) — Standard flour works perfectly. Don’t try to substitute with whole wheat unless you want a denser, heartier bar. For this recipe, light and crumbly is the goal.
Salt (¼ teaspoon) — Just a pinch to balance the sweetness. Don’t skip it, even if you’re using unsalted butter. It makes the flavors pop.
For the Strawberry Filling
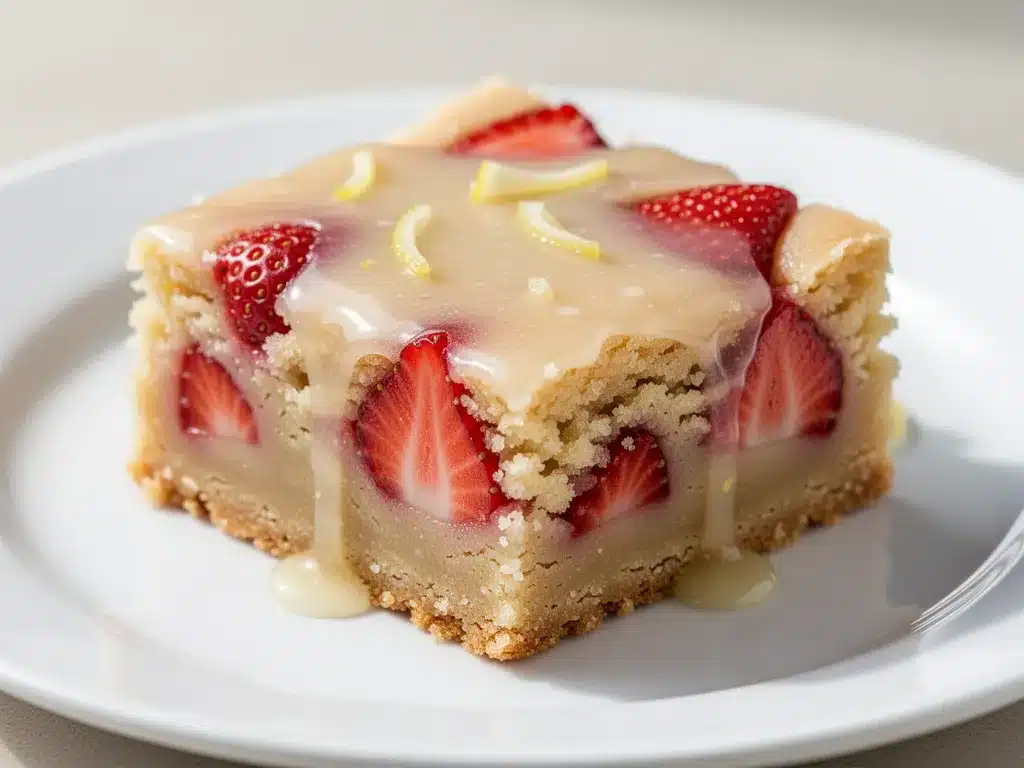
Fresh or frozen strawberries (3 cups / about 450g, hulled and sliced) — Fresh is best when they’re in season and cheap. Frozen works great too, just make sure to thaw and drain them well. I use frozen in winter because it’s cheaper and just as good.
Granulated sugar (½ cup / 100g) — Sweetens the berries and helps draw out their juices. Adjust based on how tart your strawberries are.
Cornstarch (2 tablespoons) — This is crucial. It thickens the strawberry juices so you don’t end up with a soupy bar. Without it, the filling leaks out everywhere.
Lemon juice (1 tablespoon) — Adds brightness and prevents the strawberries from tasting flat. It also helps the cornstarch activate properly.
For the Lemon Glaze
Cream cheese (4 oz / 113g, softened) — Gives the glaze a rich, tangy, cheesecake-like flavor. It’s the secret ingredient that makes this glaze better than a simple powdered sugar lemon drizzle.
Powdered sugar (1 cup / 120g) — Sweetens the glaze and gives it body. Sift it to avoid lumps.
Lemon juice (2-3 tablespoons) — Add gradually until you reach your desired consistency. More lemon = more tang.
Lemon zest (1 teaspoon) — Optional but highly recommended. It adds a burst of fresh lemon aroma that elevates the whole bar.
Vanilla extract (½ teaspoon) — Just a splash to round out the flavors.
Equipment Needed
You don’t need fancy equipment for this. Here’s what I actually use in my kitchen:
9×13 inch baking dish — A standard glass or metal pan works best. Glass heats more evenly, but metal gives a crispier crust. I prefer glass because I can see the bottom browning.
Mixing bowls — Two medium bowls. One for the crust, one for the glaze. I use plastic bowls because they’re easy to clean and don’t slip around.
Whisk — For mixing the glaze until it’s smooth. A fork works in a pinch, but a whisk is faster.
Pastry brush or knife — For spreading the crust evenly. I usually just use my fingers or the back of a spoon.
Rolling pin (optional) — I don’t use one because I press the crust by hand, but if you want it perfectly even, a rolling pin helps.
Wire cooling rack — Essential for cooling the bars completely before glazing. If you glaze them while they’re warm, the glaze will melt into the crust.
Sharp knife or pizza cutter — For slicing. A pizza cutter makes clean cuts without squishing the bars. I’ve ruined several bars with a dull knife, so keep this in mind.
How to Make Easy Strawberry Shortbread Bars
Alright, let’s make these! I’m walking you through exactly how I do it, including the little tricks I’ve picked up over the years.
Step 1: Prep Your Pan and Oven (5 minutes)
Preheat your oven to 350°F (175°C). Line your 9×13 inch baking dish with parchment paper, leaving an overhang on the long sides. This is the most important step for easy removal later. I grease the parchment lightly with butter spray to ensure it sticks to the pan.
Step 2: Make the Shortbread Crust (5 minutes)
In a medium bowl, mix the softened butter, sugar, and salt until well combined. It should look like wet sand. Add the flour and mix until a dough forms. Don’t overmix—just bring it together. Press the dough evenly into the bottom of your prepared pan. Use your fingers or the bottom of a measuring cup to pack it down firmly. This ensures the crust stays together when sliced.
Step 3: Bake the Crust (15-18 minutes)
Bake the crust for 15-18 minutes, or until the edges are lightly golden and the center is set. It shouldn’t be dark brown, just a pale gold. Remove from the oven and let it cool slightly while you make the filling. Leave the oven on.
Step 4: Prepare the Strawberry Filling (5 minutes)
In a medium bowl, combine the sliced strawberries, sugar, cornstarch, and lemon juice. Toss gently until the berries are evenly coated. The cornstarch will start to thicken the juices immediately. Let it sit for 10 minutes while the crust cools. This helps the berries release their juices so they cook evenly.
Step 5: Add Filling and Bake (25-30 minutes)
Pour the strawberry mixture over the partially baked crust. Spread it out evenly. Return to the oven and bake for 25-30 minutes, or until the filling is bubbly and the edges are golden. You’ll see the juices thickening and bubbling around the edges. If the crust edges start to brown too quickly, cover them with foil.
Step 6: Cool Completely (1-2 hours)
This is the hardest part: waiting. Remove the pan from the oven and place it on a wire rack. Let it cool completely to room temperature. This takes at least an hour, but longer is better. If you try to glaze warm bars, the glaze will melt and soak in. Patience pays off.
Step 7: Make the Lemon Glaze (5 minutes)
In a small bowl, whisk together the softened cream cheese, powdered sugar, lemon juice, lemon zest, and vanilla until smooth and spreadable. Add more lemon juice if it’s too thick, or more powdered sugar if it’s too thin. It should be thick enough to hold its shape but thin enough to spread easily.
Step 8: Glaze and Slice
Spread the glaze evenly over the cooled bars. Use a spatula to get it to the edges. Let the glaze set for 15-20 minutes before slicing. Use a sharp knife or pizza cutter for clean cuts. Dust with extra powdered sugar or fresh mint if you’re feeling fancy.
Expert Tips & Tricks
Here’s everything I’ve learned from making these bars dozens of times. These tips will save you from my mistakes.
Drain Frozen Strawberries Well — If you use frozen berries, thaw them completely and drain off excess liquid. I usually put them in a colander and press gently with a paper towel. Too much water makes the filling soggy.
Don’t Skip the Pre-Bake — Baking the crust first prevents a gummy bottom. Shortbread absorbs moisture quickly, so giving it a head start ensures a crisp base.
Cool Completely Before Glazing — I know it’s tempting to dig in early, but warm bars + glaze = mess. Trust me. Let them cool fully for the best texture and presentation.
Adjust Glaze Consistency — The glaze should be thick enough to stay on top but thin enough to spread. If it’s too thick, add lemon juice one teaspoon at a time. If it’s too thin, add powdered sugar.
Store Properly — Keep bars in an airtight container at room temperature for up to 3 days. In the fridge, they last up to 5 days, but the crust may soften slightly. Bring to room temperature before serving.
Make Ahead Strategy — You can make the crust and filling up to a day ahead. Store the baked and cooled bars (without glaze) in the fridge. Glaze them just before serving.
Variations & Substitutions
Once you’ve nailed the basic version, here’s how you can mix it up. I’ve tried all of these.
Raspberry Version — Swap strawberries for raspberries. They’re tarter, so you might want to add an extra tablespoon of sugar. Raspberry shortbread bars are equally delicious.
Mixed Berry — Use a mix of strawberries, blueberries, and raspberries. It looks beautiful and adds complexity. Just make sure all berries are similarly sized.
Chocolate Chip Twist — Add ½ cup of chocolate chips to the crust before baking. Or drizzle melted chocolate over the glaze. My kids love this version.
Coconut Cream Cheese Glaze — Replace half the lemon juice with coconut milk in the glaze. Add shredded coconut on top. It’s tropical and delicious.
Gluten-Free — Use a 1:1 gluten-free flour blend in the crust. The texture might be slightly more crumbly, but it still works well.
Dairy-Free — Use dairy-free butter in the crust and a dairy-free cream cheese alternative for the glaze. The flavor is slightly different but still good.
Serving & Storage
These bars are versatile and great for any occasion. Here’s how I serve and store them.
How to Serve
I usually serve these at room temperature. They’re perfect with a cup of tea or coffee. I also like to serve them with a dollop of whipped cream or a scoop of vanilla ice cream for a decadent treat. They travel well in a picnic basket or lunchbox.
Side Dishes
These bars are a dessert on their own, but if you’re serving them as part of a larger meal, pair them with light desserts like fruit salad or sorbet. They’re rich enough that you don’t need much else.
Storage Instructions
Refrigerator: Store in an airtight container for up to 5 days. Layer with parchment paper to prevent sticking.
Freezing: These bars freeze well without the glaze. Wrap tightly in plastic wrap and foil. Freeze for up to 2 months. Thaw in the fridge and glaze before serving.
Pro Tip: If leftovers are drying out, store them with a slice of bread in the container. The bread keeps the bars moist.
Nutrition Information
I’m not a nutritionist, but here’s the breakdown if you’re tracking. Each bar (makes 16) is approximately:
– Calories: 220
– Protein: 3g
– Carbs: 28g
– Fiber: 1g
– Sugar: 18g
– Fat: 12g
– Saturated Fat: 7g
– Cholesterol: 30mg
– Sodium: 90mg
This is comfort food, so it’s not a diet recipe. But it’s homemade, so you know exactly what’s in it. When I want to make it lighter, I reduce the sugar in the crust and glaze slightly. But usually? I just enjoy a reasonable portion and savor the taste.
Final Thoughts
So that’s my go-to Easy Strawberry Shortbread Bars! I’ve probably talked your ear off at this point, but when you make a recipe this often, you have a lot to say about it.
These bars have saved me on countless occasions. They’re my answer to “what dessert should I bring?” when I’m short on time but want to impress. My family loves them, my friends request them, and I’m happy because I’m not stressed about making something complicated.
Make them your own! Try different berries, swap the lemon for orange, or add a hint of almond extract. The best recipes are the ones you adapt to your tastes. If you make these, drop a comment and let me know what you think! I love hearing how recipes turn out in your kitchen.
Happy baking! I hope your kitchen smells as sweet as mine does right now.
Frequently Asked Questions
Can I use frozen strawberries instead of fresh?
Yes, absolutely. Frozen strawberries work great and are often cheaper. Just make sure to thaw them completely and drain off excess liquid. I usually put them in a colander and press gently with a paper towel to remove moisture. This prevents the bars from becoming soggy. The flavor is just as good, especially in winter when fresh strawberries are expensive.
Why did my shortbread crust turn out soft instead of crisp?
This usually happens if the crust isn’t baked long enough or if the filling is too wet. Make sure to pre-bake the crust for the full 15-18 minutes until the edges are golden. Also, ensure your strawberry filling isn’t too watery. If using frozen berries, drain them well. The cornstarch helps thicken the filling, so don’t skip it.
Can I make these bars ahead of time?
Yes! These bars are actually better the next day. You can bake them up to 2 days ahead. Store them in an airtight container at room temperature. Glaze them just before serving to keep the glaze fresh. If you need to store them longer, freeze the bars (without glaze) for up to 2 months.
Can I substitute the cream cheese in the glaze?
You can use buttercream instead. Mix ½ cup softened butter with 2 cups powdered sugar, 2 tablespoons lemon juice, and ½ teaspoon vanilla. It will be sweeter and less tangy than the cream cheese glaze, but still delicious. The cream cheese adds a nice richness that balances the tart lemon.
How do I cut clean slices without squishing the bars?
Use a sharp knife or a pizza cutter. Wipe the blade between cuts to keep them clean. For the cleanest cuts, chill the bars in the fridge for 30 minutes before slicing. The colder bars hold their shape better. A pizza cutter is especially helpful because it rolls through the bars without pressing down.
Can I add other fruits to this recipe?
Definitely! Raspberries, blueberries, or mixed berries work beautifully. Adjust the sugar slightly based on the tartness of your fruit. Raspberries are tarter, so you might want to add an extra tablespoon of sugar. Mixed berries create a beautiful, colorful bar that’s perfect for spring.
Why is my glaze too thin or too thick?
The consistency depends on the humidity and the brand of powdered sugar. If it’s too thick, add lemon juice one teaspoon at a time. If it’s too thin, add more powdered sugar. The glaze should be thick enough to spread easily but thin enough to coat the back of a spoon. Remember, it will thicken slightly as it sets.
Pin This Recipe!
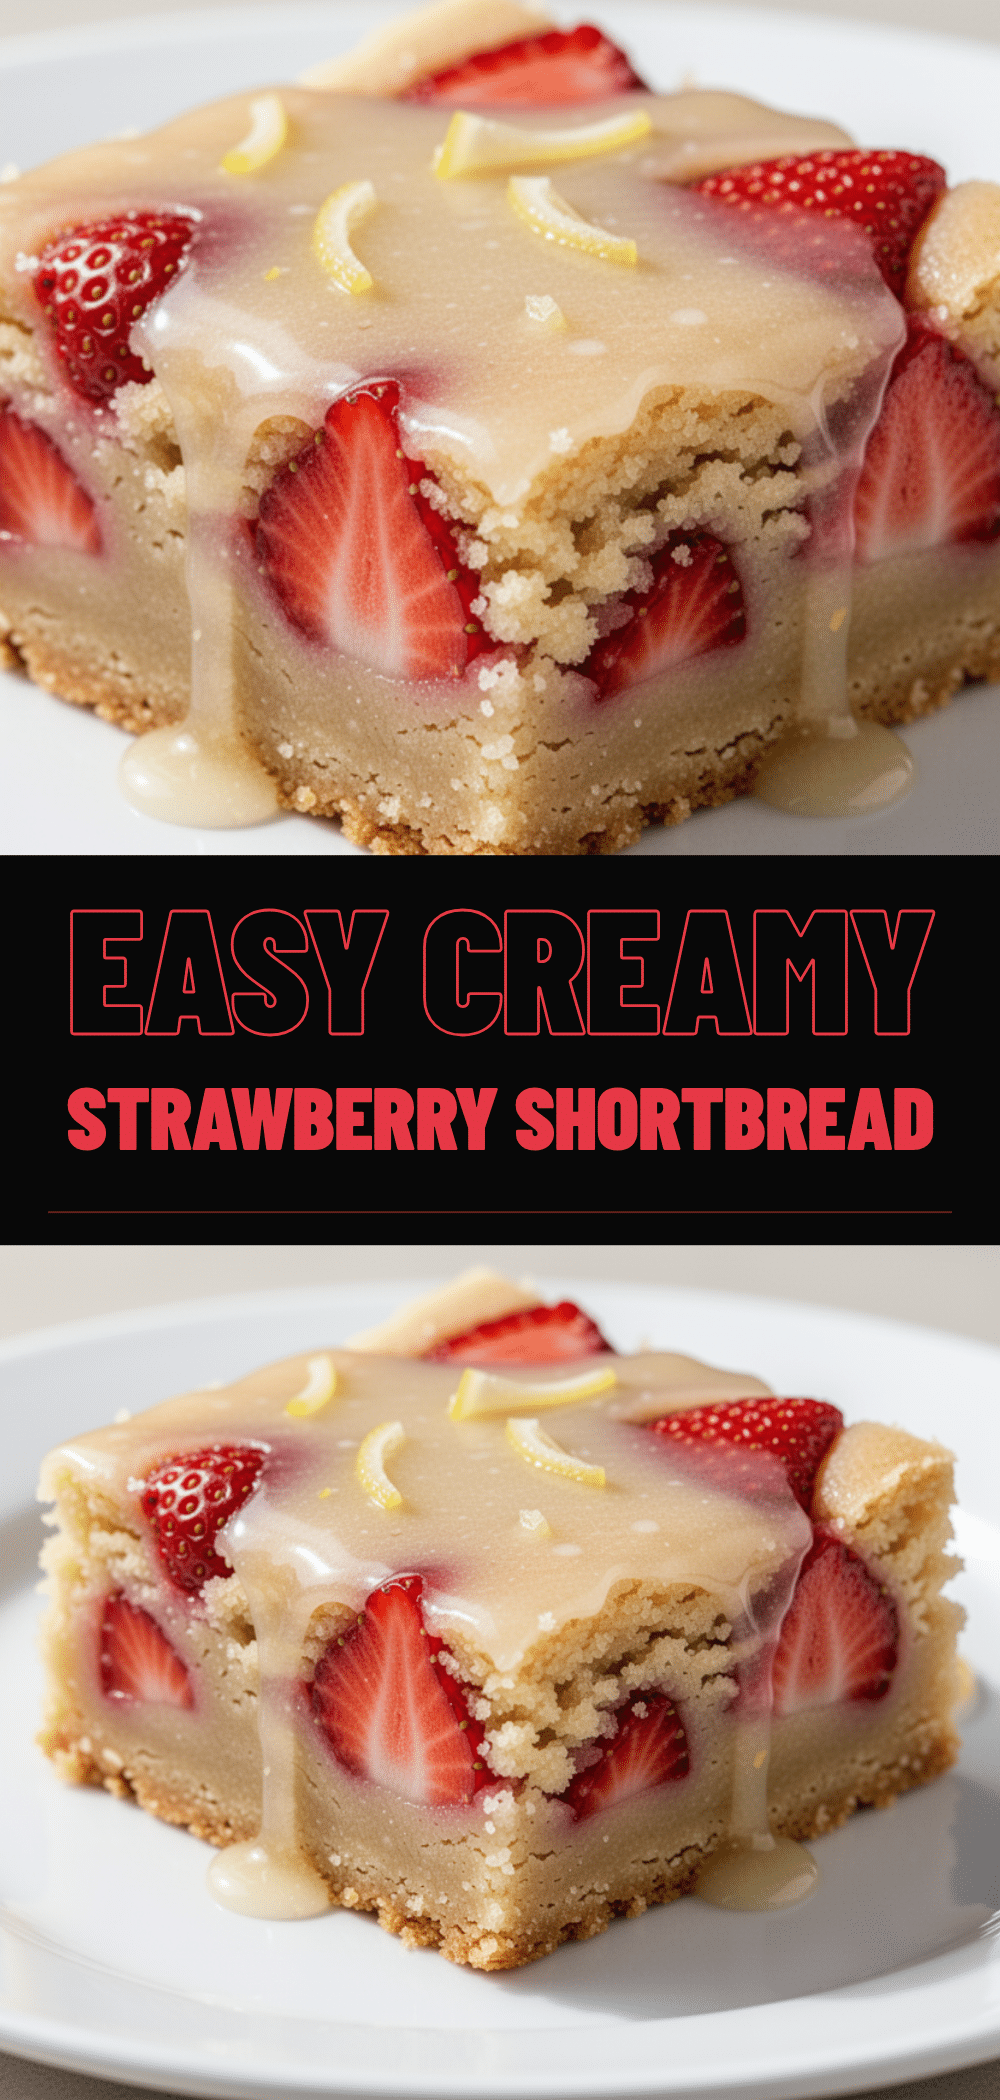
Easy Strawberry Shortbread Bars: Best Lemon Glazed
- Total Time: 1 hour 5 minutes
- Yield: 16 servings 1x
Description
Crisp shortbread crust topped with a jammy strawberry filling and finished with a tangy lemon cream cheese glaze. These bars are easy to make, make-ahead friendly, and perfect for any occasion.
Ingredients
- 1 cup (226g) unsalted butter, softened
- ½ cup (100g) granulated sugar
- 2 cups (250g) all-purpose flour
- ¼ teaspoon salt
- 3 cups (450g) fresh or frozen strawberries, hulled and sliced
- ½ cup (100g) granulated sugar
- 2 tablespoons cornstarch
- 1 tablespoon lemon juice
- 4 oz (113g) cream cheese, softened
- 1 cup (120g) powdered sugar
- 2–3 tablespoons lemon juice
- 1 teaspoon lemon zest
- ½ teaspoon vanilla extract
Instructions
- Preheat oven to 350°F (175°C). Line a 9×13 inch baking dish with parchment paper, leaving an overhang on the long sides, and lightly grease with butter spray.
- In a medium bowl, mix softened butter, ½ cup sugar, and salt until combined like wet sand. Add flour and mix until a dough forms. Press dough evenly into the bottom of the prepared pan.
- Bake the crust for 15-18 minutes until edges are lightly golden. Remove from oven and let cool slightly while making the filling. Leave oven on.
- In a separate bowl, combine sliced strawberries, ½ cup sugar, cornstarch, and 1 tablespoon lemon juice. Toss to coat and let sit for 10 minutes.
- Pour strawberry mixture over the partially baked crust. Return to oven and bake for 25-30 minutes until filling is bubbly and edges are golden.
- Remove from oven and let cool completely to room temperature on a wire rack (at least 1 hour).
- In a small bowl, whisk cream cheese, powdered sugar, 2-3 tablespoons lemon juice, lemon zest, and vanilla until smooth and spreadable.
- Spread glaze evenly over cooled bars. Let glaze set for 15-20 minutes before slicing with a sharp knife or pizza cutter.
Notes
If using frozen strawberries, thaw completely and drain excess liquid to prevent soggy bars. Pre-baking the crust ensures a crisp base. Cool bars completely before glazing to prevent the glaze from melting. Bars can be stored in the fridge for up to 5 days or frozen (without glaze) for up to 2 months.
- Prep Time: 20 minutes
- Cook Time: 45 minutes
- Category: Dessert
- Cuisine: American
Nutrition
- Serving Size: 1 bar
- Calories: 220
- Sugar: 18
- Sodium: 90
- Fat: 12
- Saturated Fat: 7
- Carbohydrates: 28
- Fiber: 1
- Protein: 3
Keywords: strawberry shortbread bars, lemon glazed dessert, easy bars recipe, make ahead dessert, summer dessert, strawberry bars, cream cheese glaze


