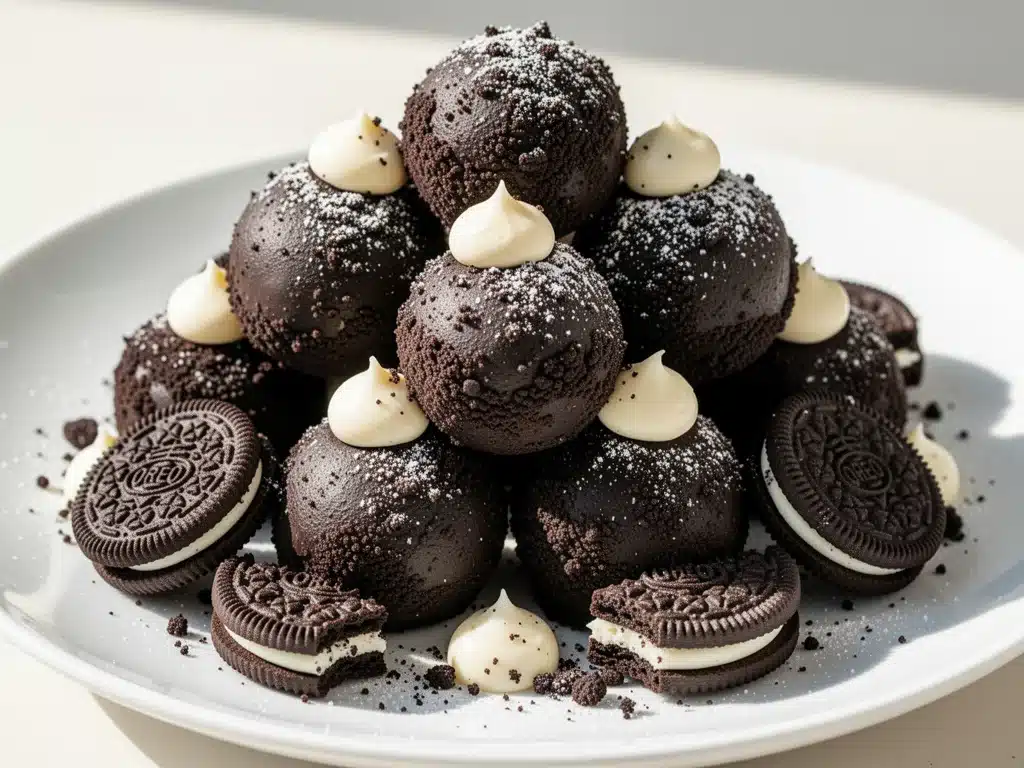
I have a confession to make. I once spent forty-five minutes in the grocery store aisle staring at a box of Oreos, trying to decide if I was allowed to buy them for “snacking” or if they were strictly reserved for “special occasions.” Spoiler alert: They are for Tuesday nights when I’m stressed, for 3 a.m. cravings, and absolutely, without a doubt, for this recipe.
These Oreo truffles with cream cheese filling aren’t just a dessert; they are my emotional support snack. I’ve made them so many times that my kitchen smells like crushed cookies and vanilla even when I’m not cooking. The first time I tried this combination, I was skeptical. Cream cheese? In a chocolate truffle? It sounded too rich, too heavy, maybe even a bit weird. But then I took one bite, and suddenly I understood why people cry over food. The tang of the cream cheese cuts through the sweetness of the chocolate and cookies perfectly. It’s not just sweet; it’s complex. It’s balanced. It’s the kind of dessert that makes you close your eyes and just exist in the moment.
I’ve tested this recipe with different brands of cream cheese, different types of chocolate, and even different cookie varieties (Oreo Double Stuf is a game-changer, by the way). But the version I’m sharing today? This is the gold standard. It’s the one I make when I need to impress a crowd with zero effort, the one I pack for potlucks because it travels well, and the one I eat straight from the bowl when no one is looking. If you’ve ever felt intimidated by no-bake desserts—thinking they’re too simple or not “real” cooking—you need to rethink that. This is real cooking. It’s just honest, unpretentious cooking.
What I love most about these Oreo truffles is how forgiving they are. You don’t need a candy thermometer. You don’t need to whip egg whites to stiff peaks. You don’t need to wait hours for a cake to cool. You just need patience while the truffles chill. And honestly? That’s the hardest part. I’ve set timers for 30 minutes, only to pull them out at 15 because I couldn’t wait. Don’t be like me. Let them set. Your reward will be worth the wait.
These are the perfect treat for anyone who thinks they don’t like “fancy” desserts. They taste like childhood but feel like a gourmet experience. Whether you’re hosting a dinner party, need a last-minute gift for a neighbor, or just want to treat yourself after a long day, these truffles deliver. I’ve paired them with everything from spiked apple cider margaritas to simple black coffee, and they hold up beautifully in every scenario. Let’s get into the details of how to make these magical little bites.
Why You’ll Love This Recipe
There are about ten reasons I keep making these, but here are the big ones that keep me coming back to the kitchen every time I crave something sweet.
Zero Baking Required — Seriously, if you can crush cookies and mix ingredients, you can make this. No oven, no preheating, no timing a bake. This is the ultimate low-effort, high-reward dessert. I’ve made these on weeknights when I was too exhausted to turn the oven on, and my family didn’t even know the difference.
Texture Heaven — The combination of the crumbly, cookie-dense exterior with the smooth, creamy, tangy center is addictive. It’s not just soft; it has structure. Each bite offers a contrast that keeps you coming back. I’ve tried other no-bake recipes that turn into mush, but these hold their shape perfectly if you follow the chilling steps.
Crowd-Pleaser Status — I’ve served these to people who claim they “don’t like dessert” and they’ve asked for the recipe. The Oreo flavor is universally loved, and the cream cheese filling adds a sophistication that surprises people. They look like they came from a high-end chocolate shop, but they cost pennies to make.
Make-Ahead Friendly — This is my secret weapon for stress-free entertaining. I make these two days ahead, store them in the fridge, and they actually taste better after the flavors have melded together. I don’t have to worry about last-minute prep when guests arrive. I just pull out the plate and smile.
Customizable Fun — Once you master the basic recipe, you can change the coating, the filling, or the mix-ins. Want to add crushed peppermint? Go for it. Want to dip them in white chocolate? Done. It’s a blank canvas for your creativity.
This is my go-to when I need a dessert that just works. No complicated techniques, no weird ingredients you have to hunt for, just reliable, delicious food that makes everyone happy. And it’s cheaper than buying a box of gourmet truffles at the store.
Ingredients You’ll Need
Here’s the best part: you probably have most of this already. I’m particular about three ingredients here, and I’ll tell you exactly why. The rest is pantry staples.
Oreo Cookies (30-36 cookies, about 1.5 packages) — You need the full meal, not just the cookies. Save the cream filling! I usually buy two packages of regular Oreos and scrape out the cream from one, then crush the cookies from both. This gives you enough cream for the filling and enough crumbs for the coating. If you’re using Double Stuf, adjust accordingly, but regular Oreos give a more consistent ratio.
Full-Fat Cream Cheese (8 ounces, softened) — Do not use low-fat or light cream cheese. It won’t bind properly and the texture will be grainy. Let it sit on the counter for at least 30 minutes before you start. If it’s cold, it won’t mix smoothly with the cookie crumbs. I’ve ruined batches by rushing this step. Patience pays off.
Confectioners’ Sugar (1 tablespoon) — Just a little bit to sweeten the cream cheese filling. Since Oreos are already sweet, you don’t need much. If you prefer a tangier bite, skip this. If you like it sweeter, add another tablespoon.
Semi-Sweet Chocolate Chips (12 ounces) — I use Ghirardelli or Hershey’s. Avoid baking bars unless you know how to temper chocolate, because we’re going for easy. Chocolate chips melt smoothly and stay stable. You can also use chocolate melting wafers if you want a thinner coating, but chips work perfectly fine.
Shortening or Coconut Oil (1 tablespoon) — This is the secret ingredient most people miss. Adding a tablespoon of shortening or coconut oil to your melted chocolate makes the coating glossy and helps it set harder. Without it, the chocolate can be soft and sticky at room temperature. I always keep a small container of shortening in my pantry just for this.
Crushed Oreos for Dipping (From the saved cookies) — You’ll need about 1 cup of fine crumbs. Pulse them in a food processor until they’re like sand. If they’re chunky, your truffles won’t coat evenly.
Optional: Sea Salt Flakes — A tiny sprinkle on top after dipping adds a professional touch and balances the sweetness. I love this for a gourmet feel.
Common Questions: Can I use white Oreos? Yes, but the cream filling will be vanilla-flavored, which changes the taste profile. Can I use dark chocolate? Yes, but it will be less sweet and more bitter. Adjust your sugar in the filling if you go dark.
Equipment Needed
You don’t need fancy equipment for this. Here’s what I actually use.
Food Processor or Ziplock Bag — For crushing the cookies. A food processor is faster, but a ziplock bag and a rolling pin work great if you’re doing it by hand. I like the bag method because I can control the texture better.
Mixing Bowls — Two medium bowls. One for the cream cheese mixture, one for the crushed cookies.
Microwave-Safe Bowl — For melting the chocolate. Glass or ceramic works best. I use my 2-cup measuring cup bowl.
Parchment Paper — To line a baking sheet. Do not skip this. Chocolate sticks to everything else.
Paring Knife or Small Spoon — For portioning the cream cheese filling. A melon baller is ideal if you have one, but a small spoon works too.
Tea Towel or Paper Towels — To dry your hands. Sticky hands are the enemy of good truffle shaping.
Optional: Tweezers — For handling the finished truffles so you don’t leave fingerprints on the chocolate.
How to Make It: Step-by-Step
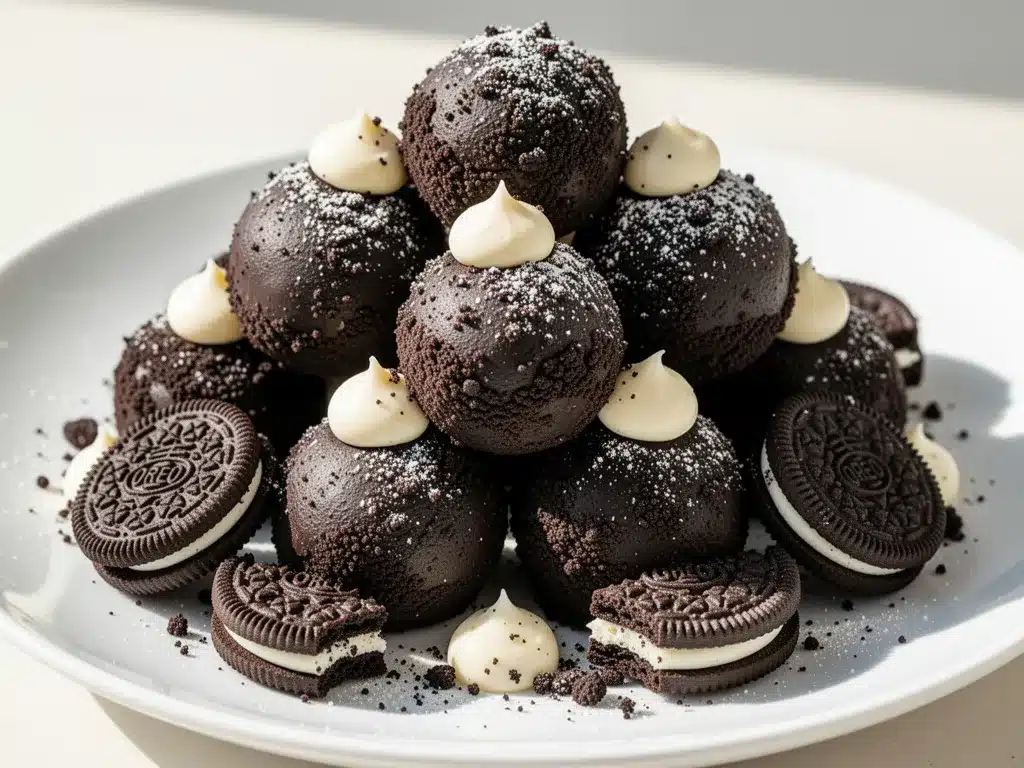
Alright, let’s make this! I’m walking you through exactly how I do it, including the little tricks I’ve picked up.
Step 1: Prep Your Cookies (10 minutes)
Separate the cream filling from the cookie wafers. Save all the cream in a bowl. Crush the wafers into fine crumbs. I pulse mine in a food processor, but if you’re doing it by hand, put them in a ziplock bag and crush them with a rolling pin until they’re powder-like. You need about 1 cup of crumbs for dipping later, so set that aside. The rest will go into the filling.
Step 2: Make the Cream Cheese Filling (5 minutes)
In a medium bowl, beat the softened cream cheese and confectioners’ sugar together until smooth. Add half of the crushed cookie crumbs and mix until combined. The mixture should be thick and hold together when pressed. If it’s too dry, add a teaspoon of milk. If it’s too wet, add more crumbs. Refrigerate this mixture for 30 minutes to firm up. This makes it easier to roll later.
Step 3: Portion the Filling (10 minutes)
Line a baking sheet with parchment paper. Scoop out small balls of the cream cheese mixture. I use a small cookie scoop or a teaspoon. Roll them into smooth balls. Place them on the lined sheet. You should get about 30-35 balls. Return them to the fridge while you melt the chocolate. Keeping them cold is crucial.
Step 4: Melt the Chocolate (3 minutes)
Place the chocolate chips in a microwave-safe bowl. Add the shortening or coconut oil. Microwave in 30-second intervals, stirring between each, until smooth. Do not overheat! Chocolate burns easily. If it looks lumpy, keep stirring; the residual heat will melt it. The mixture should be thin and glossy.
Step 5: Dip the Truffles (15 minutes)
Take a cold truffle ball from the fridge. Dip it into the melted chocolate, turning it to coat completely. Use a fork to lift it out, letting excess chocolate drip off. Tap the fork gently on the side of the bowl to remove excess. Place it back on the parchment paper. Repeat with all truffles.
Step 6: Coat in Crumbs (5 minutes)
While the chocolate is still wet, roll each truffle in the reserved crushed Oreos. Press gently so the crumbs stick. You can also just sprinkle crumbs on top if you prefer a less textured look. I like the full coating for that authentic Oreo experience.
Step 7: Chill and Set (30 minutes)
Place the tray in the fridge for at least 30 minutes, or until the chocolate is completely set. Do not rush this step. If the chocolate is soft, they’ll stick together in storage.
Visual Cues: The chocolate should look shiny and smooth, not dull or streaky. The truffles should feel firm to the touch after chilling.
Expert Tips & Tricks
Here’s everything I’ve learned from making this dozens of times. These tips will save you from my mistakes.
Keep Everything Cold — The biggest mistake people make is letting the filling get warm. If your hands are warm, your truffles will melt. Keep your hands cool, and keep the filling in the fridge between batches. I even chill my fork before dipping.
Don’t Skimp on the Shortening — I know it sounds weird, but the fat in the shortening helps the chocolate set harder and shine better. Without it, your truffles might stay soft in a warm kitchen. It’s a game-changer.
Crush Your Cookies Fine — If your crumbs are too big, they won’t stick to the chocolate, and the truffles will look uneven. You want a fine, sandy texture. Pulse, don’t chop.
Work in Batches — Don’t try to dip all 35 truffles at once. The chocolate will cool and thicken. Dip 5-6 at a time, then return the rest to the fridge. This ensures every truffle gets a smooth, even coat.
Common Mistakes (and how to avoid them):
Mistake: Chocolate is too thick. Fix: Add a tiny bit more shortening or coconut oil. Don’t add milk or water; it will seize the chocolate.
Mistake: Truffles are too soft. Fix: You didn’t chill them long enough. Or your filling was too wet. Add more cookie crumbs next time.
Mistake: Coating is patchy. Fix: Your crumbs were too coarse, or you didn’t press them on gently enough. Make sure the chocolate is still wet when you add the crumbs.
Pro Tricks I’ve Learned:
For Extra Crunch — Add a handful of crushed nuts to the chocolate dip before rolling in crumbs. It adds a nice texture contrast.
For Gift Giving — Place truffles in cupcake liners in a tin. They stack beautifully and look professional. I wrap the tin with a ribbon and it’s the perfect gift.
For Flavor Boost — Add a teaspoon of vanilla extract to the cream cheese mixture. It enhances the cookie flavor.
Variations & Substitutions
Once you’ve nailed the basic version, here’s how you can mix it up. I’ve tried all of these.
White Chocolate Oreo Truffles — Use white chocolate chips for the coating. The contrast of white chocolate and dark cookie crumbs is stunning. Add a drop of red food coloring to the cream cheese for a Valentine’s Day twist.
Chocolate Chip Cookie Dough Truffles — Replace the cream cheese with a mixture of butter and sugar, and add mini chocolate chips to the filling. It tastes like raw cookie dough!
Peanut Butter Oreo Truffles — Mix 2 tablespoons of peanut butter into the cream cheese filling. It adds a salty, savory note that pairs perfectly with the chocolate. This is a favorite in my house.
Double Stuf Version — Use Double Stuf Oreos and skip the confectioners’ sugar. The filling will be sweeter and creamier. Adjust the amount of crumbs you add to the filling to compensate.
Dietary Modifications:
Gluten-Free — Use gluten-free Oreos (they exist!) and ensure your chocolate chips are certified gluten-free. The rest of the ingredients are naturally gluten-free.
Dairy-Free — Use vegan cream cheese (like Kite Hill or Miyoko’s) and dairy-free chocolate chips. The texture will be slightly different but still delicious. I’ve made this for my vegan friends, and they loved it.
Different Flavors:
Peppermint — Add crushed peppermint candies to the chocolate dip. Great for holidays.
Espresso — Add a teaspoon of instant espresso powder to the melted chocolate. It makes the chocolate flavor more intense.
Matcha — Mix matcha powder into the cream cheese filling for a green tea twist. It’s earthy and unique.
Serving & Storage
I usually serve these straight from the fridge on a platter with cocktail napkins. They look rustic and stay cold. But here are other ways I’ve enjoyed them:
How to Serve: Pair them with coffee, tea, or a glass of cold milk. They’re rich, so you don’t need a huge portion. I also like serving them with charred corn and black bean dip for a sweet-and-savory party spread. The contrast is fun.
Toppings Bar: When I have guests, I put out extra crushed Oreos, sea salt flakes, and sprinkles. Everyone can customize their truffle.
Wine Pairing: Not a wine expert, but my wine-snob friend says a sweet Riesling or a Moscato works great with this. The sweetness complements the chocolate.
Storage Instructions:
Refrigerator: Store in an airtight container for up to 2 weeks. Place parchment paper between layers so they don’t stick. They taste best cold.
Freezing: Yes, you can freeze them! Place them on a baking sheet until solid, then transfer to a freezer bag. They’ll last for 3 months. Thaw in the fridge overnight. The texture might be slightly softer, but they’re still good.
Room Temperature: Not recommended. The cream cheese filling needs to be kept cold for food safety, and the chocolate will melt in warm weather.
Pro tip: If leftovers are drying out, stir in a teaspoon of milk to the filling next time. It keeps them moist.
Nutrition Information
I’m not a nutritionist, but here’s the breakdown if you’re tracking. These are rich, so a little goes a long way.
Per Serving (based on 30 truffles, 1 truffle each):
| Nutrient | Amount |
|---|---|
| Calories | 90 |
| Protein | 1g |
| Carbs | 10g |
| Fiber | 1g |
| Sugar | 7g |
| Fat | 5g |
| Saturated Fat | 3g |
| Cholesterol | 10mg |
| Sodium | 55mg |
What’s Good: Low in protein, but decent for a treat. Contains calcium from the cream cheese. Easy to control portions since they’re small.
What to Know: Higher in sugar and saturated fat due to the cookies and chocolate. Contains dairy and gluten. Not suitable for vegan or gluten-free diets without modifications.
My Take: Look, this is a dessert. It’s meant to be enjoyed, not analyzed. When I want to make it lighter, I use fewer cookies and more dark chocolate. But usually? I just eat one or two and enjoy it.
Final Thoughts
So that’s my go-to Oreo truffles with cream cheese filling! I’ve probably talked your ear off at this point, but when you make a recipe this often, you have a lot to say about it.
This has saved weeknight desserts more times than I can count. It’s my answer to “what’s for dessert” when I’m tired, don’t want to bake, and still want something that tastes really good. My kids are happy, my husband’s happy, and I’m happy because I’m not stressed about cooking.
Make it yours! Try different add-ins, swap in your favorite chocolate, adjust the garlic (though more is always better in my opinion). The best recipes are the ones you adapt to your family’s tastes.
If you make this, drop a comment and let me know what you think! I love hearing how recipes turn out in your kitchen. And if something doesn’t work, tell me that too—I’m here to help troubleshoot.
Happy cooking! And I hope your kitchen smells half as good as mine does right now.
Frequently Asked Questions
Q: Can I use low-fat cream cheese?
A: You can, but the texture will be different. Low-fat cream cheese has more water and less fat, which can make the filling runny and prevent it from holding its shape. I recommend full-fat for the best results. If you must use low-fat, add more cookie crumbs to absorb the moisture.
Q: Why did my chocolate seize?
A: Chocolate seizes when it comes into contact with water. Even a drop of water in the bowl or on your spoon can cause it to clump up. Make sure all your equipment is completely dry. If it seizes, you can try adding a teaspoon of hot water and whisking vigorously, but it’s usually better to start over.
Q: Can I make these ahead of time?
A: Absolutely! In fact, they taste better after a day or two in the fridge. The flavors meld together, and the chocolate sets harder. I make them 2 days before parties to save time.
Q: How do I store them?
A: Keep them in an airtight container in the refrigerator. They’ll last up to 2 weeks. If you’re in a warm climate, they might melt, so refrigeration is key. Do not leave them out at room temperature for more than 2 hours.
Q: Can I freeze the filling?
A: Yes, you can freeze the cream cheese mixture before rolling it into balls. Just thaw it in the fridge before portioning. This is a good strategy if you want to prep everything in advance.
Q: Can I use white chocolate chips?
A: Yes, white chocolate works beautifully with Oreos. It creates a nice visual contrast. Just be careful not to overheat it, as white chocolate burns easily. Use lower microwave power or shorter intervals.
Q: What if I don’t have a food processor?
A: You can crush the cookies in a ziplock bag using a rolling pin or a heavy pan. It takes a bit more effort, but it works fine. Just make sure the crumbs are fine enough to stick to the chocolate.
Pin This Recipe!

Oreo Truffles: Easy No Bake Dessert
- Total Time: 30 minutes
- Yield: 30 servings 1x
Description
These Oreo truffles with cream cheese filling are an easy, no-bake dessert that combines crushed cookies and tangy cream cheese, coated in semi-sweet chocolate. They are perfect for parties, gifts, or satisfying late-night cravings.
Ingredients
- 30–36 Oreo cookies (about 1.5 packages)
- 8 ounces full-fat cream cheese, softened
- 1 tablespoon confectioners’ sugar
- 12 ounces semi-sweet chocolate chips
- 1 tablespoon shortening or coconut oil
- 1 cup crushed Oreos (for dipping)
- Sea salt flakes (optional)
Instructions
- Separate the cream filling from the cookie wafers. Save all the cream in a bowl.
- Crush the wafers into fine crumbs using a food processor or a ziplock bag with a rolling pin. Set aside 1 cup of crumbs for dipping.
- In a medium bowl, beat the softened cream cheese and confectioners’ sugar until smooth.
- Add half of the crushed cookie crumbs to the cream cheese mixture and mix until combined. Refrigerate for 30 minutes to firm up.
- Line a baking sheet with parchment paper. Scoop out small balls of the cream cheese mixture (about 30-35 balls) and place them on the sheet. Return to the fridge.
- Place chocolate chips and shortening (or coconut oil) in a microwave-safe bowl. Microwave in 30-second intervals, stirring between each, until smooth and glossy.
- Take a cold truffle ball from the fridge and dip it into the melted chocolate, coating completely. Use a fork to lift it out and let excess drip off.
- While the chocolate is still wet, roll the truffle in the reserved crushed Oreos to coat.
- Place coated truffles back on the parchment-lined sheet.
- Refrigerate for at least 30 minutes until the chocolate is completely set.
Notes
Ensure all equipment is completely dry to prevent chocolate from seizing. Keep the cream cheese filling cold while working to maintain shape. For best results, use full-fat cream cheese and crush cookies into a fine, sandy texture. Store in an airtight container in the refrigerator for up to 2 weeks.
- Prep Time: 30 minutes
- Cook Time: 0 minutes
- Category: Dessert
- Cuisine: American
Nutrition
- Serving Size: 1 truffle
- Calories: 90
- Sugar: 7
- Sodium: 55
- Fat: 5
- Saturated Fat: 3
- Carbohydrates: 10
- Fiber: 1
- Protein: 1
Keywords: Oreo truffles, no bake dessert, cream cheese truffles, chocolate truffles, easy dessert, party snacks, make ahead dessert


