Last Tuesday, I was standing in my kitchen at 6:45 AM, holding a plastic container like it was a bomb I had to defuse. Inside were three sad, soggy squares of what I thought was a “no-bake” energy bar. My six-year-old, Leo, looked at it, poked it with a fork, and said, “Mom, this tastes like dirt and regret.” He was right. It was oatmeal, peanut butter, and a lot of poor life choices.
I was desperate. I had spent the previous night trying to find a lunchbox dessert that wasn’t a cookie (too crumbly), a brownie (too messy), or fruit (too boring). I wanted something that could survive a backpack toss, stay firm in a warm car, and actually make Leo say “yes” without negotiation. I wanted a dessert that felt special but was practical enough for a Tuesday.
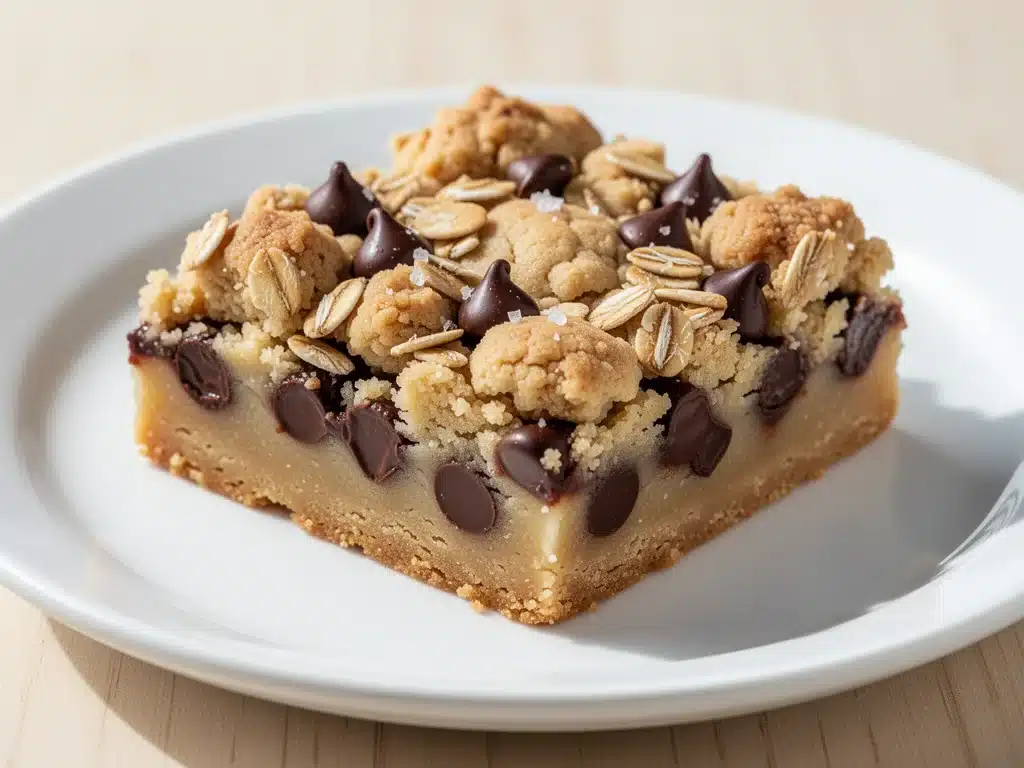
That’s when I decided to stop looking for no-bake solutions and just bake something. But not just any bar. I needed a Chocolate Chip Crumble Bars recipe that had structure. Something with a buttery, shortbread-like base that could hold up to the chaos of school lunch boxes, and a crumbly, oat-heavy topping that added texture without falling apart. I needed the perfect balance of sweet, salty, and chewy.
I spent the next week testing batches. I burned three pans. I underbaked two more, which resulted in gooey centers that leaked everywhere (a mess I didn’t need). But on the fifth attempt, I got it. The base was crisp enough to cut cleanly but soft enough to bite into. The topping was golden and crunchy. And when Leo opened his lunchbox that Thursday? He pulled out a square, took a bite, and actually smiled. “These are good, Mom,” he said. “Can we have these every day?”
That’s how I fell in love with these Chocolate Chip Crumble Bars. They’ve become my go-to for lunchboxes, potlucks, and late-night cravings. They’re easier than pie, faster than cake, and they taste like childhood. If you’re tired of sad lunchbox snacks, trust me on this one. It’s the best easy lunchbox dessert you’ll ever make.
Why You’ll Love This Recipe
I know what you’re thinking. “Another bar recipe? I have enough.” But hear me out. These chocolate chip crumble bars solve the biggest problem with homemade lunchbox treats: the mess factor. Here’s why they’ve earned a permanent spot in my rotation:
Structurally Sound — Seriously, these don’t crumble everywhere. The shortbread base acts like an anchor for the oat crumble top. I’ve thrown these in bags next to heavy textbooks, and when I pull them out an hour later, they’re still perfect squares. No crumbs on the bottom of the lunchbox.
Make-Ahead Friendly — I bake these on Sunday, store them in the fridge, and pack them all week. They actually taste better on day two because the oats have had time to soak up the butter and chocolate. I make a double batch just so I don’t have to think about it during the week.
Customizable for Picky Eaters — My daughter hates chocolate chips but loves white chocolate and macadamia nuts. I swapped them out, and she loved it. You can add nuts, dried fruit, or just keep it classic. It’s a blank canvas for whatever your family likes.
Zero Fuss Cleanup — One 9×13 pan. That’s it. No mixing bowls piling up, no intricate piping. Just dump, spread, sprinkle, and bake. When I’m exhausted after work, this is the only dessert I have the energy to make.
Budget-Smart — You probably have all these ingredients already. Flour, butter, oats, sugar, chocolate chips. It costs less than $5 to make a full pan, which feeds 12-15 people. That’s way cheaper than buying those fancy bakery bars at the grocery store.
This is my answer to “what’s for dessert?” when I want something homemade but don’t want to spend hours in the kitchen. It’s reliable, delicious, and makes kids (and adults) happy.
Ingredients You’ll Need
Here’s the best part: you probably have most of this already in your pantry. This isn’t a recipe that requires a trip to three different specialty stores. I’m particular about a few things, though, so pay attention to the details.
For the Shortbread Base
Unsalted butter (1/2 cup / 113g, softened) — This is crucial. Softened, not melted. You want it to cream with the sugar to create a tender, cake-like base. If you melt it, the texture gets dense. I take mine out of the fridge 30 minutes before starting.
Confectioners’ sugar (1/2 cup / 60g) — Also known as powdered sugar. This dissolves completely into the butter, giving the base that melt-in-your-mouth shortbread texture. Don’t swap this for granulated sugar, or it’ll be gritty.
Vanilla extract (1 teaspoon) — Pure vanilla, please. The fake stuff tastes chemical and ruins the delicate butter flavor.
All-purpose flour (1 1/2 cups / 190g) — Just standard flour. Spoon it into the cup and level it off. Don’t scoop and pack, or you’ll get too much flour and a dry bar.
Salt (1/4 teaspoon) — Even though we’re using unsalted butter, a pinch of salt balances the sweetness. Don’t skip it.
For the Crumble Topping
Unsalted butter (1/2 cup / 113g, softened) — Same as the base. Softened is key here too.
Granulated sugar (1/2 cup / 100g) — This gives the topping some crunch. It doesn’t dissolve like the powdered sugar in the base, so you get that nice crumbly texture.
Packed brown sugar (1/2 cup / 110g) — Light or dark brown sugar works. Brown sugar adds moisture and a hint of caramel flavor. I prefer dark for a deeper taste.
Vanilla extract (1 teaspoon) — For that warm, home-baked smell.
All-purpose flour (1 1/2 cups / 190g) — Same flour as the base.
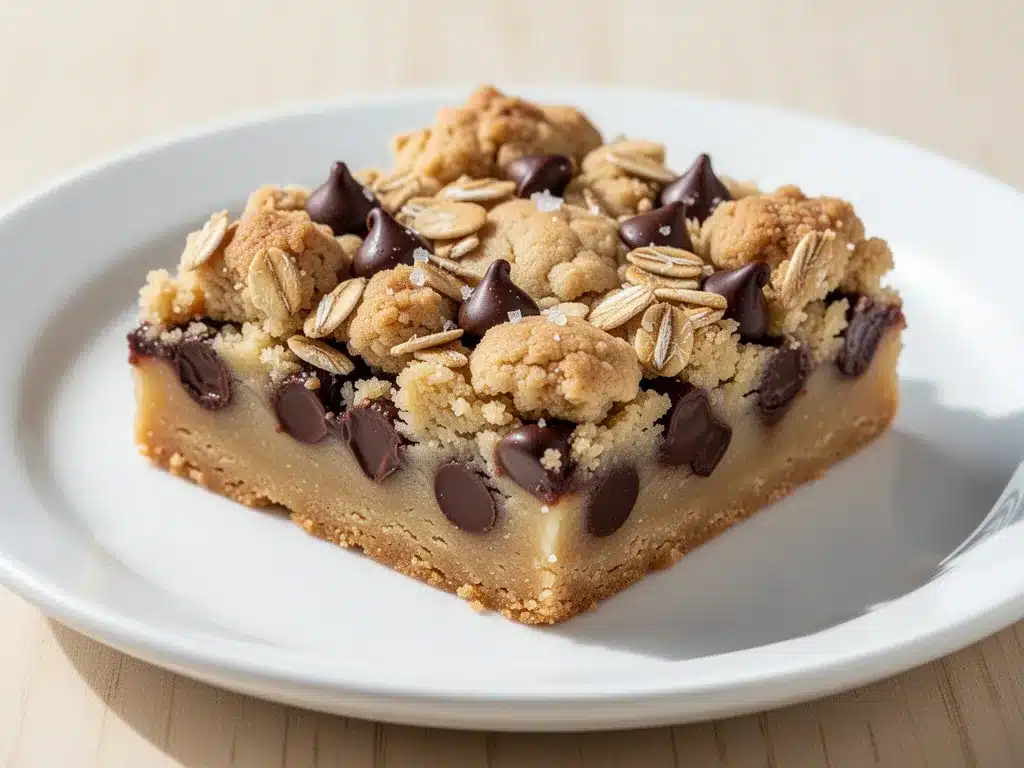
Old-fashioned oats (1 1/2 cups / 120g) — Use the big flakes, not quick oats. Quick oats will turn into mush. Old-fashioned oats give you that hearty, chewy texture that makes crumble bars so good.
Salt (1/4 teaspoon) — Again, don’t skip this.
For the Chocolate Chip Layer
Chocolate chips (1 1/2 cups / 255g) — Semi-sweet or milk chocolate. I use a mix of both for depth. Nestle Toll House is my go-to brand, but any good quality chip works. Avoid baking chips meant for melting; you want chunks that stay distinct.
Optional: Sea salt flakes — Sprinkling these on top after baking elevates the whole thing. The salty-sweet combo is addictive.
Pro Tip: If you’re making these for a school lunch, check if nuts are allowed. This recipe is naturally nut-free, which is a huge win for parents.
Equipment Needed
You don’t need fancy equipment for this. Here’s what I actually use:
9×13 inch baking pan — I use a glass Pyrex pan because it bakes evenly. Metal pans work too, but you might need to reduce the temperature by 25 degrees. Dark pans can burn the bottom, so keep an eye on it.
Electric mixer — Hand mixer or stand mixer. You need to cream the butter and sugar properly. Doing this by hand is possible but tiring. I use my hand mixer because it’s quick.
Measuring cups and spoons — Standard stuff. Dollar store versions work fine.
Fork — For pressing the base into the pan. I don’t use a spatula because it smears too much. A fork creates little ridges that help the topping grip.
Sharp knife or pizza cutter — For cutting the bars. A pizza cutter is actually the secret weapon here. It glides through without squishing the crumble. If you use a knife, wipe it between cuts to keep the edges clean.
Cooling rack — Essential. You must let these cool completely before cutting, or they’ll fall apart. Patience pays off.
Optional: Parchment paper — I don’t always use it, but if you line the pan with parchment (leaving an overhang), lifting the whole block out is a breeze. Great for cleanup.
How to Make It: Step-by-Step
Alright, let’s make this! I’m walking you through exactly how I do it, including the little tricks I’ve picked up over years of making lunchbox desserts.
Step 1: Prep the Pan and Oven (5 minutes)
Preheat your oven to 350°F (175°C). Grease your 9×13 inch pan with butter or cooking spray. If you’re using parchment paper, line it now. I usually just grease it because these bars release fine on their own, but parchment is safer if you’re worried about sticking.
Step 2: Make the Shortbread Base (5 minutes)
In a medium bowl, beat the softened butter and confectioners’ sugar together until smooth and creamy. Add the vanilla and salt. Mix until combined. Add the flour gradually, mixing on low speed until just combined. Don’t overmix here, or the base will be tough. It should look like a thick, sticky dough.
Press this dough evenly into the bottom of your prepared pan. Use your fingers or a fork to push it into the corners. It should be a thin, even layer. This is your foundation, so make sure it’s flat.
Step 3: Bake the Base (12-15 minutes)
Bake the base alone for 12-15 minutes. You want it lightly golden around the edges but still pale in the center. It will firm up as it cools. Remove from the oven and let it cool on the counter while you make the topping. This prevents the base from getting soggy.
Step 4: Make the Crumble Topping (5 minutes)
In the same bowl (or a clean one if you prefer), beat the softened butter, granulated sugar, brown sugar, and vanilla until creamy. Add the flour, oats, and salt. Mix until the mixture looks like coarse crumbs. Some large clumps are good—that’s where the texture comes from.
Spread the chocolate chips evenly over the baked base. Then, sprinkle the crumble topping generously over the chips. You want good coverage, but don’t press it down. Let it sit loosely on top.
Step 5: Bake the Bars (25-30 minutes)
Return the pan to the oven. Bake for 25-30 minutes. You’re looking for a deep golden brown color on the topping. The edges should be bubbling slightly. If the top is browning too fast, cover it loosely with foil after 20 minutes.
Remove from the oven and let it cool completely in the pan. This is the hardest part. I usually set a timer for 45 minutes and distract myself with dishes. If you cut them warm, they’ll be a mess.
Step 6: Cut and Serve
Once completely cool, use a sharp knife or pizza cutter to slice into squares. I cut them into 12 large bars or 16 smaller ones for lunchboxes. Dust with sea salt if you’re feeling fancy.
Total Time: About 1 hour (including cooling), but mostly hands-off.
Troubleshooting:
– Base is too soft? You didn’t bake it long enough in Step 3. It needs to set.
– Topping isn’t crunchy? Your oats might be too old, or you didn’t bake long enough. They should be golden, not pale.
– Chocolate chips sank? This is normal. Just make sure you have enough chips to cover the base.
Expert Tips & Tricks
Here’s everything I’ve learned from making these dozens of times. These tips will save you from my mistakes.
Butter Temperature is Everything
Both the base and topping require softened butter, not melted. If you melt it, you lose the airiness. To soften butter quickly, microwave it in 5-second bursts until it leaves an indent when you press it. Don’t let it turn to liquid.
Don’t Skip the Pre-Bake
Baking the base alone first is non-negotiable. If you put the topping on raw dough, the bottom gets gummy and the top burns before the bottom cooks. The pre-bake ensures a crisp foundation.
Use Old-Fashioned Oats
I made this once with quick oats, and it turned into a mushy cake. Old-fashioned oats hold their shape and provide that essential chew. If you only have quick oats, pulse them in a food processor for a few seconds to break them up slightly, but old-fashioned is best.
Cool Completely
I know it’s tempting. But these bars are fragile when hot. The butter needs to solidify to hold the structure. If you cut them warm, you’ll get a crumbly mess. Wait at least 45 minutes. Better yet, make them the night before.
Sea Salt Finish
Sprinkling flaky sea salt on top after baking isn’t just for looks. It enhances the chocolate and balances the sugar. It’s the difference between “good” and “amazing.”
Storage Hack
If you’re packing these for lunch, let them cool completely, then store them in an airtight container in the fridge. They stay fresh for up to a week. In the fridge, they firm up even more, making them easier to pack.
Variations & Substitutions
Once you’ve nailed the basic version, here’s how you can mix it up. I’ve tried all of these.
Peanut Butter Chip Version
Swap chocolate chips for peanut butter chips. This pairs beautifully with the oat topping. My kids love this combo, especially with a glass of cold milk.
White Chocolate Macadamia
Use white chocolate chips and 1/2 cup chopped macadamia nuts in the topping layer. It’s richer and more tropical. Great for special occasions.
Double Chocolate
Add 2 tablespoons of cocoa powder to the base dough. It turns the shortbread base into a chocolate cookie crust. Then use dark chocolate chips on top. For chocolate lovers.
Butterscotch Chip
Butterscotch chips + oats = heaven. This tastes like a caramel bar. I make this in the fall with some cinnamon added to the topping.
Gluten-Free Option
Use a 1:1 gluten-free flour blend in both the base and topping. The texture might be slightly more tender, but it works great. I’ve used Bob’s Red Mill and Cup4Cup with success.
Dairy-Free
Use vegan butter sticks (not tubs) and dairy-free chocolate chips. The texture will be slightly different, but still delicious. Miyoko’s or Earth Balance work well.
Nut-Free
This recipe is naturally nut-free, which is perfect for school lunches. Just ensure your chocolate chips are certified nut-free if you have severe allergies.
Serving & Storage
How to Serve:
I serve these plain, but you can add a scoop of vanilla ice cream or a dollop of whipped cream if you’re having them for dessert at home. For lunchboxes, they’re perfect on their own.
Side Dishes:
Pair with a cold glass of milk, a piece of fruit, or some carrot sticks to balance the sweetness. I usually pack these with a mini yogurt cup.
Storage Instructions:
Refrigerator: Store in an airtight container for up to 1 week. They actually taste better after a day in the fridge as the flavors meld.
Freezer: Yes, you can freeze these! Wrap individual bars in plastic wrap, then put them in a freezer bag. They last up to 3 months. Thaw in the fridge or at room temperature for 15 minutes before eating. I freeze a batch every other week for busy weeks.
Reheating: You don’t need to reheat these. They’re best at room temperature or chilled. If you want them warm, microwave one for 10-15 seconds. It melts the chocolate slightly and makes the oats chewy.
Pro Tip: If you’re packing these for lunch, wait until they are completely cool to avoid condensation, which can make the crumble soggy. A quick tip: pack them in a rigid container to prevent crushing.
Nutrition Information
I’m not a nutritionist, but here’s the breakdown if you’re tracking. Keep in mind this is an estimate based on standard ingredients.
Per Serving (based on 12 bars):
– Calories: 280
– Protein: 3g
– Carbs: 38g
– Fiber: 1g
– Sugar: 22g
– Fat: 14g
– Saturated Fat: 8g
– Cholesterol: 30mg
– Sodium: 120mg
What’s Good:
– No nuts, so safe for nut allergies
– Can be made gluten-free
– Uses real butter and oats for some fiber
What to Know:
– High in sugar and saturated fat (it’s a dessert, after all)
– Not a “healthy” snack, but a treat
– Portion control is key
My Take:
Look, these are chocolate chip crumble bars. They’re butter, sugar, and chocolate. They’re not a diet food. But they’re better than store-bought bars because you know exactly what’s in them. I eat one as a special treat, and my kids love them as a lunchbox reward. Moderation is everything.
Final Thoughts
So that’s my go-to chocolate chip crumble bars recipe! I’ve probably talked your ear off at this point, but when you make a recipe this often, you have a lot to say about it.
This has saved my lunchbox game more times than I can count. It’s my answer to “what’s for dessert?” when I want something homemade but don’t want to stress. My kids are happy, I’m happy because it’s easy, and I don’t have to buy those overpriced, messy bars from the store.
Make it yours! Try different chips, add nuts if you’re not worried about allergies, or sprinkle sea salt on top. The best recipes are the ones you adapt to your family’s tastes.
If you make this, drop a comment and let me know what you think! I love hearing how recipes turn out in your kitchen. And if something doesn’t work, tell me that too—I’m here to help troubleshoot.
Happy cooking! And I hope your kitchen smells half as good as mine does right now.
Frequently Asked Questions
Can I use melted butter instead of softened?
You can, but the texture will be different. Softened butter traps air when creamed, giving the base a tender, cake-like crumb. Melted butter makes it denser and more cookie-like. If you must use melted, let it cool slightly first, and expect a chewier result. For the best texture, stick to softened.
Why did my topping turn out mushy?
This usually happens if the base wasn’t baked long enough before adding the topping, or if the oven temperature was too low. The base needs to set first. Also, make sure you’re using old-fashioned oats, not quick oats. Quick oats absorb too much moisture and lose their crunch.
Can I make these gluten-free?
Yes! Use a 1:1 gluten-free flour blend in both the base and topping. The texture might be slightly more tender, but it works great. Just ensure your oats and chocolate chips are certified gluten-free if you have celiac disease or severe sensitivity.
How do I cut them cleanly?
Wait until they are completely cool. Then use a sharp knife or a pizza cutter. Wipe the blade between cuts to keep the edges clean. If you use a pizza cutter, press firmly and roll—it glides through without squishing the crumble. This is my secret weapon for perfect squares.
Can I freeze these bars?
Absolutely. Wrap individual bars in plastic wrap, then place them in a freezer-safe bag or container. They last up to 3 months. Thaw at room temperature for 15 minutes or in the fridge overnight. They taste just as good frozen or thawed.
Can I use mini chocolate chips?
Yes, mini chips distribute more evenly throughout the bar. You might need slightly less (about 1 cup) since they’re smaller. I prefer large chips because you get those satisfying melty pockets in every bite.
What if I don’t have a 9×13 pan?
You can use an 8×8 pan, but the bars will be thicker. Increase the baking time by 5-10 minutes for the base, and 5 minutes for the final bake. Keep an eye on them to ensure they don’t burn on top. The center might take longer to set.
Pin This Recipe!
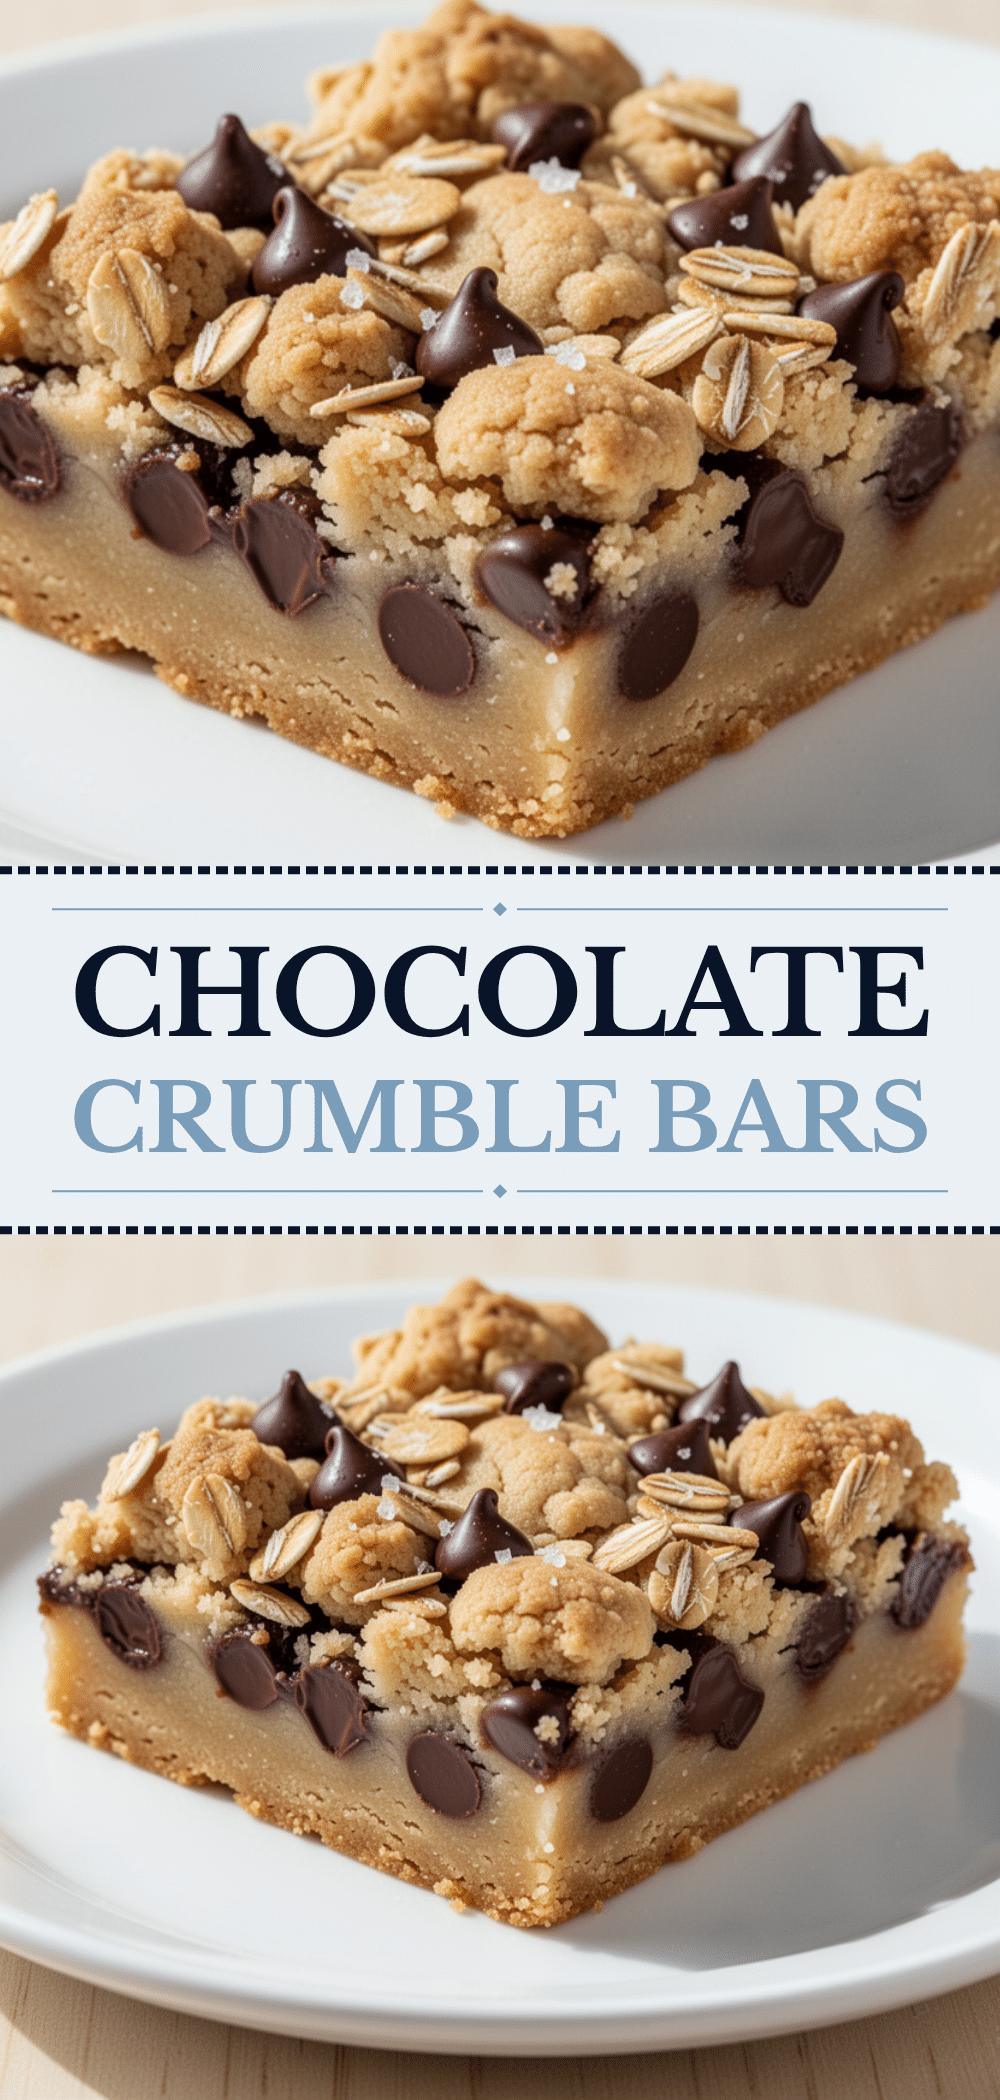
Chocolate Chip Crumble Bars: Best Easy Lunchbox Dessert
- Total Time: 1 hour
- Yield: 12 servings 1x
Description
These structurally sound, make-ahead friendly chocolate chip crumble bars feature a buttery shortbread base and a crunchy oat topping. They are perfect for lunchboxes, potlucks, and late-night cravings.
Ingredients
- 1/2 cup (113g) unsalted butter, softened (for base)
- 1/2 cup (60g) confectioners’ sugar
- 1 teaspoon vanilla extract
- 1 1/2 cups (190g) all-purpose flour
- 1/4 teaspoon salt
- 1/2 cup (113g) unsalted butter, softened (for topping)
- 1/2 cup (100g) granulated sugar
- 1/2 cup (110g) packed brown sugar
- 1 teaspoon vanilla extract
- 1 1/2 cups (190g) all-purpose flour
- 1 1/2 cups (120g) old-fashioned oats
- 1/4 teaspoon salt
- 1 1/2 cups (255g) chocolate chips
- Sea salt flakes (optional, for topping)
Instructions
- Preheat oven to 350°F (175°C). Grease a 9×13 inch baking pan or line with parchment paper.
- In a medium bowl, beat softened butter and confectioners’ sugar until smooth and creamy. Add vanilla and salt, mix to combine. Gradually add flour and mix on low until a thick, sticky dough forms.
- Press the dough evenly into the bottom of the prepared pan using fingers or a fork.
- Bake the base alone for 12-15 minutes until lightly golden around the edges. Remove from oven and let cool on the counter.
- In the same bowl, beat softened butter, granulated sugar, brown sugar, and vanilla until creamy. Add flour, oats, and salt, mixing until the mixture resembles coarse crumbs.
- Spread chocolate chips evenly over the baked base. Sprinkle the crumble topping generously over the chips without pressing down.
- Bake for 25-30 minutes until the topping is deep golden brown and edges are bubbling. Cover loosely with foil if browning too quickly.
- Let cool completely in the pan (at least 45 minutes) before cutting into squares.
- Dust with sea salt flakes if desired before serving.
Notes
Ensure butter is softened, not melted, for proper texture. Do not skip pre-baking the base to prevent a gummy bottom. Cool completely before cutting to ensure clean slices. Can be stored in the fridge for up to a week or frozen for up to 3 months.
- Prep Time: 15 minutes
- Cook Time: 45 minutes
- Category: Dessert
- Cuisine: American
Nutrition
- Serving Size: 1 bar
- Calories: 280
- Sugar: 22
- Sodium: 120
- Fat: 14
- Saturated Fat: 8
- Carbohydrates: 38
- Fiber: 1
- Protein: 3
Keywords: chocolate chip crumble bars, lunchbox dessert, easy bars, make ahead dessert, oat bars, shortbread bars, kid-friendly snacks


