It was late October. The leaves had finally turned that deep, russet red that makes you want to buy a flannel shirt you’ll never actually wear. I was standing in my kitchen, staring at a grocery bag full of Honeycrisp apples that had somehow multiplied in my fridge, and feeling a distinct sense of panic. I didn’t want apple pie. Pie is a commitment. It requires a crust, blind baking, and a level of patience I simply did not possess on a Tuesday evening.
But I also didn’t want to just eat them raw. There was something about the cold crunch of a raw apple that felt too stark for the season. I needed something warm. Something that smelled like cinnamon and nostalgia but didn’t require three hours of my life.
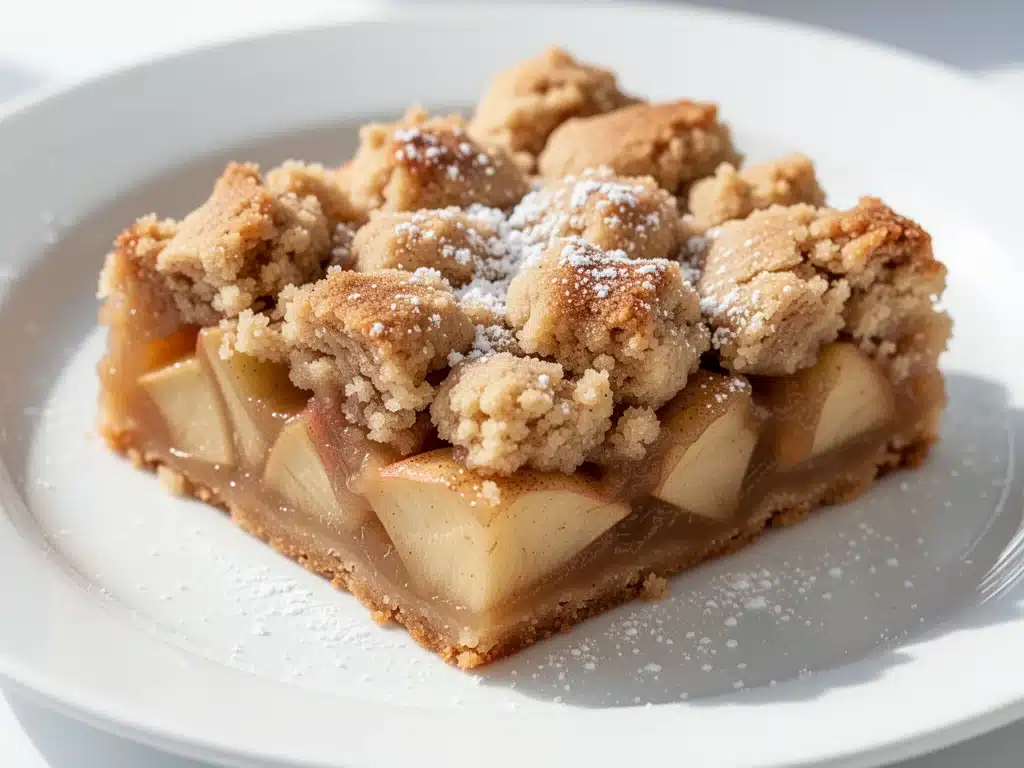
So, I threw together a batter. I chopped the apples. I mixed cinnamon and sugar. I hoped for the best. What came out of the oven thirty minutes later was a bar that was crispy on the edges, tender in the middle, and coated in that magical cinnamon-sugar crunch that hits you the second you take a bite. I ate one standing over the cooling rack. Then another. Then I had to force myself to let them cool so my husband wouldn’t think I was hiding the entire dessert in the pantry.
That night, these cinnamon sugar apple bars became a permanent fixture in our home. They are the perfect bridge between summer’s last gasp and winter’s first chill. They’re easier than grilled peach cobbler, which is saying something because I love that dessert to pieces, but they’re infinitely more manageable when you’re juggling work, kids, and a lack of energy. This is my go-to fall dessert, and once you try it, you’ll understand why.
Why You’ll Love These Cinnamon Sugar Apple Bars
There are about ten reasons I keep making these bars, but let’s be real. You’re here because you want dessert that tastes amazing but doesn’t feel like a chore. Here’s why these have earned a spot in your weekly rotation:
**Stupid Simple** — Seriously, if you can chop an apple and mix batter, you can make this. I’ve walked my teenage daughter through it over FaceTime while she was at college. She nailed it on the first try.
**Lightning Fast** — From start to finish, it’s about 45 minutes. Only 15 of those are active hands-on time. The rest is just waiting for the oven to do its thing. I make these on weeknights when I need a win.
**Pantry-Friendly** — You probably have all the dry ingredients already. Flour, sugar, cinnamon, butter. The only thing you need to buy is apples. And let’s be honest, if you’re making apple bars, you probably have apples.
**Crowd-Pleaser** — I’ve served these to my keto friend (she took one bite and admitted it was worth the cheat day), my gluten-sensitive neighbor (using GF flour works great), and my dad who thinks all desserts are “too sweet.” He asked for the recipe. That’s the highest praise possible.
**Makes Amazing Leftovers** — These actually taste better the next day. The flavors meld together, and the texture gets even more tender. I deliberately make a double batch on Sundays for Monday snacks.
**Budget-Smart** — Apples are cheap in the fall. You can feed 9-12 people for under $10. That’s less than a single slice of cake at a fancy bakery.
**Perfect for Gifting** — These travel well. I’ve boxed them up for teachers, neighbors, and coworkers. The smell of cinnamon filling the car when I drop them off is basically a love letter.
This is my answer to “what’s for dessert” when I want something homemade but don’t want to spend my evening at the stove. No complicated techniques, no weird ingredients, just reliable, delicious food that makes everyone happy.
Ingredients You’ll Need
Here’s the best part: this recipe uses ingredients you likely already have in your pantry. I’m particular about a few things here, and I’ll tell you exactly why, but don’t worry—you won’t need to go to three different specialty stores.
**For the Base:**
**All-purpose flour** (2 cups / 250g) — This gives the bars their structure. I use regular AP flour, but if you’re gluten-free, a 1:1 GF blend works perfectly. Don’t use self-rising flour; you’ll mess up the rise.
**Unsalted butter** (½ cup / 113g, softened) — Softened is key. You want to be able to press it into the pan easily. If it’s melted, the bars will be too greasy. If it’s rock hard, you’ll struggle to mix it in. Room temperature is the sweet spot.
**Granulated sugar** (½ cup / 100g) — This goes into the dough. I use white sugar for that classic bar texture. Brown sugar works too, but it makes them chewier and more molasses-forward.
**Cinnamon** (1 teaspoon) — Pure, ground cinnamon. Not the dusty stuff from the back of the cabinet. If your cinnamon smells like nothing, buy new. It makes a huge difference.
**For the Filling:**
**Granny Smith apples** (3 medium, peeled and diced) — I use Granny Smith because they hold their shape and have that perfect tartness to balance the sugar. You can use Honeycrisp or Fuji, but they’ll be softer and sweeter. Mix them if you want a balance.
**Brown sugar** (½ cup / 100g, packed) — This adds moisture and depth. Dark brown sugar is best for that rich, caramel-like flavor.
**Cinnamon** (1 teaspoon) — More cinnamon. Because it’s fall. And because it’s delicious.
**Butter** (2 tablespoons, melted) — Just a little bit to help the apples caramelize slightly in the pan.
**For the Topping:**
**Flour** (½ cup / 60g) — Yes, more flour. This creates that crumbly, streusel-like topping.
**Granulated sugar** (½ cup / 100g) — For the crunch.
**Cinnamon** (1 teaspoon) — Round out the flavor profile.
**Unsalted butter** (¼ cup / 57g, cold and cubed) — This is crucial. Cold butter cut into the flour and sugar creates those little crumbly bits. If you use melted butter, you’ll just get a wet paste.
**Optional:**
**Chopped pecans or walnuts** (½ cup) — I add nuts sometimes for texture. It’s not traditional, but I love the crunch. If you’re allergic, skip it. The bars are still amazing without them.
**Personal Tips:**
– **Apple Prep:** Don’t dice the apples too small. You want visible chunks of apple in every bite. Aim for ½-inch cubes.
– **Butter Temperature:** If you forget to soften your butter, just microwave it for 5-10 seconds. It should be pliable but not oily.
– **Pan Size:** Use a 9×13 inch baking pan. If you use a smaller pan, the bars will be too thick and might not cook through. If you use a larger pan, they’ll be too thin and dry.
Equipment Needed
You don’t need fancy equipment for this. Here’s what I actually use:
**9×13 Inch Baking Pan** — I use a glass Pyrex pan because it heats evenly. Metal works too, but keep an eye on the edges so they don’t burn. Dark metal pans can cause the bottom to brown too quickly.
**Mixing Bowls** — Two medium bowls. One for the base, one for the topping. You can get by with one if you’re lazy, but two keeps things organized.
**Pastry Cutter or Fork** — To cut the cold butter into the flour and sugar for the topping. I use a pastry cutter because it’s faster, but a fork works fine if you have the arm strength.
**Sharp Knife** — For dicing the apples. A chef’s knife is best.
**Peeler** — I peel my apples. Some people leave the skins on for fiber, but I find the skins get tough and chewy in baked bars. Peel them for a smoother texture.
**Rolling Pin** — Optional. I usually just press the dough with my hands, but a rolling pin helps if you want it perfectly even.
**Cooling Rack** — Essential. Don’t cut these hot. They’ll fall apart. Let them cool on a rack so air circulates underneath.
**Whisk** — For mixing the dry ingredients together quickly.
**Measuring Cups and Spoons** — Standard stuff. Dollar store versions work fine for this recipe.
How to Make It: Step-by-Step
Alright, let’s make this! I’m walking you through exactly how I do it, including the little tricks I’ve picked up over the years.
Step 1: Prep Your Oven and Pan (5 minutes)
Preheat your oven to 350°F (175°C). Line your 9×13 inch baking pan with parchment paper, leaving an overhang on the sides. This is non-negotiable. It makes lifting the bars out of the pan so much easier and keeps cleanup to a minimum. Lightly spray the parchment with non-stick spray.
Step 2: Make the Base Layer (5 minutes)
In a medium bowl, mix the flour, softened butter, granulated sugar, and 1 teaspoon of cinnamon. Use your fingers or a pastry cutter to mix until it resembles coarse crumbs. Press this mixture firmly and evenly into the bottom of your prepared pan. You want it compact. Use the bottom of a measuring cup to press it down tight. This is your foundation, so don’t skimp on the pressing.
Step 3: Prepare the Apple Filling (5 minutes)
In a separate bowl, toss the diced apples with the brown sugar and 1 teaspoon of cinnamon. Let them sit for a few minutes while you prep the topping. This draws out some of the moisture and starts the caramelization process. Add the melted butter to the apples and stir to coat.
Step 4: Spread the Apples (2 minutes)
Evenly distribute the apple mixture over the pressed base layer. Don’t pile them too high in the center; try to keep the layer relatively uniform so they bake evenly. If you have big chunks, move them around a bit.
Step 5: Make the Crumb Topping (5 minutes)
In a clean bowl, combine the ½ cup flour, ½ cup granulated sugar, and 1 teaspoon cinnamon. Add the cold, cubed butter. Use a pastry cutter, two forks, or your fingers to rub the butter into the flour mixture until you have large, pea-sized crumbs. Don’t overmix. You want visible chunks of butter. These are what create the crispy, crunchy top.
Step 6: Add Topping and Bake (30-35 minutes)
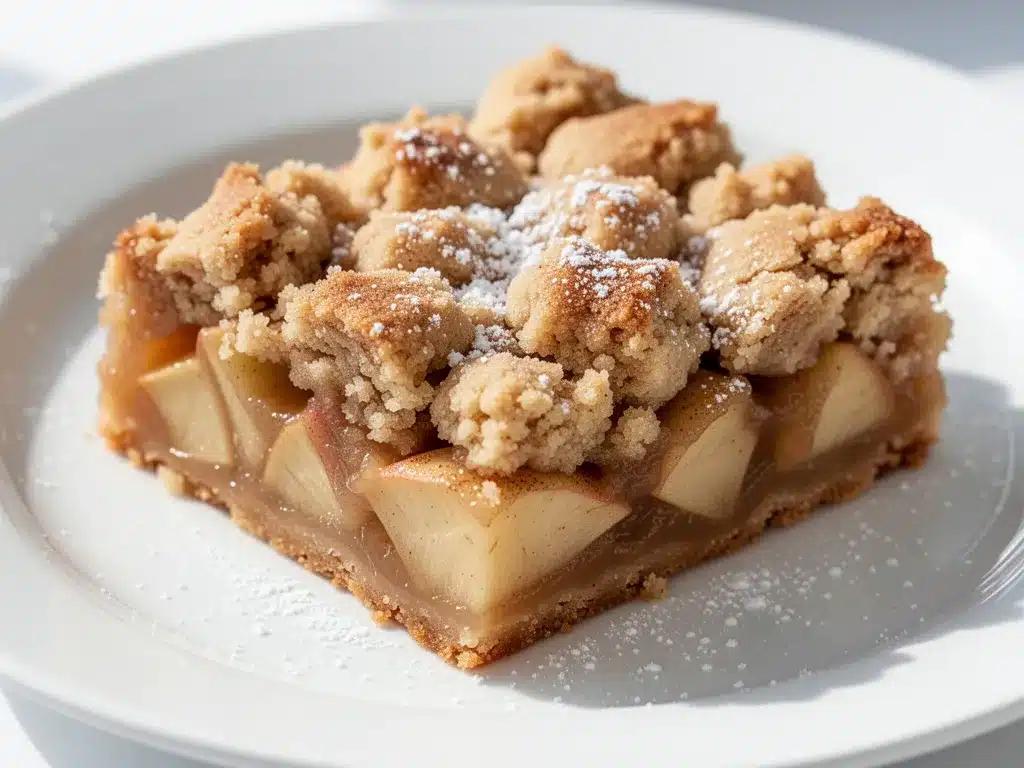
Sprinkle the crumb topping evenly over the apples. It doesn’t need to be perfect; rustic is good. Bake for 30-35 minutes, or until the topping is golden brown and the apples are tender. You can test doneness by inserting a knife into the center; it should go through the apples easily. Keep an eye on the edges—if they’re browning too fast, cover them with a piece of foil.
Step 7: Cool Completely (At least 1 hour)
This is the hardest part. Let the bars cool in the pan on a wire rack for at least 30 minutes. Then, lift them out using the parchment overhang and let them cool completely on the rack. If you cut them warm, they will be mushy. Patience pays off.
Total Time: About 45 minutes (15 minutes active, 30 minutes baking, plus cooling time)
Expert Tips & Tricks
Here’s everything I’ve learned from making these dozens of times. These tips will save you from my mistakes.
**Don’t Skip the Parchment**
I know it feels like extra work, but lifting the bars out makes cutting them so much cleaner. If you bake them directly in the pan, you’ll end up with broken pieces and a sticky mess. Trust me on this.
**Cold Butter for the Topping**
If your butter is warm, it will melt into the flour and you’ll lose the crumbly texture. Keep it in the fridge until the last second. Cube it small so it mixes in easier.
**Apple Selection Matters**
Granny Smith is my favorite for a reason. They don’t turn into applesauce. If you use Red Delicious, they’ll get mushy and bland. If you use Fuji, they’ll be very sweet. Mix two types if you want complexity.
**Cooling is Crucial**
I know you want to eat them now. But the structure sets as they cool. Cutting them hot is a recipe for disaster. Set a timer for 1 hour. Use that time to clean up or make a cup of tea.
**Storage for Freshness**
Store in an airtight container at room temperature for up to 3 days. If it’s humid, they might get a bit soft. In that case, store them in the fridge. They’ll hold up for up to a week.
**Common Mistakes:**
**Mistake: Base is soggy**
Fix: Make sure you press the base firmly. Also, don’t overload the apples. If you have too much juice, drain it slightly before adding to the pan.
**Mistake: Topping burns**
Fix: Your oven might run hot. Check at 25 minutes. If the top is dark but apples aren’t tender, cover with foil.
**Mistake: Bars fall apart**
Fix: You didn’t cool them enough. Or you cut them too hot. Or you didn’t press the base tight enough.
**Pro Tricks:**
**Add a Glaze**
Mix 1 cup powdered sugar with 2-3 tablespoons milk or apple cider. Drizzle over the cooled bars. It’s optional but adds a nice sweet finish.
**Boost the Flavor**
Add a pinch of nutmeg or allspice to the apple filling. It adds warmth without overpowering the cinnamon.
**Make Ahead**
You can make the base and topping up to 2 days ahead. Store them separately in the fridge. Assemble and bake when ready. Saves time on busy days.
Variations & Substitutions
Once you’ve nailed the basic version, here’s how you can mix it up. I’ve tried all of these.
**Pecan Apple Bars**
Add ½ cup chopped pecans to the crumb topping. Toast them first for extra flavor. This is my favorite variation.
**Spiced Apple Bars**
Add ½ teaspoon nutmeg and ¼ teaspoon allspice to the apple filling. Great for holiday gatherings.
**Cheddar Apple Bars**
Add ½ cup sharp cheddar cheese to the base layer. The salty cheese contrasts with the sweet apples and cinnamon. It sounds weird, but it’s amazing.
**Gluten-Free**
Use a 1:1 gluten-free flour blend. Everything else stays the same. The texture might be slightly denser, but it’s still delicious.
**Dairy-Free**
Use dairy-free butter sticks (not tub margarine) for the base and topping. Use coconut oil or dairy-free butter for the apple mixture. It works surprisingly well.
**Vegan**
Use vegan butter and ensure your sugar is vegan (some white sugar is processed with bone char). The bars are naturally vegan-friendly with these swaps.
**Different Fruits:**
– **Pear Bars:** Substitute pears for apples. Use Bartlett or Bosc pears. They’re softer, so reduce baking time by 5 minutes.
– **Apple-Peach Bars:** Half apples, half peaches. Summer-fall transition dessert.
– **Apple-Blueberry Bars:** Add 1 cup fresh or frozen blueberries to the apple layer. Adds tartness and color.
Serving & Storage
How to serve these bars to maximize enjoyment:
**How to Serve:**
I usually serve these warm, right after they’ve cooled for 30 minutes. They’re perfect with a cup of coffee or a glass of cold milk. For dinner parties, I cut them into small squares and serve them on a platter with a dollop of whipped cream or a scoop of vanilla ice cream. It’s like having apple pie without the fuss.
**Side Dishes:**
These are a dessert, so they stand alone. But if you’re serving them as part of a larger meal, they pair well with:
– Hot apple cider (obviously)
– Spiked apple cider margaritas if you’re feeling festive
– A simple green salad if you’re having a light lunch
**Toppings Bar:**
When I have guests, I put out:
– Whipped cream
– Vanilla bean ice cream
– Caramel sauce
– Chopped pecans
– A dusting of powdered sugar
**Storage Instructions:**
**Refrigerator:**
Store in an airtight container for up to 5 days. They might get a bit soft, but they’ll still be tasty.
**Freezing:**
Yes, these freeze well! Wrap individual bars in plastic wrap, then place them in a freezer-safe bag. They’ll keep for up to 3 months. Thaw at room temperature. They taste almost as good as fresh.
**Reheating:**
To reheat, microwave a bar for 15-20 seconds. Or warm it in a 350°F oven for 10 minutes. Restores that fresh-baked texture.
**Meal Prep:**
Make a batch on Sunday. Store in the fridge. Grab one for breakfast or a snack throughout the week. They’re portable and filling.
Nutrition Information
I’m not a nutritionist, but here’s the breakdown if you’re tracking. This is a dessert, so enjoy it guilt-free!
**Per Serving (based on 12 bars):**
– Calories: 280
– Protein: 3g
– Carbs: 42g
– Fiber: 2g
– Sugar: 28g
– Fat: 12g
– Saturated Fat: 7g
– Cholesterol: 30mg
– Sodium: 150mg
**What’s Good:**
– Apples provide some fiber and vitamins
– Reasonable portion size if you cut them small
– Can be made with whole wheat flour for more fiber
**What to Know:**
– Higher in sugar from the cinnamon-sugar topping
– Contains gluten and dairy
– Moderate calories, but dense
**My Take:**
“This is comfort food. It’s sweet, buttery, and perfect for fall. It’s not a diet recipe, but it’s better than store-bought bars. When I want to make it lighter, I reduce the sugar in the topping by half and use more apples. But usually? I just eat one bar and enjoy it.”
Final Thoughts
So that’s my go-to cinnamon sugar apple bars! I’ve probably talked your ear off at this point, but when you make a recipe this often, you have a lot to say about it.
This has saved dessert nights more times than I can count. It’s my answer to “what’s for dessert” when I want something homemade but don’t want to spend my evening at the stove. My kids are happy, my husband’s happy, and I’m happy because I’m not stressed about cooking.
Make it yours! Try different apples, add nuts, or drizzle with glaze. The best recipes are the ones you adapt to your family’s tastes. If you make this, drop a comment and let me know what you think! I love hearing how recipes turn out in your kitchen. And if something doesn’t work, tell me that too—I’m here to help troubleshoot.
Happy baking! And I hope your kitchen smells half as good as mine does right now.
Frequently Asked Questions
**Q: Can I use frozen apples?**
A: You can, but they’ll be softer and release more water. Thaw them first and drain the excess liquid. You might need to add a tablespoon of flour to the apple mixture to absorb the extra moisture. Fresh apples are best for texture.
**Q: Why did my bars turn out dry?**
A: You probably overbaked them. Check them at 30 minutes. If the topping is golden and a knife comes out clean, they’re done. Overbaking dries out the apples and the base.
**Q: Can I use apple pie filling instead of fresh apples?**
A: You can, but it’s much sweeter and softer. Use 2 cans of pie filling, drain off excess syrup, and reduce the sugar in the topping by half. It’s a shortcut, but the texture will be different.
**Q: How do I store leftovers?**
A: Store in an airtight container at room temperature for up to 3 days. In the fridge for up to 5 days. They freeze well for up to 3 months.
**Q: Can I make these gluten-free?**
A: Yes! Use a 1:1 gluten-free flour blend. The texture might be slightly denser, but they’ll still be delicious. Make sure your baking powder is GF if you add any.
**Q: Can I double this recipe?**
A: Absolutely! Double everything and use a 9×13 pan. The baking time might increase by 5-10 minutes. Keep an eye on them.
**Q: Can I use brown sugar in the base?**
A: Yes, but it will make the base chewier and darker. White sugar gives a crisper base. I prefer white sugar for the base and brown sugar for the apples.
**Q: What kind of apples are best?**
A: Granny Smith is my top choice for tartness and structure. Honeycrisp is good for sweetness. Mix them for the best balance. Avoid Red Delicious—they get mealy when baked.
Pin This Recipe!
Cinnamon Sugar Apple Bars: Best Easy Fall Dessert
- Total Time: 45 minutes
- Yield: 12 servings 1x
Description
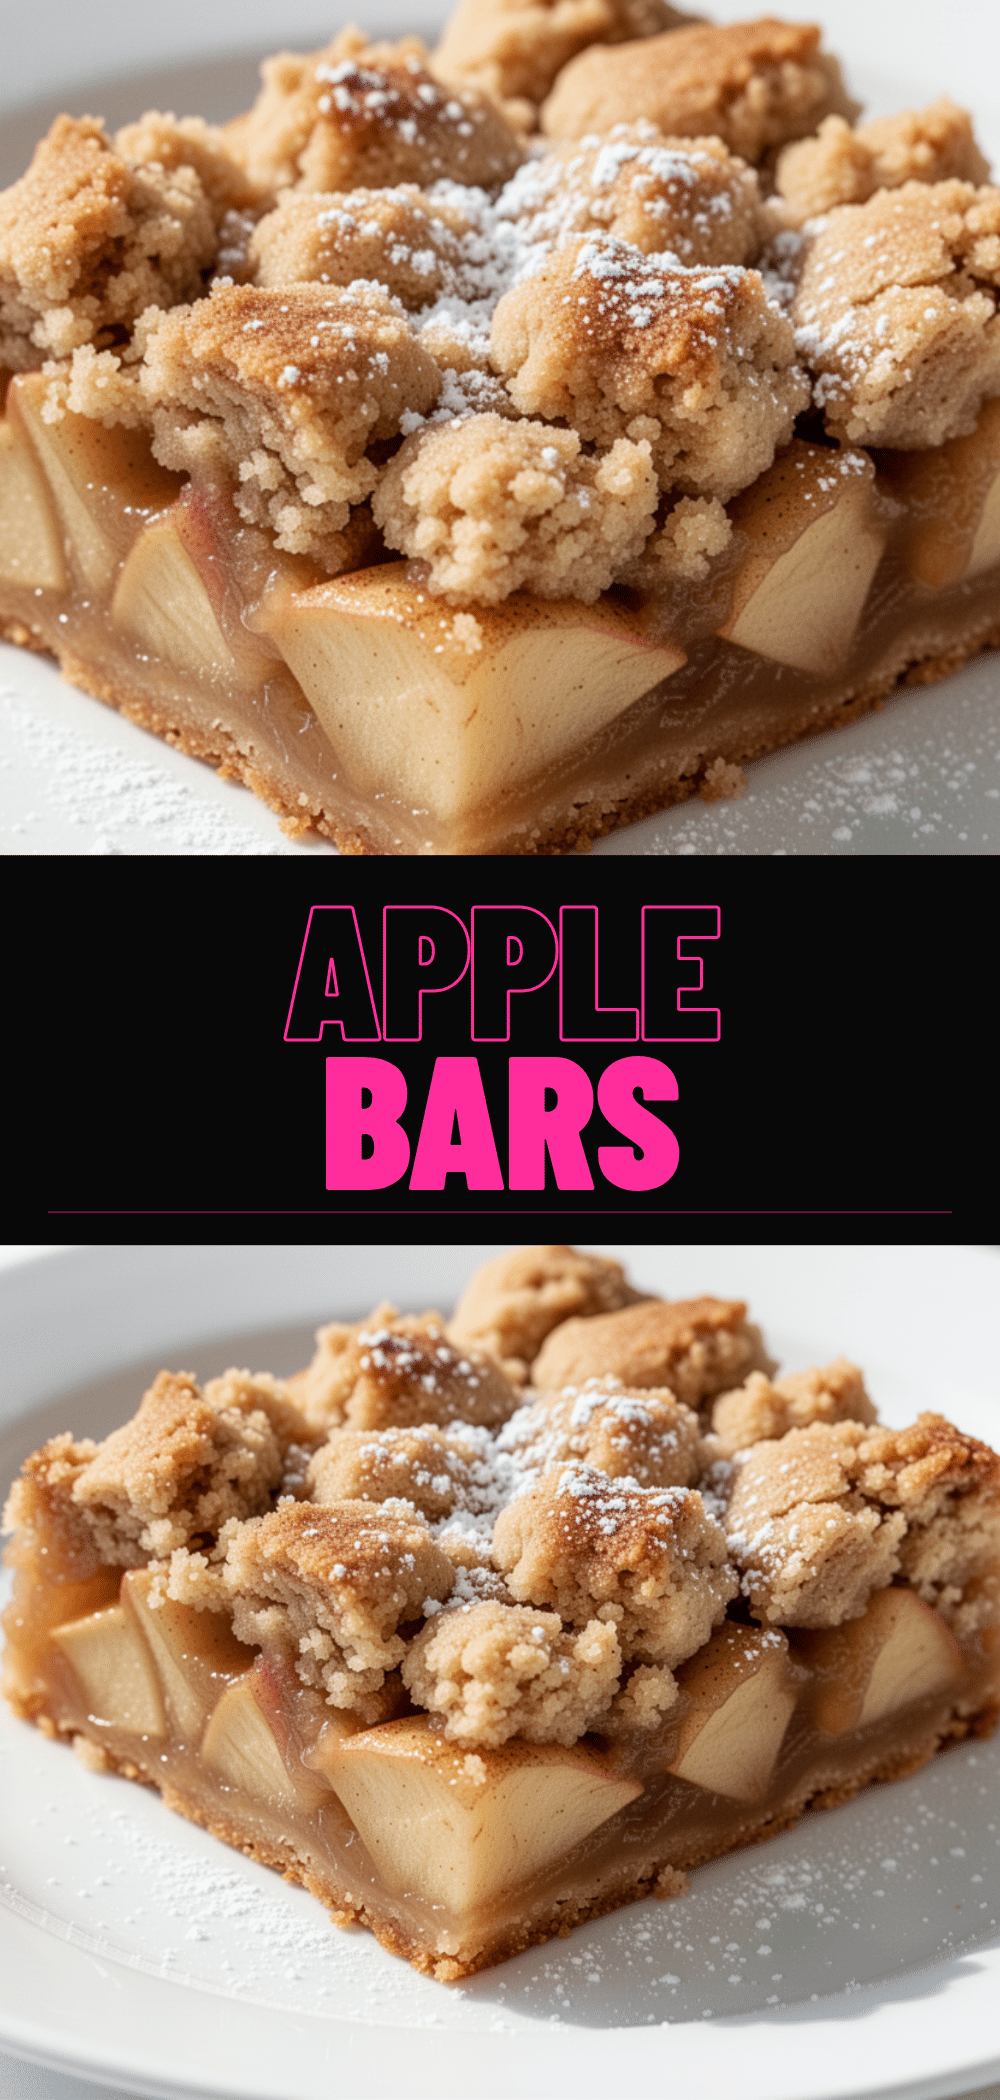
These easy cinnamon sugar apple bars are the perfect fall dessert, combining a buttery base, tender spiced apples, and a crunchy crumb topping. Ready in just 45 minutes, they are simpler than pie and perfect for weeknights or gifting.
Ingredients
- 2 cups all-purpose flour (for base)
- 1/2 cup unsalted butter, softened (for base)
- 1/2 cup granulated sugar (for base)
- 1 teaspoon ground cinnamon (for base)
- 3 medium Granny Smith apples, peeled and diced into 1/2-inch cubes
- 1/2 cup packed brown sugar (for filling)
- 1 teaspoon ground cinnamon (for filling)
- 2 tablespoons unsalted butter, melted (for filling)
- 1/2 cup all-purpose flour (for topping)
- 1/2 cup granulated sugar (for topping)
- 1 teaspoon ground cinnamon (for topping)
- 1/4 cup unsalted butter, cold and cubed (for topping)
- 1/2 cup chopped pecans or walnuts, optional
Instructions
- Preheat oven to 350°F (175°C). Line a 9×13 inch baking pan with parchment paper, leaving an overhang on the sides, and lightly spray with non-stick spray.
- In a medium bowl, mix the base flour, softened butter, granulated sugar, and 1 teaspoon cinnamon until it resembles coarse crumbs. Press this mixture firmly and evenly into the bottom of the prepared pan using the bottom of a measuring cup.
- In a separate bowl, toss the diced apples with brown sugar and 1 teaspoon cinnamon. Let sit for a few minutes, then stir in the melted butter to coat.
- Spread the apple mixture evenly over the pressed base layer.
- In a clean bowl, combine the topping flour, granulated sugar, and 1 teaspoon cinnamon. Add the cold, cubed butter and cut it in using a pastry cutter or fingers until large, pea-sized crumbs form.
- Sprinkle the crumb topping evenly over the apples.
- Bake for 30-35 minutes, or until the topping is golden brown and a knife inserted into the center comes out clean. If edges brown too quickly, cover with foil.
- Cool completely in the pan on a wire rack for at least 1 hour before lifting out and cutting. This ensures the bars set properly and don’t fall apart.
Notes
For best texture, use Granny Smith apples as they hold their shape. Ensure the butter for the topping is cold to create a crumbly texture. Do not cut the bars while warm, or they will be mushy. Store in an airtight container at room temperature for up to 3 days, or in the fridge for up to 5 days. They can also be frozen for up to 3 months.
- Prep Time: 15 minutes
- Cook Time: 30 minutes
- Category: Dessert
- Cuisine: American
Nutrition
- Serving Size: 1 bar
- Calories: 280
- Sugar: 28
- Sodium: 150
- Fat: 12
- Saturated Fat: 7
- Carbohydrates: 42
- Fiber: 2
- Protein: 3
Keywords: fall dessert, apple bars, cinnamon sugar, easy dessert, weeknight baking, gluten-free option, make ahead dessert


