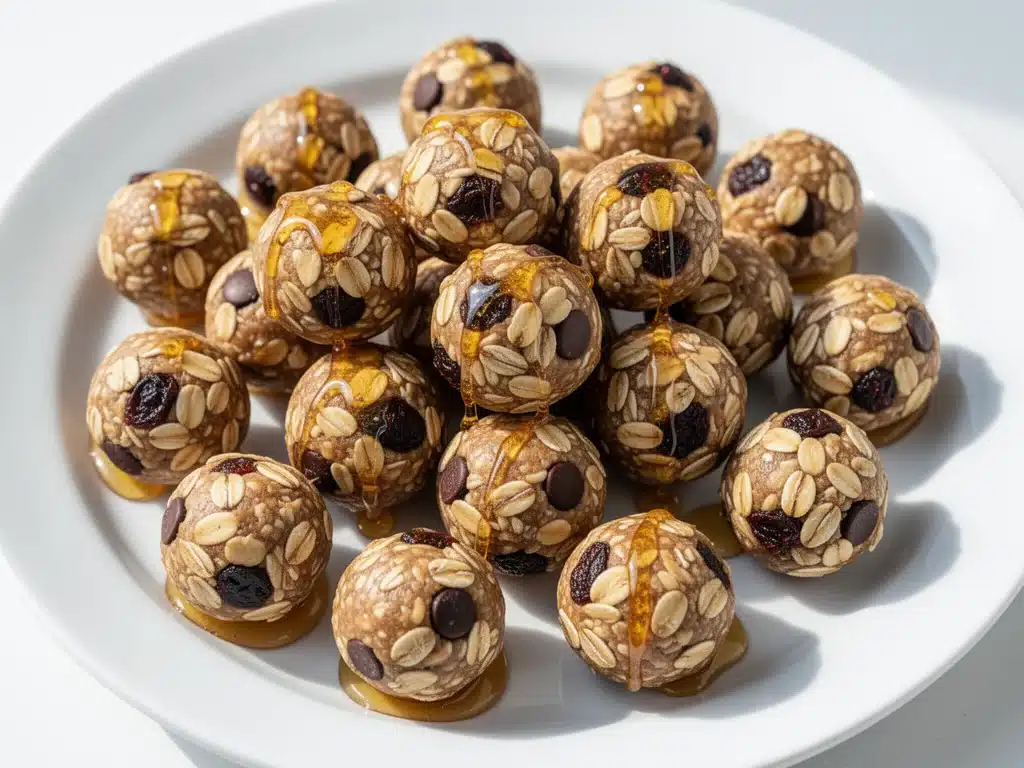
It was 6:30 AM on a Tuesday, the kind of morning where the coffee hasn’t kicked in and my brain is still buffering. I was staring into the pantry, looking for something that wasn’t cereal, but also wasn’t going to weigh me down like a brick before my 8 AM meeting. Usually, I grab a granola bar from the dollar store, but let’s be real—they’re mostly sugar and cardboard. That morning, I had half a bag of oats, a stubborn jar of honey, and a desperate need for fuel.
I threw together what I thought would be a mediocre oatmeal ball. Stir, chill, eat. Simple. But when I took that first bite three hours later, right when my afternoon slump usually hits, I was shocked. It wasn’t just filling; it was actually delicious. The honey gave it this warm, golden sweetness that didn’t taste artificial, and the oats had just the right amount of chew. I made them again that night. And the next day. Now, I keep a batch in the fridge at all times because these no-bake honey oat energy bites have completely replaced my junk food stash.
They’re the ultimate healthy snack for busy mornings, pre-workout fuel, or just when you need a sweet fix without the guilt trip. I’ve tested this recipe dozens of times, tweaking the ratios until I got the perfect balance of sticky and crunchy. It’s one of those recipes that feels like a cheat code for healthy eating. If you’re tired of dry, flavorless protein balls, you need to try this. It’s stupid simple, uses five ingredients you probably already have, and takes less time than it takes to boil water. Trust me on this one.
Why You’ll Love This 5-Ingredient Snack
There are about ten reasons I keep making these energy bites, but here are the big ones that keep them in my rotation week after week.
Zero Baking Required — Seriously. You don’t need to preheat an oven, wait for it to cool, or deal with sticky baking sheets. It’s just a bowl, a spoon, and the fridge. I’ve made these on weeknights after work when I didn’t want to turn on the stove, and on lazy Sundays when I didn’t want to stand over a mixer.
Actually Tastes Good — A lot of “healthy” snacks taste like they were designed by a committee of dietitians who’ve never tasted real food. These taste like dessert. The honey brings such a rich, natural sweetness that you don’t need any refined sugar. They’re chewy, slightly crunchy, and deeply satisfying. My kids argue over who gets the last one.
Pantry-Friendly — You probably have 90% of these ingredients already. Rolled oats, honey, peanut butter, maybe some chia seeds or chocolate chips if you’re feeling fancy. I keep the base ingredients stocked just so I can throw these together on a whim when I’m heading out the door.
Meal Prep Gold — These keep for up to two weeks in the fridge. I make a big batch on Sunday, pop them into a container, and grab one or two each morning for the week. It’s my answer to “what’s for breakfast/snack” when I’m rushing out the door. No more stopping at the drive-thru.
Customizable AF — Hate peanut butter? Use almond butter. Want chocolate? Throw in dark chocolate chips. Need more protein? Add a scoop of powder. This recipe is a blank canvas. I’ve made them with sunflower butter for school-safe snacks and with flaxseed for extra omega-3s. They always work.
This is my go-to when I need a snack to just work. No complicated techniques, no weird ingredients, just reliable, delicious food that makes everyone happy. It’s better than vegan mango turmeric smoothie bowls if you need something you can eat with your hands while driving.
Ingredients You’ll Need
Here’s the best part: you probably have most of this already in your kitchen. This isn’t a recipe that requires a trip to three different specialty stores. I’m particular about a couple of things here, and I’ll tell you exactly why.
For the Base
Rolled Oats (2 cups / 160g) — I use old-fashioned rolled oats, not quick oats. Quick oats get too mushy and turn these into a paste. Rolled oats give that nice, chewy texture. I buy the store brand; it’s cheap and works perfectly. If you need gluten-free, just make sure your oats are certified gluten-free, as oats are often cross-contaminated.
Honey (½ cup / 170g) — This is the star. It binds everything together and adds that floral sweetness. I use raw honey when I can find it because it has more flavor, but regular grocery store honey works fine too. Don’t use artificial honey substitute; it won’t bind right. If you’re dairy-free and vegan, swap this for maple syrup, but note that it’s thinner, so you might need a bit more oats.
Peanut Butter (½ cup / 128g) — I use natural creamy peanut butter. The kind with the oil on top is perfect. Stir it well before measuring. Some people hate peanut butter, but in this recipe, it’s mostly a binder and adds protein. If you don’t like the taste, it’s subtle enough that you won’t notice it, especially if you add chocolate chips. For nut-free versions (like for school), use sunflower seed butter or soy nut butter. It works great.
For the Flavor & Texture
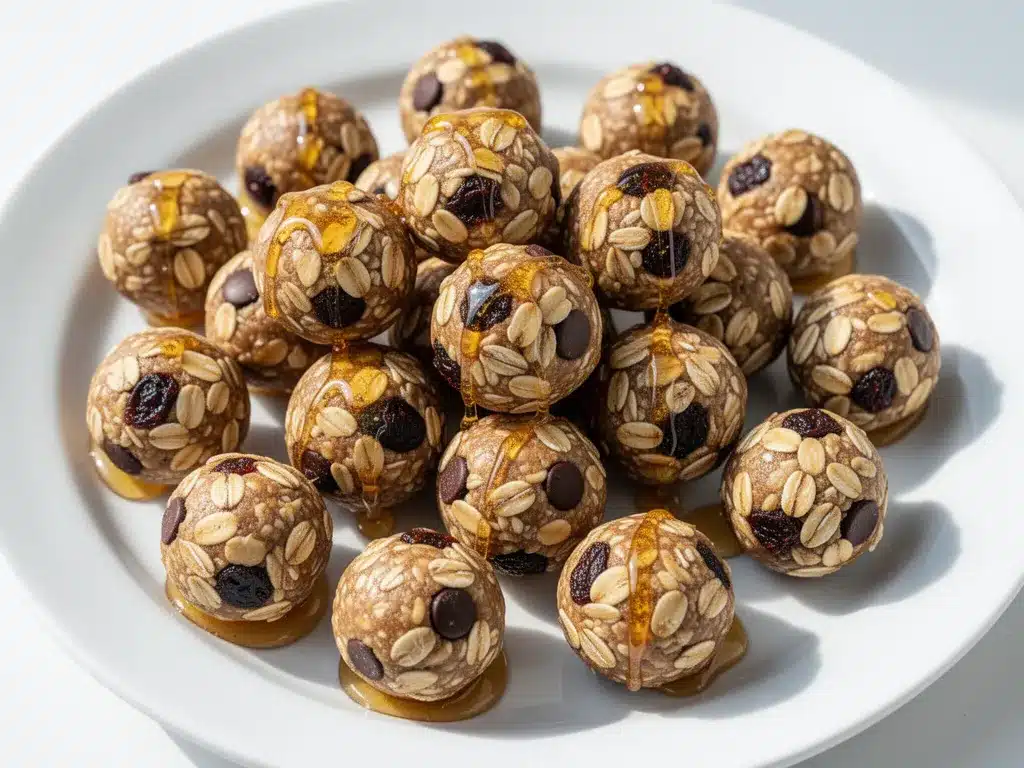
Chia Seeds (2 tablespoons / 24g) — Optional, but I highly recommend them. They add a little crunch and boost the omega-3s. They also help absorb excess moisture so the bites don’t fall apart. If you don’t have chia, you can skip them or use ground flaxseed. I keep a jar of chia seeds in my pantry specifically for this.
Vanilla Extract (1 teaspoon) — Just a splash to round out the flavors. It makes the honey taste more “candy-like.” Don’t skip it; it adds depth.
Salt (½ teaspoon) — This is non-negotiable. Honey and peanut butter are sweet and salty, but a pinch of salt in the mix makes all the flavors pop. I use kosher salt. If you use table salt, maybe use a little less.
Optional Add-ins:
- Dark Chocolate Chips (½ cup) — I throw these in for about half my batches. It turns them into little energy truffles. Use high-quality dark chocolate for less sugar.
- Mini Chocolate Chips — Easier to distribute evenly than regular chips.
- Dried Cranberries — For a tart contrast to the sweet honey. Great for variety.
- Protein Powder — 1-2 scoops of vanilla or chocolate protein powder. Note: This will absorb moisture, so you may need to add an extra tablespoon of honey or water.
Shopping Tips
I always grab the biggest jar of peanut butter I can find when it’s on sale. It lasts forever in the pantry (or fridge if you want to prevent oil separation). For oats, the large canisters are the most economical. And don’t buy pre-minced anything for this; it’s all no-chop. Just stir.
Equipment Needed
You don’t need fancy equipment for this. Here’s what I actually use, and what you can skip.
Large Mixing Bowl — I use a 4-quart bowl. It needs to be big enough to toss the oats with the wet ingredients without making a mess. I have a few glass bowls that are perfect for this. Plastic works too, but glass is easier to clean.
Measuring Cups and Spoons — Pretty standard stuff. I use a set of nesting cups for the oats and spoons for the honey and chia seeds. The dollar store versions work fine for this.
Spatula — A silicone spatula is best for scraping the honey out of the jar and mixing everything together. You want to get all that sticky honey off the sides of the bowl.
Baking Sheet or Plate — For chilling the bites. I use a standard half-sheet pan lined with parchment paper. Parchment paper makes cleanup instant. If you don’t have parchment, a light spray of cooking oil works.
Airtight Container — For storage. I use a glass container with a snap-lock lid. Plastic works too, but glass doesn’t retain smells. I’ve had plastic containers that started smelling like peanut butter after a week.
Ice Cream Scoop (Optional) — If you want uniform bites, an ice cream scoop is great. It makes them all the same size, which is nice for portion control. But honestly, I just roll them by hand. It’s faster and gives them that rustic, homemade look.
Hands — Yes, you’ll get a little sticky. Wash your hands before starting, and maybe keep a damp towel nearby. It’s worth it.
How to Make It: Step-by-Step
Alright, let’s make this! I’m walking you through exactly how I do it, including the little tricks I’ve picked up to avoid the common pitfalls.
Step 1: Mix the Dry Ingredients (2 minutes)
Grab your large bowl. Add the rolled oats, chia seeds, and salt. Stir them together with a spoon or your hands. This ensures the salt and chia seeds are distributed evenly so you don’t get a salty bite in the middle. If you’re adding protein powder or cocoa powder, add it now. Mix it all until it looks uniform.
Step 2: Add the Wet Ingredients (2 minutes)
Add the honey and peanut butter to the bowl. If your peanut butter is very stiff, microwave it for 15 seconds to soften it up. This makes it much easier to mix. Pour in the vanilla extract. Now, here’s the tricky part: don’t just stir gently. You need to really work this together. Use your spatula to fold the wet ingredients into the oats. It will look dry and shaggy at first. Don’t panic.
Step 3: Get Hands-On (3 minutes)
Once the initial mixing is done, switch to your hands. This is where the magic happens. Your fingers need to press the mixture together. Squeeze it. It should feel like damp sand. If it’s too crumbly and falls apart when you squeeze it, add another tablespoon of honey. If it’s too sticky and won’t hold shape, add another tablespoon of oats. This is the most important step. Spend a good minute or two kneading the mixture in the bowl until it’s cohesive.
Step 4: Add Mix-Ins (1 minute)
If you’re using chocolate chips or dried fruit, fold them in now. Use your hands to distribute them evenly. Make sure every bite has a good mix of mix-ins. I try to get one chip or berry in every single ball.
Step 5: Roll the Bites (5 minutes)
Line your baking sheet with parchment paper. Take a small amount of the mixture—about a tablespoon—and roll it into a ball between your palms. If it’s sticking to your hands, wet them slightly with water. This helps them roll smoothly. Place them on the baking sheet. They don’t need to be perfect spheres; rustic is fine. I usually make about 20-24 bites from this batch. If you’re making them for meal prep, try to make them all the same size for consistent portions.
Step 6: Chill (At least 30 minutes)
This is the hardest part: waiting. Place the baking sheet in the fridge. The cold firm up the peanut butter and honey, which helps the bites hold their shape. If you’re in a huge rush, you can put them in the freezer for 15 minutes, but the fridge is better for even chilling. Don’t skip this step. If you try to eat them immediately, they’ll be soft and messy. Let them set.
Total Time: About 15 minutes active, plus chilling time.
Troubleshooting During the Process
- Mixture too dry? Add honey, one teaspoon at a time. Keep mixing until it holds together.
- Mixture too wet? Add oats, one tablespoon at a time. Don’t add too much or they’ll be dry.
- Sticking to hands? Wet your hands with cold water. It sounds weird, but it works instantly.
Expert Tips & Tricks
Here’s everything I’ve learned from making these dozens of times. These tips will save you from my mistakes.
Use Natural Peanut Butter
I can’t stress this enough. The kind with hydrogenated oils (the kind that doesn’t need stirring) has added sugar and wax. It changes the texture and taste. Natural peanut butter gives a richer, nuttier flavor. Just stir the oil back in before measuring.
Don’t Over-Roll
When you’re rolling the balls, don’t overwork the mixture in your hands. The heat from your hands can melt the peanut butter, making the balls too soft. Roll them firmly but quickly. If they start to feel greasy, put them back in the fridge for a minute to reset.
Chia Seeds Are Secret Weapons
If you skip the chia seeds, the bites might be a bit looser. Chia seeds absorb moisture and help bind the mixture. If you don’t have them, flaxseed meal works too. Or just add a tiny bit more honey.
Make Them Small
I used to make these huge, golf-ball-sized spheres. They were filling, but also overwhelming. I’ve since switched to smaller, bite-sized balls (about 1 inch in diameter). They’re easier to eat on the go, and you can have two or three without feeling like you just ate a meal. Plus, they look more elegant.
Freeze for Later
If you’re making a big batch, freeze them. They freeze beautifully. Just store them in a freezer-safe bag with parchment paper between layers. They’ll last up to 3 months. Take them out the night before for a thawed snack, or eat them frozen—they taste like ice cream bites.
Variations & Substitutions
Once you’ve nailed the basic version, here’s how you can mix it up. I’ve tried all of these, and they all work.
Chocolate Peanut Butter Cups
Add ½ cup mini chocolate chips and 1 tablespoon cocoa powder to the dry mix. These taste like miniature peanut butter cups. My kids’ favorite.
Almond Joy Style
Swap peanut butter for almond butter. Add ¼ cup shredded coconut and ½ cup chocolate chips. It’s tropical and sweet. Great for summer.
Snickerdoodle
Add 1 teaspoon cinnamon to the dry mix. Use ½ cup of brown sugar instead of honey (note: this changes the texture, so add a bit more oats). Roll the finished balls in cinnamon sugar. They taste like cookie dough.
Trail Mix
Add ¼ cup dried cranberries, ¼ cup chopped walnuts, and ¼ cup dark chocolate chips. It’s like a energy ball version of trail mix. Very crunchy.
Dietary Modifications:
- Vegan: Use maple syrup or agave nectar instead of honey. Use vegan chocolate chips. Everything else is naturally vegan.
- Gluten-Free: Use certified gluten-free oats. Check your chocolate chips and peanut butter to ensure they’re processed in a GF facility if you’re severe.
- Nut-Free: Use sunflower seed butter or soy nut butter. Use sunflower seeds or pumpkin seeds instead of nuts. Chocolate chips should be checked for nut cross-contamination.
- Lower Sugar: Use unsweetened almond butter and reduce honey to ⅓ cup. Add stevia or monk fruit if needed. They’re still sweet from the honey, so you might not need much.
Serving & Storage
How to Serve:
I usually keep them in a container in the fridge and grab one or two as I’m leaving the house. They’re perfect for:
- Breakfast on the go: Pair with a piece of fruit or a yogurt.
- Pre-workout: Eat one 30 minutes before exercising for quick energy.
- Afternoon snack: Beat the 3 PM slump without the sugar crash.
- Packing lunch: They don’t melt in your bag if you keep them cool.
They’re also great paired with a cup of spiked apple cider if you’re hosting a casual get-together, though they’re non-alcoholic so kids can have them too.
Storage Instructions:
Refrigerator:
Store in an airtight container for up to 2 weeks. They actually get firmer and chewier in the fridge, which I love. If you live in a hot house, the fridge is mandatory. In the winter, the pantry might work, but the fridge is safer.
Freezer:
Store in a freezer-safe bag or container for up to 3 months. They thaw quickly at room temperature. I keep a bag in the freezer at all times for emergencies.
Pro Tip:
If you’re meal prepping, make two batches. One for the fridge (to eat this week) and one for the freezer (to eat next week). This way, you never run out.
Nutrition Information
I’m not a nutritionist, but here’s the breakdown if you’re tracking. Note that this is an estimate based on standard ingredients.
Per Serving (1 bite, based on 20 bites):
| Nutrient | Amount |
|---|---|
| Calories | 95 |
| Protein | 3g |
| Carbs | 12g |
| Fiber | 1.5g |
| Sugar | 7g |
| Fat | 4g |
| Sodium | 35mg |
What’s Good:
Decent fiber from the oats. Protein from the peanut butter. No refined sugar. Easy to control portions.
What to Know:
Higher in calories if you add chocolate chips or eat more than 2-3. Contains nuts (unless substituted). Moderate sugar from honey.
My Take:
Look, these are a snack, not a meal replacement. They’re calorie-dense because of the nuts and oats. But they’re nutrient-dense too. I eat two as a snack, and I’m good for hours. When I want to make them lighter, I reduce the honey slightly and add more oats. But usually? I just enjoy them in moderation.
Final Thoughts
So that’s my go-to no-bake honey oat energy bites! I’ve probably talked your ear off at this point, but when you make a recipe this often, you have a lot to say about it. These have saved me from buying overpriced, sugar-laden snacks at the gas station more times than I can count.
They’re my answer to “I need something sweet and healthy” when I’m tired, don’t want to cook, and still want to eat well. My kids are happy, my husband is happy (he sneaks them when I’m not looking), and I’m happy because I’m not stressed about finding a good snack.
Make it yours! Try different nut butters, add different chocolates, or skip the chia seeds if you don’t have them. The best recipes are the ones you adapt to your tastes. If you make these, drop a comment and let me know what variations you tried! I love hearing how recipes turn out in your kitchen. And if something doesn’t work, tell me that too—I’m here to help troubleshoot.
Happy snacking! And I hope your pantry smells half as good as mine does right now.
Frequently Asked Questions
Can I use quick oats instead of rolled oats?
You can, but the texture will be different. Quick oats are thinner and will make the bites softer and denser, almost like a bar. Rolled oats give that nice chew. If you only have quick oats, just use them, but maybe add an extra tablespoon of honey to help them bind better.
Why are my energy bites too crumbly?
This usually means there isn’t enough wet ingredient. Add more honey, one teaspoon at a time, and mix thoroughly. Sometimes the peanut butter brand you’re using is drier than others. Natural peanut butter can vary in oil content. If it’s still crumbly after adding honey, add a splash of water or milk.
Why are my energy bites too sticky?
Too much wet ingredient. Add more oats, one tablespoon at a time, until the mixture feels like damp sand and holds together when squeezed. You can also refrigerate them for 15 minutes to firm up the peanut butter before rolling.
Can I freeze these energy bites?
Yes! They freeze beautifully. Store them in an airtight container or freezer bag with parchment paper between layers. They’ll last up to 3 months. Thaw them in the fridge or eat them frozen for a cold, ice-cream-like treat.
Can I make these nut-free?
Absolutely. Swap the peanut butter for sunflower seed butter, soy nut butter, or almond butter (if tree nuts are the only issue). Use sunflower seeds or pumpkin seeds instead of nuts. Make sure your chocolate chips are certified nut-free if you have severe allergies.
How many calories are in each bite?
It depends on the size and add-ins, but a standard 1-inch bite is about 90-100 calories. If you add chocolate chips, it goes up to about 120-130. I aim for about 20 bites per batch, which makes portion control easy.
Can I use maple syrup instead of honey?
Yes, for a vegan version. Keep in mind that maple syrup is thinner than honey, so you might need a little more oats to absorb the extra liquid. Start with ½ cup and add oats until it reaches the right consistency.
Pin This Recipe!
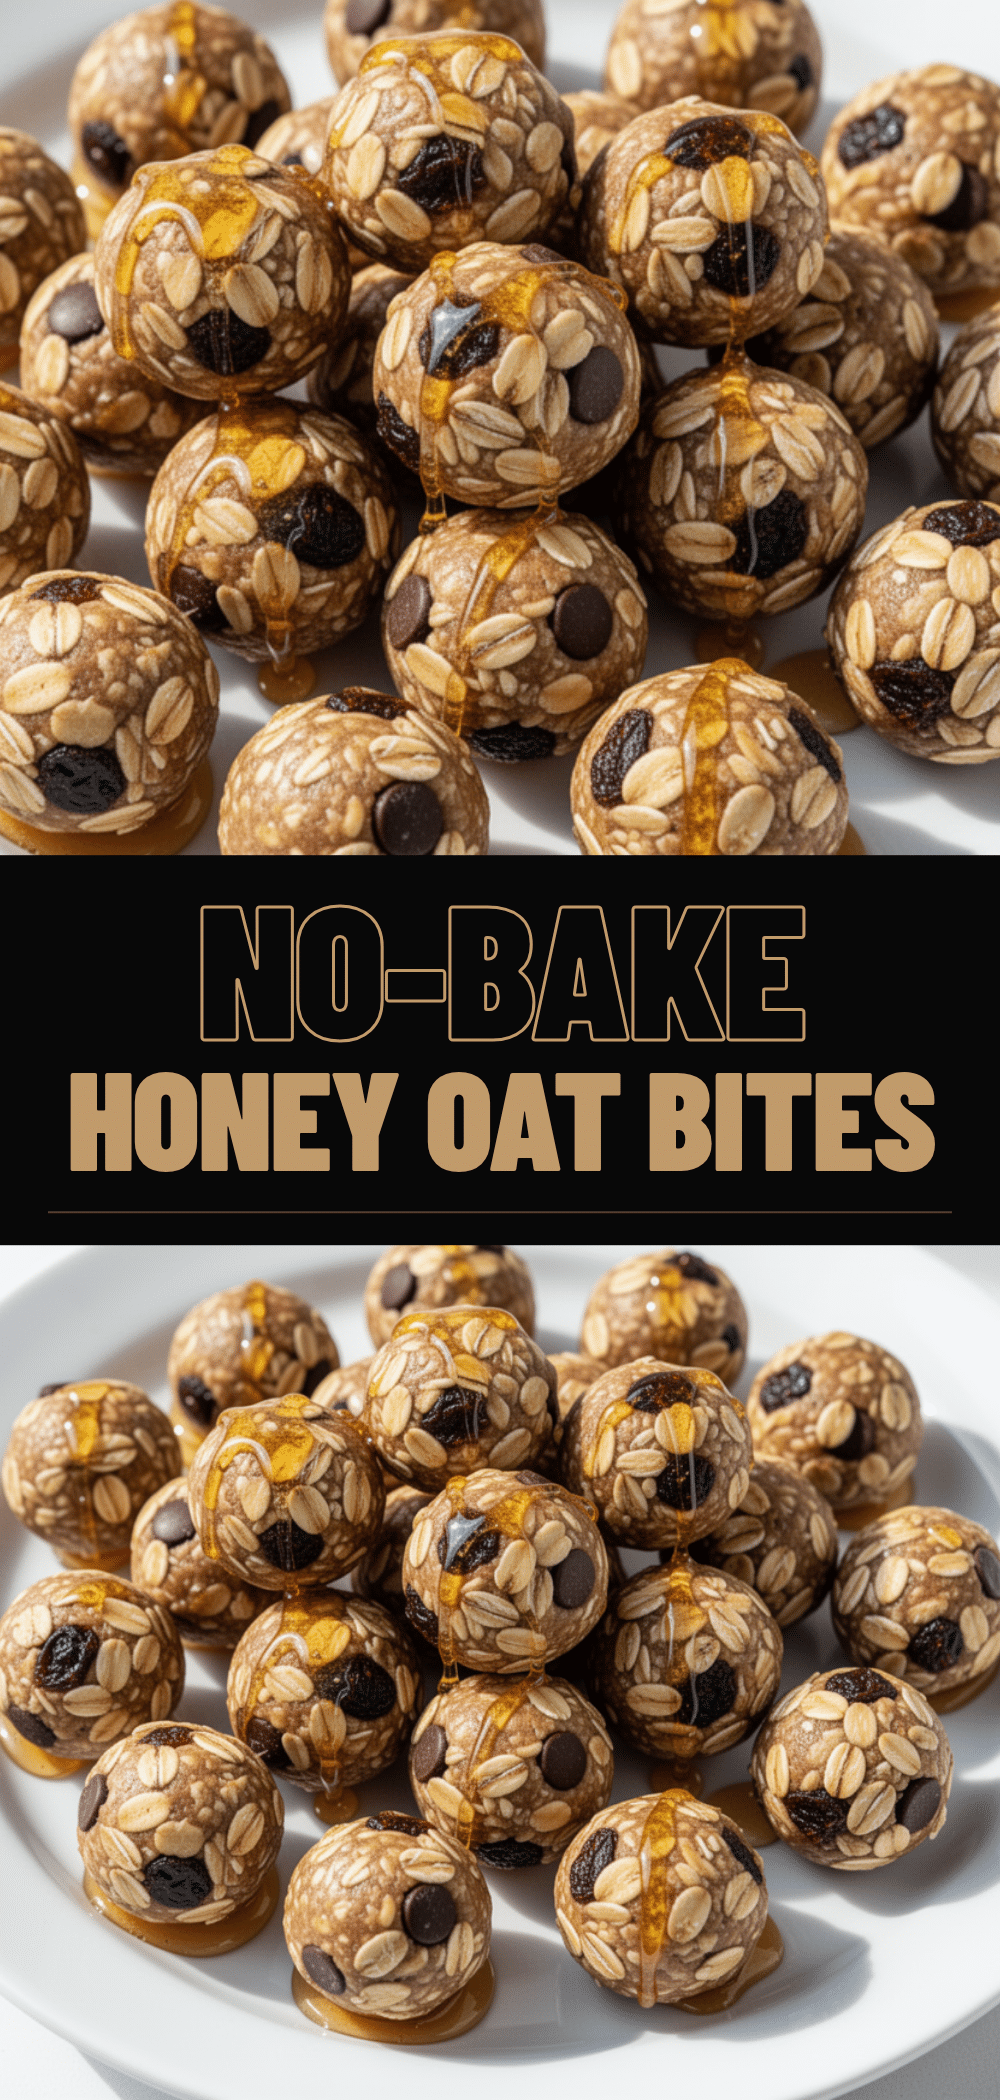
No-Bake Honey Oat Energy Bites
- Total Time: 45 minutes
- Yield: 20 servings 1x
Description
A simple, healthy 5-ingredient snack made with rolled oats, honey, and peanut butter. These no-bake energy bites are perfect for busy mornings, pre-workout fuel, or a sweet treat without the guilt.
Ingredients
- 2 cups (160g) rolled oats
- ½ cup (170g) honey
- ½ cup (128g) natural creamy peanut butter
- 2 tablespoons (24g) chia seeds
- 1 teaspoon vanilla extract
- ½ teaspoon salt
- Optional: ½ cup dark chocolate chips, dried cranberries, or protein powder
Instructions
- In a large mixing bowl, combine the rolled oats, chia seeds, and salt. Stir to distribute evenly.
- Add the honey, peanut butter, and vanilla extract to the bowl. If the peanut butter is stiff, microwave it for 15 seconds to soften.
- Mix the ingredients with a spatula, then switch to your hands to knead the mixture until it feels like damp sand and holds together.
- If the mixture is too crumbly, add more honey; if too sticky, add more oats.
- Fold in any optional mix-ins like chocolate chips or dried fruit.
- Line a baking sheet with parchment paper. Roll the mixture into 1-inch balls (about 20-24 bites) and place them on the sheet.
- Refrigerate for at least 30 minutes to firm up before serving.
Notes
Use natural peanut butter for best texture. If using maple syrup instead of honey, you may need slightly more oats as maple syrup is thinner. Store in the fridge for up to 2 weeks or freeze for up to 3 months.
- Prep Time: 15 minutes
- Cook Time: 0 minutes
- Category: Snack
- Cuisine: American
Nutrition
- Serving Size: 1 bite (approx. 1 in
- Calories: 95
- Sugar: 7
- Sodium: 35
- Fat: 4
- Saturated Fat: 0.5
- Carbohydrates: 12
- Fiber: 1.5
- Protein: 3
Keywords: no-bake, energy bites, healthy snack, oatmeal cookies, gluten-free, vegan option, meal prep, peanut butter, honey


