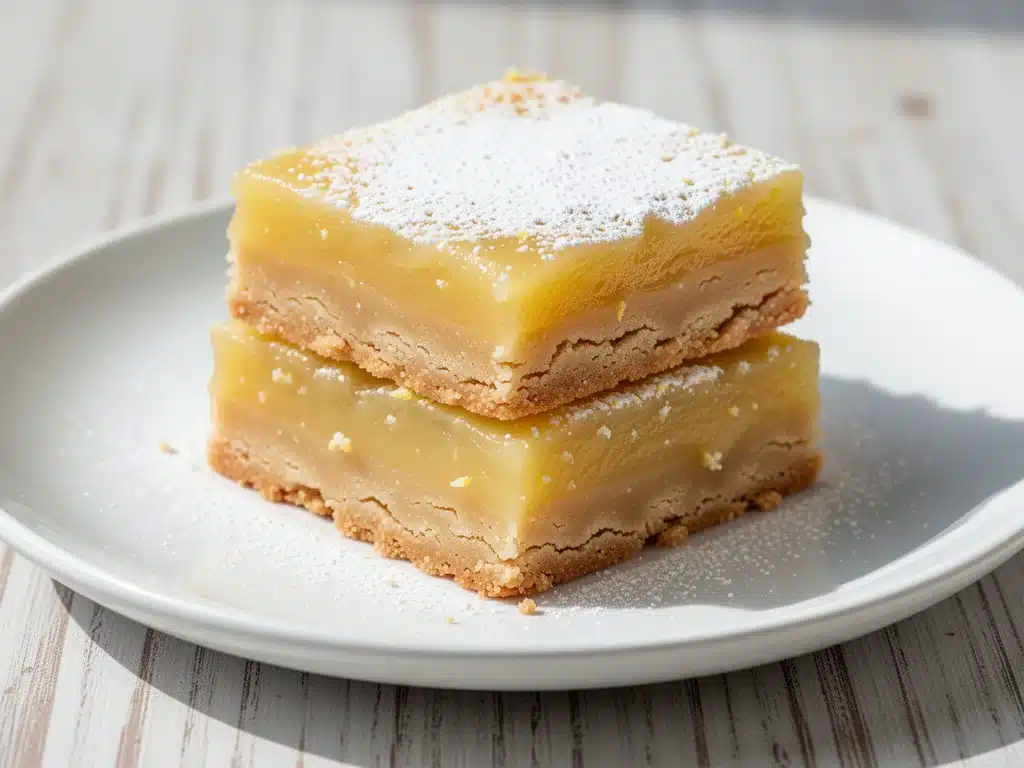
It was a Tuesday in late July, the kind of day where the heat radiates off the pavement so intensely you can practically see the air shimmering. I had just come from the farmers market, my basket overflowing with lemons so bright they looked like they were glowing. I had no plan. None. I just knew I wanted something cold, something tart, something that would cut through that heavy summer humidity.
Most people bake cookies or cakes in July. But me? I craved texture. I wanted something buttery and crisp that wouldn’t melt into a sticky mess in my hands. So I stood in my kitchen, staring at a bag of flour and a stick of butter, and decided to improvise. I threw together a shortbread crust, squeezed every last drop of lemon juice into a sweetened curd, and baked it all in one pan.
I was expecting mediocre. I was expecting a soggy bottom and a crust that tasted like cardboard.
Instead, I got magic. The first bite was a shock of tart lemon that hit my taste buds, followed immediately by the rich, buttery crunch of the shortbread. It was light enough for a summer afternoon but substantial enough to feel like a real dessert. I ate half the pan before my husband even walked through the door. He didn’t even complain. He just asked for the recipe.
That was three years ago. Since then, I’ve made these simple lemon dessert bars for every picnic, potluck, and spontaneous guest appearance. They are the ultimate crowd-pleaser because they balance sweet and sour perfectly, and they hold up beautifully in the heat. Unlike some delicate pastries that fall apart, these bars stay firm, slice cleanly, and taste even better after a day in the fridge. If you’re looking for a best 5 step dessert option that feels fancy but is actually foolproof, this is it. It’s my go-to when I want to impress without spending hours in the kitchen.
Why You’ll Love This Simple Lemon Dessert Bars Recipe
There are about a dozen reasons I keep making these lemon shortbread bars, but here are the big ones that keep them in my regular rotation.
Zero Failure Rate — Seriously. If you can mix dough and stir a sauce, you can make these. I’ve walked my teenage niece through this recipe over FaceTime while she was in college. She called me an hour later saying, “Mom was right, this is actually easy.” It’s not one of those recipes that demands precision baking skills.
Summer-Perfect Texture — Unlike dense pound cakes or heavy cheesecakes that feel like a brick in July, these bars are airy and crisp. The shortbread base provides a sturdy crunch, and the lemon layer is tangy and bright. They don’t melt on your fingers, which is crucial for outdoor eating.
Make-Ahead Friendly — This is the secret weapon for busy hosts. You can bake these up to three days in advance. In fact, they taste better the next day because the lemon flavors have had time to meld with the buttery crust. I often bake them on Sunday for a Saturday party.
One-Pan Wonder — Minimal cleanup. You mix the crust in a bowl, press it into a pan, make the filling in the same bowl (or a small saucepan), and bake it all in one 9×13 dish. No fancy tart pans, no springform cakes that leak. Just one pan, one tray.
Budget-Friendly — You probably have most of these ingredients already. Flour, butter, sugar, lemons, eggs. It costs less than $10 to make a full 9×13 pan, which feeds 12-16 people. That’s cheaper than buying a single slice of lemon tart at a cafe.
Versatile — Need to make them gluten-free? Swap the flour. Want to add berries? Throw some in. These bars are a blank canvas for your creativity. I’ve even added a little lavender to the crust for a floral twist that surprised everyone.
This is my answer to “what can I bring to the BBQ?” when I don’t want to grill again. It’s reliable, delicious, and always disappears first.
Ingredients You’ll Need for Lemon Shortbread Bars
Here’s the best part: this ingredient list is short, simple, and mostly pantry staples. I’m particular about two things here—the quality of the butter and the freshness of the lemons—and I’ll tell you exactly why.
For the Shortbread Crust:
Unsalted butter (1 cup / 225g, softened) — This is non-negotiable. Use high-quality European-style butter if you can find it. It has a higher fat content and richer flavor that makes the crust taste incredible. Soften it in the microwave for 10 seconds or leave it on the counter for 30 minutes. Cold butter won’t cream properly.
Granulated sugar (½ cup / 100g) — Standard white sugar. Don’t try to use brown sugar here; it will make the crust chewy instead of crisp. We want that shortbread crunch.
All-purpose flour (2 cups / 250g) — The base of the crust. Sift it if you’re being fancy, but it’s not strictly necessary. For a gluten-free version, use a 1:1 gluten-free flour blend that contains xanthan gum.
Salt (½ teaspoon) — Just a pinch to balance the sweetness. Don’t skip it.
For the Lemon Filling:
Fresh lemons (3-4 medium lemons) — You need about ½ cup of fresh lemon juice. Please, do not use bottled lemon juice. It tastes metallic and flat. Fresh lemons have that bright, vibrant acidity that defines this dessert. Look for lemons that are heavy for their size and have smooth, shiny skin.
Granulated sugar (1 cup / 200g) — The filling is sweet to balance the tartness. Adjust slightly if your lemons are extra sour, but start with this amount.
Large eggs (2 whole eggs + 2 yolks) — The eggs provide structure. The extra yolks add richness and help create that custard-like texture. Room temperature eggs mix more evenly, so take them out of the fridge 15 minutes before you start.
Heavy cream (¼ cup / 60ml) — Adds creaminess and tenderizes the filling. Milk works in a pinch, but heavy cream gives it that luxurious mouthfeel.
Vanilla extract (1 teaspoon) — Just a hint to round out the lemon flavor. Pure vanilla is best.
Optional Garnish:
Powdered sugar — For dusting on top. It looks pretty and adds a tiny bit of sweetness.
Edible flowers or mint leaves — For that Pinterest-worthy presentation. Not necessary, but fun.
Pro Tip: I always zest the lemons before juicing them. Save the zest! It adds intense lemon flavor that the juice alone can’t match. If you buy pre-zested lemon, it often lacks potency. Fresh zest is key.
Equipment Needed
You don’t need fancy gadgets for this. Here’s what I actually use, and what works.
9×13-inch baking dish — Glass or ceramic works best because it distributes heat evenly. Metal pans can sometimes over-brown the edges. I use a Pyrex dish that has served me for decades.
Electric mixer or whisk — An electric mixer makes creaming the butter and sugar easier, but a sturdy whisk and elbow grease work fine. You want the mixture light and fluffy.
Mixing bowls — One large bowl for the crust, one medium for the filling. You can actually reuse the same bowl if you wash it quickly, saving on dishes.
Microplane or zester — For getting fine lemon zest. A regular grater works but can get bitter if you hit the white pith. A microplane gives you just the yellow part.
Rolling pin (optional) — If you want a perfectly even crust, roll it out. But honestly, I just press it in with my hands. It’s faster and just as good.
Parchment paper — Line your baking dish with parchment, leaving an overhang on the sides. This is the #1 trick for getting the bars out in one piece. Without it, you’re digging for crumbs.
Sifter or fine-mesh strainer — For the powdered sugar dusting. Keeps it smooth and even.
Sharp knife or pizza cutter — To slice the bars. A pizza cutter is surprisingly effective for clean cuts without squishing the bars.
How to Make Simple Lemon Dessert Bars: Step-by-Step
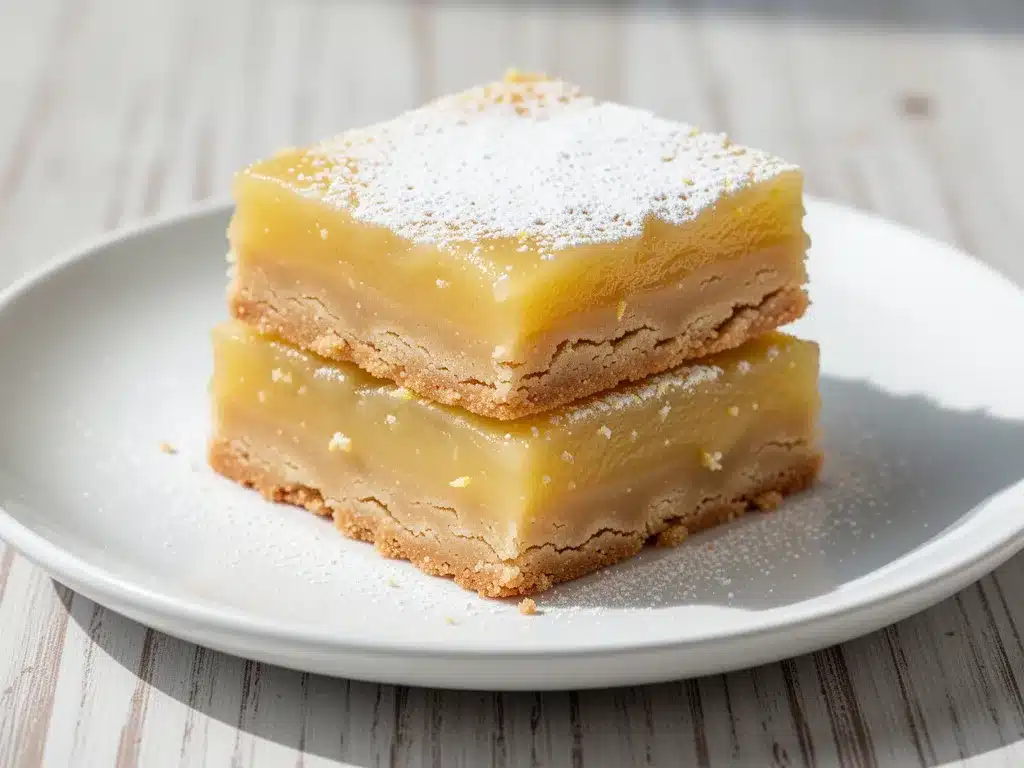
Alright, let’s make these! I’m walking you through exactly how I do it, including the little tricks I’ve picked up over the years.
Step 1: Prep Your Pan and Oven (5 minutes)
Preheat your oven to 350°F (175°C). Line your 9×13-inch baking dish with parchment paper. Leave a few inches of overhang on the long sides—this acts as handles to lift the entire slab of bars out later. Spray the parchment lightly with non-stick spray or brush with a little butter. This prevents sticking.
Step 2: Make the Shortbread Crust (5 minutes)
In a large mixing bowl, combine the softened butter and ½ cup of granulated sugar. Beat with an electric mixer on medium speed until light and fluffy, about 2-3 minutes. This step incorporates air, which helps the crust stay crisp rather than dense. If you’re doing it by hand, whisk vigorously.
Add the flour and salt. Mix on low speed just until the dough comes together. It will look crumbly at first, then clump up. Don’t overmix! Overmixing develops gluten, which makes the crust tough. We want tender, crumbly shortbread.
Press the dough evenly into the bottom of your prepared baking dish. Use your fingers or the bottom of a measuring cup to press it down firmly. You want it flat and compact. If there are cracks, just press them shut. Bake the crust for 15 minutes until it’s lightly golden and set. This pre-baking step is crucial to prevent a soggy bottom.
Step 3: Prepare the Lemon Filling (5 minutes)
While the crust bakes, make the filling. Zest your lemons before juicing them. You’ll need about 2 tablespoons of zest. Juice the lemons until you have ½ cup of fresh juice. Strain the juice to remove seeds and pulp if you prefer a smoother texture.
In a medium bowl, whisk together the 1 cup of sugar, eggs, and egg yolks until smooth. Whisk in the heavy cream and vanilla extract. Then, add the lemon juice and lemon zest. Whisk until everything is fully combined. The mixture will be thin and liquidy—that’s normal.
Step 4: Assemble and Bake (25-30 minutes)
Remove the partially baked crust from the oven. Carefully pour the lemon filling over the hot crust. The hot crust helps start the setting process. Use a spatula to spread the filling evenly and get into the corners.
Return to the oven and bake for 25-30 minutes. You’ll know it’s done when the edges are set and slightly puffed, and the center has a slight jiggle (like Jell-O, not liquid). It will firm up as it cools. Do not overbake, or the filling will crack and become dry.
Step 5: Cool Completely (2-3 hours)
This is the hardest part. Let the bars cool in the pan on a wire rack for at least 1 hour. Then, refrigerate for at least 1 hour, or preferably overnight. The bars need to be completely cold to slice cleanly. If you cut them warm, they’ll be mushy and fall apart. Patience pays off.
Step 6: Slice and Serve
Lift the bars out of the pan using the parchment overhang. Place on a cutting board. Use a sharp knife or pizza cutter to slice into squares or rectangles. Dust with powdered sugar right before serving. Enjoy!
Expert Tips & Tricks for Perfect Bars
Here’s everything I’ve learned from making these dozens of times. These tips will save you from my mistakes.
Don’t Skip the Pre-Bake
The lemon filling is wet. If you put it on raw dough, the bottom will stay gummy. Baking the crust for 15 minutes first creates a barrier. It’s a small step that makes a huge difference in texture.
Room Temperature Ingredients
Make sure your eggs and cream are at room temperature. Cold ingredients can cause the filling to curdle or not emulsify properly. Room temp ingredients blend into a smooth, uniform custard.
Don’t Overbake the Filling
The center should still have a slight jiggle when you take it out. It continues to cook from residual heat. If it’s completely firm in the pan, it’s overbaked and will be dry. Look for that gentle wobble.
Cooling is Key
I know it’s tempting to dig in early, but wait. The filling sets as it cools. Rushing this step leads to messy, uncuttable bars. Plan ahead. If you’re hosting a party, make them the night before.
Sharp Knife Only
Dull knives squish the bars. Wipe your knife clean between cuts if you want pristine squares. For extra clean cuts, dip your knife in hot water and dry it before each slice.
Storage Matters
Store covered in the fridge. These bars keep well for up to 5 days. The lemon flavor actually deepens after a day. If you need to freeze them, freeze the whole slab first, then wrap tightly in plastic and foil. They’ll last 2 months. Thaw in the fridge overnight.
Variations & Substitutions
Once you’ve nailed the basic version, here’s how you can mix it up. I’ve tried all of these, and they all work.
Berry Lemon Bars
Add 1 cup of fresh or frozen berries (raspberries, blueberries, or blackberries) to the crust before pouring the filling. Or, swirl ½ cup of berry jam into the filling for a marbled effect. The tartness of the lemon pairs beautifully with sweet berries.
Lavender Lemon Bars
Add 1 tablespoon of culinary-grade dried lavender to the crust dough. It adds a subtle floral note that elevates the dessert to something fancy. Just make sure the lavender is food-safe.
Coconut Lemon Bars
Replace ½ cup of the flour in the crust with shredded coconut. Add a splash of coconut extract to the filling. It gives a tropical twist that’s perfect for summer.
Gluten-Free Version
Use a 1:1 gluten-free flour blend in the crust. The filling is naturally gluten-free. The texture might be slightly more delicate, so handle with care when slicing.
Lower Sugar
Reduce the sugar in the filling to ¾ cup. It will be tarter. This is good for those who prefer less sweet desserts. The crust sugar can stay the same for texture.
Dairy-Free Option
Use vegan butter in the crust. Replace heavy cream with full-fat coconut cream. The flavor will be slightly different, but still delicious.
Serving & Storage
How to Serve:
I usually serve these straight from the fridge. They are best cold, when the texture is firmest. Pair them with a cup of tea or coffee. They also go well with a glass of chilled white wine or a sparkling lemonade.
Side Dishes:
These bars are rich, so they don’t need much on the side. Maybe some fresh berries or a dollop of whipped cream if you’re feeling indulgent. They are perfect alongside a game day party drinks spread or as a light finish to a summer meal.
Storage Instructions:
Refrigerator: Store in an airtight container for up to 5 days. They can get dry if left out, so keep them chilled.
Freezer: Wrap the whole slab tightly in plastic wrap and then aluminum foil. Freeze for up to 2 months. Thaw in the fridge overnight before slicing.
Pro Tip: If you’re bringing these to a potluck, transport them in the pan with the parchment overhang. Just lift the whole thing out and set it on a platter. No transferring needed.
Nutrition Information
I’m not a nutritionist, but here’s the breakdown if you’re tracking. Keep in mind that these are rich, buttery bars, so portion control is key.
Per Serving (based on 16 bars):
| Nutrient | Amount |
|---|---|
| Calories | 180 |
| Protein | 2g |
| Carbs | 24g |
| Fiber | 0g |
| Sugar | 18g |
| Fat | 9g |
| Saturated Fat | 5g |
| Cholesterol | 45mg |
| Sodium | 110mg |
What’s Good:
They provide a nice balance of carbs for energy. The lemon adds a bit of Vitamin C. They are relatively low in protein, so they’re a treat, not a meal.
What to Know:
Higher in sugar and fat due to the butter and sugar content. Contains gluten and dairy. Moderate sodium.
My Take:
Look, this is dessert. It’s meant to be enjoyed. The portion sizes are small, so one or two bars is plenty. When I want to make it lighter, I cut them smaller and pair them with fresh fruit. But usually? I just enjoy the moment.
Final Thoughts
So that’s my go-to simple lemon dessert bars! I’ve probably talked your ear off at this point, but when you make a recipe this often, you have a lot to say about it. These bars have saved me from dessert disasters more times than I can count. They are my answer to “I need something sweet but not too heavy.” My family loves them, my friends beg for them, and I love making them because they are so forgiving.
Make them yours! Try different berries, add herbs, or change the sugar levels. The best recipes are the ones you adapt to your tastes. If you make this, drop a comment and let me know what you think! I love hearing how recipes turn out in your kitchen. And if something doesn’t work, tell me that too—I’m here to help troubleshoot.
Happy baking! And I hope your kitchen smells half as good as mine does right now.
Frequently Asked Questions
Can I use bottled lemon juice?
You can, but I strongly recommend against it. Bottled lemon juice has preservatives that give it a metallic, flat taste. Fresh lemons have that bright, vibrant acidity that makes these bars taste amazing. If you absolutely must use bottled, mix it with a little fresh zest to add some flavor back in. But fresh is always better.
Why did my lemon bars crack on top?
Cracking usually means they were overbaked. The filling continued to cook after you took it out of the oven. Next time, pull them out when the center still has a slight jiggle. They will firm up as they cool. Also, avoid opening the oven door frequently while they are baking, as temperature fluctuations can cause cracking.
Can I make these gluten-free?
Yes! Use a 1:1 gluten-free flour blend in the crust. The filling is naturally gluten-free. The texture might be slightly more delicate, so be careful when slicing. I’ve used Bob’s Red Mill 1:1 blend with great results.
How do I store leftovers?
Store them in an airtight container in the refrigerator for up to 5 days. They can also be frozen for up to 2 months. Wrap the whole slab tightly in plastic wrap and foil. Thaw in the fridge overnight before serving.
Can I double the recipe?
Yes, but you’ll need a larger pan, like a 9×13 or even a 9×16 pan. Adjust the baking time slightly—it might take a few minutes longer. Keep an eye on the edges and center for doneness.
Why is my crust soggy?
Usually, this happens if you didn’t pre-bake the crust. The wet lemon filling needs a dry base to sit on. Baking the crust for 15 minutes first creates a barrier. Also, make sure your crust is pressed down firmly and evenly.
Can I add other fruits?
Absolutely! Raspberries, blueberries, or blackberries pair beautifully with lemon. You can add them to the crust or swirl them into the filling. Just be mindful of the moisture content—fresh berries are best.
Pin This Recipe!


Simple Lemon Dessert Bars: Best Easy Shortbread Recipe
- Total Time: 1 hour 45 minutes
- Yield: 16 servings 1x
Description
These simple lemon dessert bars feature a buttery, crisp shortbread crust topped with a tangy, sweet lemon curd filling. They are easy to make, hold up well in heat, and taste even better after chilling.
Ingredients
- 1 cup (225g) unsalted butter, softened
- 1/2 cup (100g) granulated sugar
- 2 cups (250g) all-purpose flour
- 1/2 teaspoon salt
- 3–4 medium fresh lemons (for zest and juice)
- 1 cup (200g) granulated sugar
- 2 large eggs
- 2 large egg yolks
- 1/4 cup (60ml) heavy cream
- 1 teaspoon vanilla extract
- Powdered sugar, for dusting (optional)
Instructions
- Preheat oven to 350°F (175°C). Line a 9×13-inch baking dish with parchment paper, leaving an overhang on the long sides for easy removal.
- In a large mixing bowl, beat the softened butter and 1/2 cup granulated sugar until light and fluffy, about 2-3 minutes.
- Add the flour and salt to the butter mixture. Mix on low speed just until the dough comes together. Do not overmix.
- Press the dough evenly into the bottom of the prepared baking dish. Bake the crust for 15 minutes until lightly golden and set. Remove from oven.
- While the crust bakes, zest the lemons to get about 2 tablespoons of zest. Juice the lemons to get 1/2 cup of fresh juice.
- In a medium bowl, whisk together 1 cup sugar, eggs, and egg yolks until smooth. Whisk in heavy cream and vanilla extract.
- Add the lemon juice and lemon zest to the egg mixture. Whisk until fully combined.
- Pour the lemon filling over the hot, pre-baked crust. Spread evenly.
- Return to the oven and bake for 25-30 minutes, until the edges are set and the center has a slight jiggle.
- Cool the bars in the pan on a wire rack for at least 1 hour, then refrigerate for at least 1 hour or overnight until completely cold.
- Lift the bars out of the pan using the parchment overhang. Slice into squares and dust with powdered sugar before serving.
Notes
Do not skip pre-baking the crust to prevent a soggy bottom. Ensure eggs and cream are at room temperature for a smooth filling. The bars must be completely cold before slicing to ensure clean cuts. Store in the refrigerator for up to 5 days or freeze for up to 2 months.
- Prep Time: 15 minutes
- Cook Time: 45 minutes
- Category: Dessert
- Cuisine: American
Nutrition
- Serving Size: 1 bar
- Calories: 180
- Sugar: 18
- Sodium: 110
- Fat: 9
- Saturated Fat: 5
- Carbohydrates: 24
- Protein: 2
Keywords: lemon bars, shortbread crust, lemon dessert, summer dessert, easy baking, make-ahead dessert, gluten-free option


