It was three years ago, right in the thick of October, when I realized my family’s idea of “easy dessert” was wildly different from mine. I had just come home from work, exhausted, only to find my brother-in-law standing in the kitchen looking at an empty oven rack with the expression of a man who had just lost a bet. He wanted to make pumpkin pie. I wanted to make something that tasted like autumn but didn’t require three hours of standing over a hot stove or dealing with a soggy bottom crust.
That night, I threw together what I thought would be a mediocre compromise. I grabbed a box of graham crackers, some cream cheese, and a can of pumpkin puree, blending them into something that looked like mud in a pan. I expected it to be a quick fix. Instead, my dad took one bite, closed his eyes, and said, “Do not ever stop making this.”
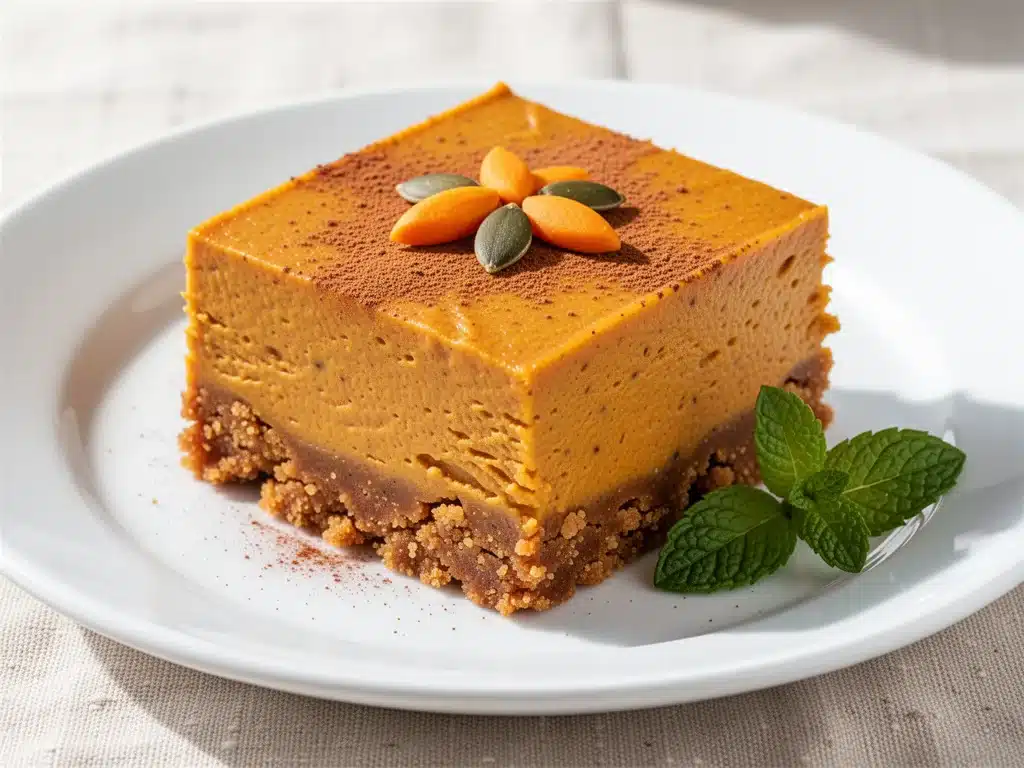
That was the birth of my no-bake pumpkin cheesecake bars. I’ve made them for every Thanksgiving, Halloween party, and random Tuesday craving since. They’re creamy, spiced, and completely foolproof. Unlike traditional pumpkin pie, which can be finicky with its custard filling, these bars hold their shape, travel beautifully, and taste like you spent all day in the kitchen (even though you didn’t). If you’re looking for a dessert that feels indulgent but requires zero baking skill, this is it. It’s the ultimate fall comfort food, right up there with grilled peach cobbler, but without the oven heat.
Over the last few years, I’ve tweaked this recipe about a dozen times. I’ve tested different crusts, played with spice levels, and figured out the exact chilling time needed so they don’t melt on your fingers. The result is a dessert that’s dense enough to feel like a real cheesecake but light enough to eat three squares of without feeling sluggish. Let me walk you through exactly how to make them, so you can stop worrying about dessert and start enjoying the season.
Why You’ll Love This No-Bake Pumpkin Cheesecake Recipe
There are a hundred reasons to make these bars, but I’m going to keep it real with you about the top ones that keep me coming back to this recipe.
Zero Baking Required — Seriously. If you can crush cookies and mix ingredients in a bowl, you can make this. I’ve made this while babysitting a toddler, while watching a movie, and while helping my husband with his taxes. The oven stays off, which is huge when it’s already 65 degrees outside.
Make-Ahead Friendly — This is my secret weapon for hosting. I make these the night before a party. They actually taste better the next day because the flavors have time to meld and the texture firms up. I don’t have to stress about timing dessert while everyone is still eating dinner.
Travel-Proof — Unlike a regular cheesecake that can crack or slide, these bars stay perfectly square. I’ve driven them two hours in a hot car for a potluck, and they didn’t budge. They’re perfect for office parties or tailgates where you need something sturdy.
Authentic Pumpkin Flavor — A lot of no-bake pumpkin desserts taste like artificial candy. This one tastes like actual pumpkin. By using real puree (not pie filling) and balancing the spices, you get that warm, cozy flavor profile without being overly sweet.
Creamy Texture — The combination of cream cheese and whipped topping creates a texture that’s airy yet rich. It melts in your mouth. It’s not dense like a fudge brownie, and it’s not runny like a mousse. It’s the perfect middle ground.
This recipe has completely changed our fall dessert routine. No more burnt pies, no more last-minute panic. Just pure, creamy, spiced perfection.
Ingredients You’ll Need
Here’s the best part: you probably have most of this already in your fridge or pantry. I’m particular about three ingredients here, and I’ll tell you exactly why.
For the Crust
Graham cracker crumbs (1 ½ cups / 150g) — I use standard honey graham crackers. If you buy the boxes, just crush them in a food processor or put them in a bag and smash them with a rolling pin. Don’t buy pre-made crumbs unless you’re in a huge rush; they often taste stale or lack the buttery flavor of fresh crumbs.
Unsalted butter (6 tablespoons / 85g, melted) — This binds the crust. I use unsalted so I can control the saltiness. If you only have salted, reduce the salt in the filling by half.
Granulated sugar (2 tablespoons / 25g) — Just a little bit to sweeten the crust. Don’t skip it, or the crust will taste bland compared to the sweet filling.
Cinnamon (½ teaspoon) — A pinch of cinnamon in the crust ties it to the filling. It’s a small detail that makes a big difference.
For the Filling
Full-fat cream cheese (16 oz / 450g, softened) — This is non-negotiable. Light cream cheese doesn’t set properly and has a weird texture. Let it sit on the counter for 30 minutes before you start. If it’s cold, you’ll get lumps, and nobody wants chunky cheesecake.
Heavy cream (1 cup / 240ml) — I whip this myself for the best texture. It’s richer and more stable than using whipped topping, though I’ll mention a shortcut below. Make sure it’s cold.
Confectioners’ sugar (1 cup / 120g) — Also called powdered sugar. Sift it if it’s lumpy. It dissolves instantly in the cream cheese, unlike granulated sugar which might stay gritty.
Pumpkin puree (15 oz / 425g, one can) — Use 100% pure pumpkin. Do NOT use pumpkin pie filling, which is already sweetened and spiced. You want the plain stuff so you control the sweetness.
Pumpkin pie spice (2 teaspoons) — This blend of cinnamon, ginger, nutmeg, and cloves is what makes it taste like fall. If you don’t have it, mix 1 tsp cinnamon, ½ tsp ginger, ¼ tsp nutmeg, and a pinch of cloves.
Vanilla extract (1 teaspoon) — Pure vanilla, please. Artificial vanilla tastes chemical in delicate desserts.
For the Topping (Optional but Recommended)
Whipped cream — Freshly whipped heavy cream with a little sugar and vanilla. It looks beautiful and adds a light contrast to the dense bars.
Whipped topping (like Cool Whip) — If you want to save time, thaw 8 oz of frozen whipped topping and fold it in. It’s easier but less rich.
Equipment Needed
You don’t need fancy equipment for this. Here’s what I actually use.
8×8 inch baking pan — This is the standard size for bars. Line it with parchment paper leaving an overhang on the sides. This is the #1 trick for getting the bars out cleanly. If you don’t have parchment, grease it well, but parchment is better.
Electric mixer — Handheld or stand mixer. You need to whip the cream cheese until it’s smooth, and a hand mixer makes this much faster. I’ve tried doing it by hand, and it takes forever and hurts my arm. Don’t suffer.
Large mixing bowls — You’ll need one for the crust and one for the filling. Make sure they’re clean and dry.
Spatula — A rubber spatula is essential for folding the whipped cream into the pumpkin mixture. It keeps the air in, which makes the bars light.
Food processor or Ziploc bag — For crushing the graham crackers. The processor is faster, but the bag and rolling pin method is fun if you have kids helping.
Measuring cups and spoons — Standard stuff. Precision matters a bit here because of the balance between the sweet filling and the spiced crust.
How to Make It: Step-by-Step
Alright, let’s make this! I’m walking you through exactly how I do it, including the little tricks I’ve picked up.
Step 1: Prep Your Pan (2 minutes)
Line your 8×8 inch baking pan with parchment paper. Leave a generous overhang on the long sides—this creates “handles” so you can lift the entire block of cheesecake out later. Spray it lightly with non-stick spray just in case. This step is crucial for clean slicing.
Step 2: Make the Crust (5 minutes)
In a medium bowl, mix the graham cracker crumbs, melted butter, sugar, and cinnamon. It should look like wet sand. Press this mixture firmly into the bottom of your prepared pan. Use the bottom of a measuring cup to pack it down tight. If the crust is loose, the bars will crumble. Refrigerate the pan while you make the filling. This helps it set faster.
Step 3: Whip the Cream (3 minutes)
In a large, cold bowl, whip the heavy cream on high speed until you form stiff peaks. This means when you lift the beaters, the cream stands up straight. Be careful not to over-whip it into butter, but stiff peaks are necessary for structure. Set this aside.
Step 4: Mix the Pumpkin Base (5 minutes)
In a separate large bowl, beat the softened cream cheese and confectioners’ sugar on medium speed until smooth and creamy. This should take about 2 minutes. Scrape down the sides of the bowl. Add the pumpkin puree, pumpkin pie spice, and vanilla extract. Beat on low until just combined. Don’t overmix once the pumpkin is in, or you’ll incorporate too much air and make the texture fluffy but unstable.
Step 5: Fold It Together (3 minutes)
This is the most important step. Gently fold the whipped cream into the pumpkin mixture using your spatula. Fold slowly and deliberately, lifting from the bottom and turning over. You want to keep as much air in as possible. Stop when you see no white streaks left. The mixture should be light orange and airy.
Step 6: Assemble and Chill (4+ hours)
Pour the filling over the chilled crust. Spread it out evenly with the spatula. Tap the pan gently on the counter to remove any air bubbles. Cover with plastic wrap and refrigerate for at least 4 hours, preferably overnight. The longer it chills, the firmer it gets. If you rush this, it’ll be mushy.
Step 7: Slice and Serve
Once set, lift the bars out of the pan using the parchment handles. Use a sharp knife to cut into squares. Wipe the knife clean between cuts for neat edges. Top with whipped cream and a sprinkle of pumpkin spice if you want to get fancy.
Total Time: About 20 minutes active, plus 4 hours chilling.
Expert Tips & Tricks
Here’s everything I’ve learned from making these dozens of times. These tips will save you from my mistakes.
Softened Cream Cheese is Key
I can’t stress this enough. If your cream cheese is cold, you will get lumps. Take it out of the fridge at least 30 minutes before you start. If you’re in a rush, you can microwave it in 10-second bursts, but watch it closely—it melts fast.
Don’t Skip the Chill Time
I know it’s tempting to eat it right away. Resist. The structure needs time to set. If you cut it too soon, it’ll slide apart. Overnight is best, but 4 hours works in a pinch.
Use a Sharp Knife
For clean cuts, use a sharp chef’s knife. Dip it in hot water and wipe it dry before each cut. This prevents the bars from sticking to the blade and getting messy.
Puree vs. Pie Filling
Again, use pure pumpkin puree. Pie filling is way too sweet and has a different texture. If you accidentally use pie filling, reduce the sugar in the recipe by half.
Storage Matters
Keep these in the fridge. They don’t travel well at room temperature for more than an hour because of the dairy. If you’re taking them to a potluck, bring a cooler or ice pack.
Variations & Substitutions
Once you’ve nailed the basic version, here’s how you can mix it up. I’ve tried all of these.
Oreo Crust Version
Swap the graham crackers for crushed Oreo cookies. It’s like a pumpkin cheesecake sandwich. Kids love this version. Just omit the sugar in the crust since Oreos are sweet.
Gingerbread Crust
Use gingerbread cookie crumbs instead of graham crackers. It adds a spicy, molasses kick that pairs amazingly with pumpkin. This is my personal favorite variation.
Maple Pecan Topping
Top the bars with a mixture of chopped pecans, maple syrup, and a little brown sugar before serving. It adds crunch and richness.
Lighter Version
Use light cream cheese and half-and-half instead of heavy cream. It’s less rich but still tasty. I make this when I’m trying to be “healthy,” though I won’t lie, it’s not quite as good.
Dairy-Free
Use vegan cream cheese and coconut cream. It’s different but works. My lactose-intolerant friend requests this version often.
Serving & Storage
How to Serve:
I usually serve these straight from the fridge. They’re best cold. I top them with a dollop of fresh whipped cream and a tiny sprinkle of cinnamon. It looks elegant and tastes incredible.
Side Dishes:
These bars are rich, so they pair well with lighter sides. A simple green salad or some charred corn and black bean dip can balance the meal. For drinks, try a spiked apple cider margarita to keep the fall theme going.
Storage Instructions:
Store in an airtight container in the fridge for up to 5 days. They actually taste better on day two. Do not freeze them; the texture of the whipped cream and cream cheese changes when thawed. It becomes grainy and watery. Make them fresh or store in the fridge.
Pro Tip:
If you’re making these for a party, cut them into smaller squares. They’re rich, and people tend to eat more than they think. I cut mine into 16 squares, and they disappear fast.
Nutrition Information
I’m not a nutritionist, but here’s the breakdown if you’re tracking. This is per bar (makes 16 bars).
- Calories: 280
- Protein: 4g
- Carbs: 22g
- Fiber: 1g
- Sugar: 18g
- Fat: 18g
- Saturated Fat: 11g
Look, this is dessert with cream cheese and sugar. It’s not a diet food. But it’s way better than store-bought bars, and you know exactly what’s in it. When I want to make it lighter, I use the light cream cheese version and reduce the topping. But usually? I just enjoy a square and move on.
Final Thoughts
So that’s my no-bake pumpkin cheesecake bars! I’ve probably talked your ear off at this point, but when you make a recipe this often, you have a lot to say about it. This has saved my evenings more times than I can count. It’s my answer to “what’s for dessert” when I’m tired, don’t want to bake, and still want something that tastes amazing. My family is happy, my guests are happy, and I’m happy because I’m not stressed about cooking.
Make it yours! Try the gingerbread crust, add some pecans, or just keep it classic. The best recipes are the ones you adapt to your family’s tastes. If you make this, drop a comment and let me know what you think! I love hearing how recipes turn out in your kitchen. And if something doesn’t work, tell me that too—I’m here to help troubleshoot.
Happy baking… well, no-baking! And I hope your kitchen smells half as good as mine does right now.
Frequently Asked Questions
Can I use pumpkin pie filling instead of pure puree?
You can, but the flavor will be off. Pie filling is already sweetened and spiced, so you’ll need to reduce the sugar and pumpkin spice in the recipe significantly. I recommend sticking to pure pumpkin puree for the best balance. If you do use pie filling, taste the mixture before pouring it in and adjust sweetness accordingly.
Why did my cheesecake bars not set?
Usually, this means they didn’t chill long enough, or the cream cheese wasn’t soft enough when you mixed it. If there are lumps, the structure won’t hold. Also, if you over-whipped the cream cheese, you might have incorporated too much air, making it unstable. Chill for at least 4 hours, preferably overnight.
Can I make these ahead of time?
Yes! These are actually better the next day. Make them the night before your party. They’ll hold in the fridge for up to 5 days. Just keep them covered to prevent them from absorbing other fridge smells.
Can I freeze these bars?
I don’t recommend it. The dairy in the cream cheese and whipped cream can separate and become grainy when thawed. The texture won’t be the same. It’s best to make them fresh or store them in the fridge.
How do I get clean cuts?
Use a sharp knife. Dip it in hot water and wipe it dry before each cut. This prevents the bars from sticking to the blade. Also, make sure the bars are fully chilled before cutting. If they’re warm, they’ll squish.
Can I use a different pan size?
You can, but the thickness will change. If you use a 9×13 pan, you’ll need to double the recipe. If you use a 9×9 pan, it’ll be thicker and might need more chilling time. Stick to 8×8 for the original recipe.
What if I don’t have pumpkin pie spice?
Make your own! Mix 1 teaspoon cinnamon, ½ teaspoon ginger, ¼ teaspoon nutmeg, and a pinch of cloves. It’s easy and tastes fresher than store-bought blends.
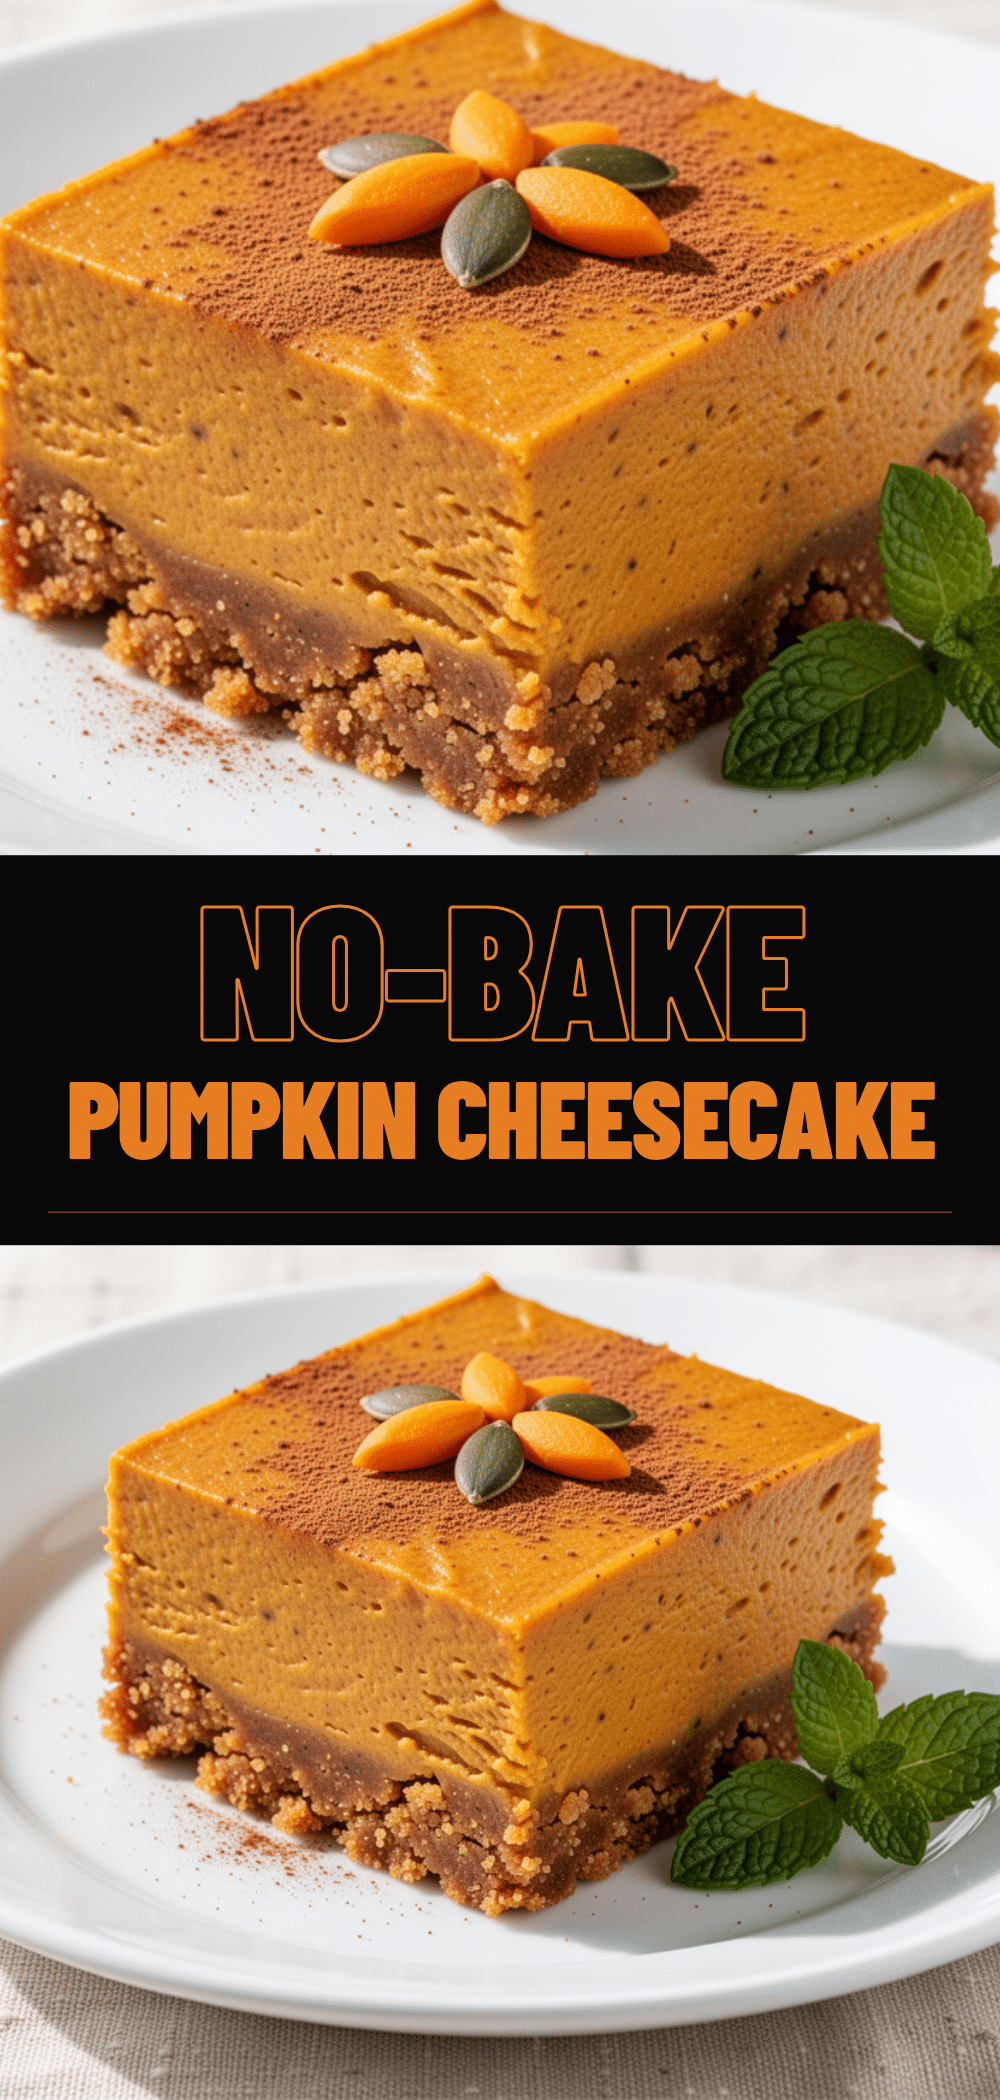
Pin This Recipe!
No-Bake Pumpkin Cheesecake Bars: Easy Fall Dessert
- Total Time: 4 hours 20 minutes
- Yield: 16 servings 1x
Description
These creamy, spiced no-bake pumpkin cheesecake bars are a foolproof fall dessert that requires zero baking. They hold their shape, travel beautifully, and taste like autumn without the hassle of a traditional pie crust.
Ingredients
- 1 ½ cups (150g) graham cracker crumbs
- 6 tablespoons (85g) unsalted butter, melted
- 2 tablespoons (25g) granulated sugar
- ½ teaspoon cinnamon
- 16 oz (450g) full-fat cream cheese, softened
- 1 cup (240ml) heavy cream, cold
- 1 cup (120g) confectioners’ sugar
- 15 oz (425g) can 100% pure pumpkin puree
- 2 teaspoons pumpkin pie spice
- 1 teaspoon vanilla extract
- Whipped cream or whipped topping for serving (optional)
Instructions
- Line an 8×8 inch baking pan with parchment paper, leaving an overhang on the sides for handles, and spray lightly with non-stick spray.
- In a medium bowl, mix graham cracker crumbs, melted butter, sugar, and cinnamon until it resembles wet sand.
- Press the crust mixture firmly into the bottom of the prepared pan using the bottom of a measuring cup. Refrigerate while making the filling.
- In a large, cold bowl, whip the heavy cream on high speed until stiff peaks form. Set aside.
- In a separate large bowl, beat the softened cream cheese and confectioners’ sugar on medium speed until smooth (about 2 minutes). Scrape down the sides.
- Add the pumpkin puree, pumpkin pie spice, and vanilla extract. Beat on low until just combined.
- Gently fold the whipped cream into the pumpkin mixture using a spatula until no white streaks remain and the mixture is light and airy.
- Pour the filling over the chilled crust and spread evenly. Tap the pan to remove air bubbles.
- Cover with plastic wrap and refrigerate for at least 4 hours, preferably overnight, until firm.
- Lift the bars out using the parchment handles. Use a sharp knife dipped in hot water and wiped dry to cut into 16 squares. Top with whipped cream if desired.
Notes
Ensure cream cheese is fully softened to avoid lumps. Do not use pumpkin pie filling; use 100% pure pumpkin puree. For clean cuts, dip a sharp knife in hot water and wipe dry between cuts. These bars do not freeze well as the texture becomes grainy when thawed. Store in the fridge for up to 5 days.
- Prep Time: 20 minutes
- Cook Time: 0 minutes
- Category: Dessert
- Cuisine: American
Nutrition
- Serving Size: 1 bar
- Calories: 280
- Sugar: 18
- Fat: 18
- Saturated Fat: 11
- Carbohydrates: 22
- Fiber: 1
- Protein: 4
Keywords: no-bake, pumpkin cheesecake, fall dessert, easy dessert, make-ahead dessert, pumpkin bars, autumn recipes


