There is a specific kind of magic that happens when the air turns crisp and the leaves start to change. For me, that shift always means one thing: Labor Day is coming, and it’s time to pull out the big dessert guns. I used to think Labor Day was just the sad end of summer, a reminder that the beach season was over. But over the years, I’ve come to realize it’s actually the perfect bridge between summer’s heat and fall’s coziness. It’s the last chance to celebrate the season’s final bounty before we dive into pumpkin spice and heavy sweaters.
Last year, I made a huge mistake. I spent three hours making an elaborate, multi-layered cake for our family BBQ. It was pretty. It was delicious. But by the time we got to dessert, everyone was too full from the grilled meats and sides to eat more than two bites. I watched that cake sit there, wilting under the summer sun, while my uncle went back for a third slice of something simpler. That was the moment I decided: no more complicated desserts for Labor Day.
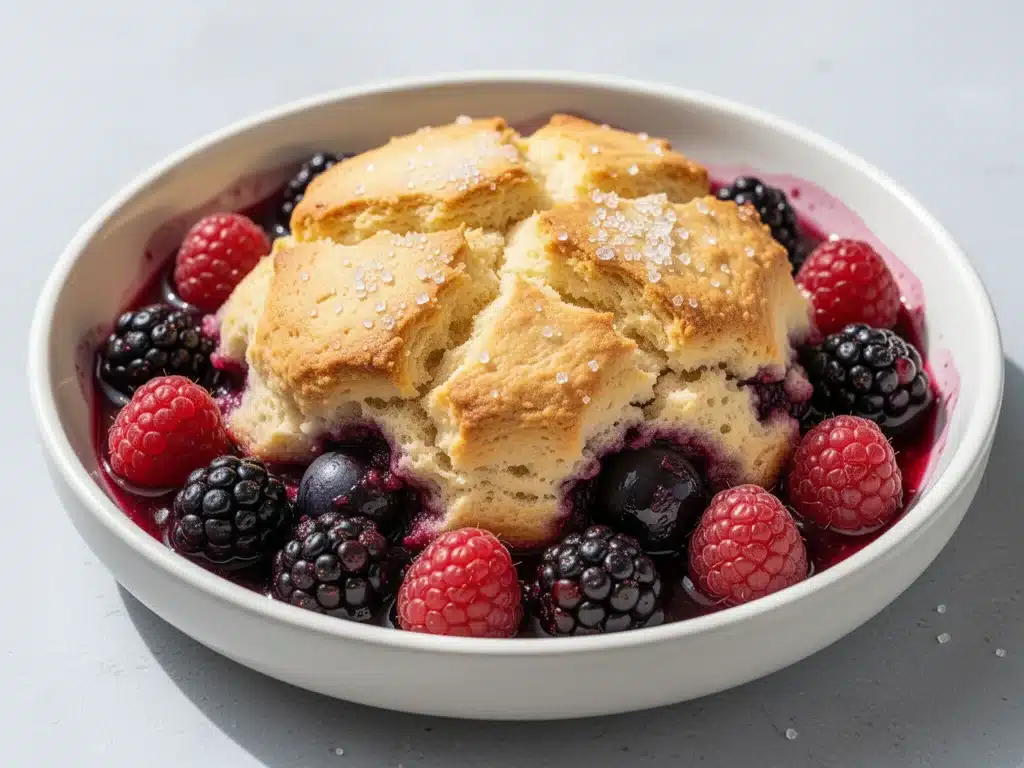
Enter this berry cobbler with golden biscuit topping. It’s not just a dessert; it’s a solution. It’s the kind of dish that feels like a warm hug on a plate. The fruit bubbles up, sweet and tart, peeking through a crust that’s crispy on the outside and tender on the inside. It’s rustic, it’s forgiving, and it tastes like it took all day to make (even though it doesn’t). I’ve tested this recipe for our family gatherings for the past four years, and it has completely replaced my fancy cakes. It’s the kind of dessert that makes people ask for the recipe before they’ve even finished their first forkful.
What I love most about this berry cobbler is how it balances the flavors. The berries bring that bright, acidic punch that cuts through the richness of the buttery biscuit topping. It’s not too sweet, not too heavy. It’s just right. And the best part? You don’t need any special skills or fancy equipment. If you can mix a bowl and scoop fruit into a pan, you can make this. Seriously. I’ve made this while juggling a toddler and a grill. It’s that simple.
So, if you’re planning your Labor Day menu and feeling stressed about what to serve for dessert, take a deep breath. Put down the cake pans. Pick up a mixing bowl. This berry cobbler is your new best friend. It’s easy, it’s delicious, and it’s going to be the highlight of your party. Trust me on this one.
Why You’ll Love This Berry Cobbler with Golden Biscuit Topping
I know there are a million dessert recipes out there. Why this one? Here’s the honest truth. This recipe works because it hits all the right notes without any of the fuss. It’s reliable, it’s adaptable, and it’s incredibly satisfying to eat. Here’s why this berry cobbler with golden biscuit topping has earned a permanent spot in my rotation.
- Stupid Simple Technique — There’s no rolling pin. No pie crusts that crack and crumble. No meringue that weeps. You just mix the topping, scoop it over the fruit, and bake. I’ve walked my teenage nephew through this recipe over FaceTime, and he nailed it on the first try. If he can do it, so can you.
- Lightning Fast Prep — The active time is under 20 minutes. The rest is just waiting for the oven to do its work. I make this on busy weekends when I want to spend time with my family, not standing at the counter. It’s the perfect low-effort, high-reward dessert.
- Seasonal Flexibility — While this recipe shines with summer berries, it’s incredibly versatile. I’ve made it with strawberries, blueberries, raspberries, and even a mix of all three. It’s also great with stone fruits like peaches or cherries. It’s the ultimate “use up what’s in the fridge” dessert.
- Crowd-Pleaser Factor — I’ve served this to picky eaters and food snobs alike. Everyone loves the contrast of the warm, juicy fruit and the crisp, buttery topping. It feels fancy but tastes like home. My in-laws, who usually prefer traditional pie, asked for the recipe specifically.
- Makes Amazing Leftovers — And let’s be real, there are almost always leftovers. This cobbler tastes even better the next day, as the flavors meld together. I deliberately make a double batch because I know I’ll want seconds for breakfast (with a little ice cream, of course).
- Budget-Smart — Berries can be expensive, but they’re also seasonal. When they’re in peak season, they’re affordable. This recipe uses about 4-5 cups of fruit, which is enough to feed a crowd for under $10 (depending on your local market). It’s a fraction of the cost of buying a dessert from a bakery.
This is my go-to when I need a dessert that just works. No stress, no weird ingredients, just reliable, delicious food that makes everyone happy. It’s the kind of recipe that brings people together.
Ingredients You’ll Need
Here’s the best part: you probably have most of these ingredients already. This recipe relies on pantry staples and fresh fruit. I’m particular about a few things here, and I’ll tell you exactly why they matter. Quality ingredients make a huge difference, especially in a recipe this simple.
For the Berry Filling
Mixed Berries (5 cups / 750g) — I use a mix of strawberries, blueberries, and raspberries for the best flavor balance. Strawberries provide bulk, blueberries add bursts of sweetness, and raspberries bring tartness. Fresh is best, but frozen works too (just don’t thaw them first). If you’re using frozen berries, add 5 minutes to the baking time.
Granulated Sugar (½ cup / 100g) — This sweetens the fruit and helps create that syrupy sauce. You can reduce this to ⅓ cup if you prefer less sweetness or if your berries are already very ripe and sweet.
Cornstarch (2 tablespoons / 16g) — This thickens the juices so you don’t end up with a watery mess. It’s crucial for getting that perfect cobbler consistency. Arrowroot powder works as a substitute.
Lemon Juice (1 tablespoon / 15ml) — This brightens the flavor and prevents the berries from tasting flat. It also helps preserve the color of the fruit. Freshly squeezed is best, but bottled works in a pinch.
Lemon Zest (1 teaspoon) — Don’t skip this! The zest adds an aromatic citrus note that elevates the entire dish. It pairs beautifully with the berries and the biscuit topping.
Vanilla Extract (1 teaspoon) — Adds depth and warmth. Use pure vanilla extract, not imitation. It makes a noticeable difference.
For the Golden Biscuit Topping
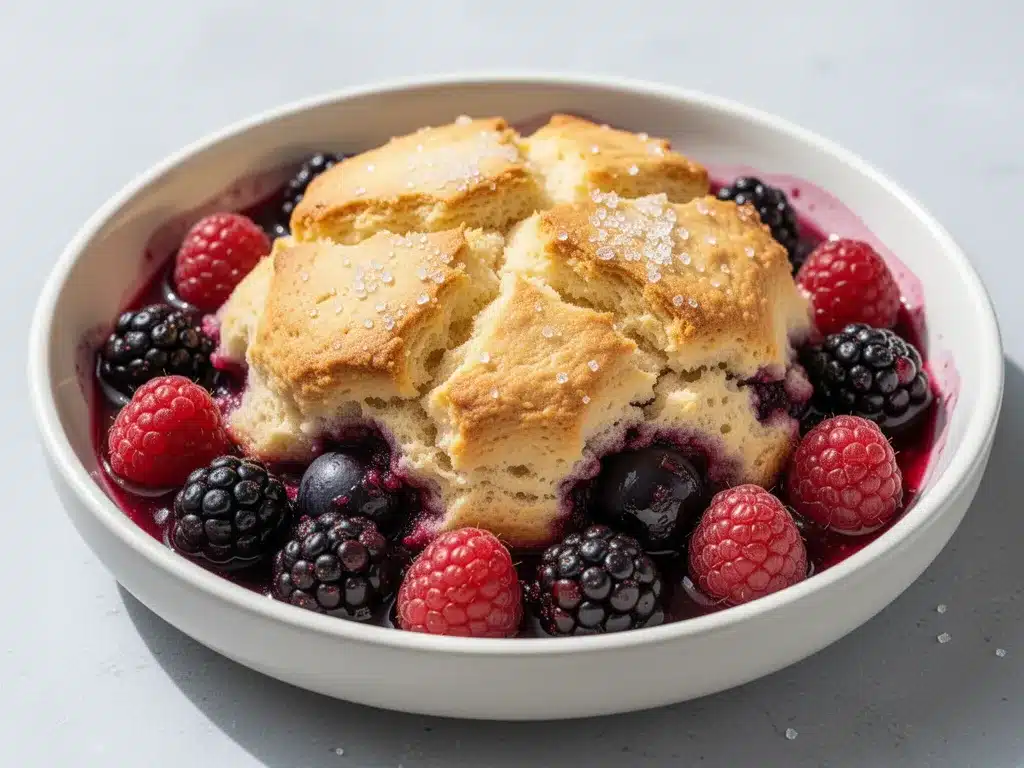
All-Purpose Flour (2 cups / 250g) — The base of the biscuit topping. Don’t use self-rising flour unless you adjust the leavening agents. Spoon and level the flour for accurate measurements.
Baking Powder (1 tablespoon / 8g) — This is what makes the topping rise and get fluffy. Make sure it’s fresh! Old baking powder won’t give you that golden, puffy crust. I replace mine every 6 months.
Salt (1 teaspoon) — Balances the sweetness and enhances the flavor. Don’t skimp on salt in baking. It’s essential.
Granulated Sugar (¼ cup / 50g) — Adds a slight crunch and sweetness to the topping. It helps create that golden, caramelized crust.
Unsalted Butter (½ cup / 113g, cold and cubed) — This is the secret to a flaky, tender topping. Cold butter creates steam pockets as it bakes, which makes the biscuit layers separate and become light. If the butter is too warm, the topping will be dense. Cut it into cubes and keep it in the fridge until you need it.
Heavy Cream (¾ cup / 180ml, cold) — Adds richness and moisture. Cold cream keeps the butter cold until it hits the oven. Whole milk works but isn’t as rich. Buttermilk is also a great option for a tangier flavor.
Extra Butter for Brushing (2 tablespoons, melted) — Brushing the tops with melted butter before baking ensures that golden, crispy finish. It’s worth the extra two minutes.
Coarse Sugar for Sprinkling (1 tablespoon) — Optional but recommended. Sprinkling coarse sugar on top before baking gives it a pretty, sparkling crust and a little extra crunch.
Equipment Needed
You don’t need fancy equipment for this. Here’s what I actually use. Most of this is basic kitchen stuff, so you probably already have it.
9×13 Inch Baking Dish — I use a glass Pyrex dish. It conducts heat evenly and lets you see the browning on the bottom. A metal pan works too, but it might brown faster. Ceramic is also nice for presentation.
Large Mixing Bowl — For tossing the berries with sugar and cornstarch. Any large bowl works. I use a stainless steel one because it’s durable and easy to clean.
Medium Mixing Bowl — For the biscuit topping. I prefer a wide bowl so I can cut the butter into the flour easily.
Pastry Blender or Fork — To cut the cold butter into the flour mixture. A pastry blender makes it faster, but a fork works fine if you’re patient. I use a fork because it’s easier to clean.
Measuring Cups and Spoons — For accuracy. I use standard nesting cups and spoons. Dollar store versions work fine.
Zester or Microplane — For the lemon zest. A regular grater works too, but a microplane gives you finer zest that distributes better.
Wooden Spoon or Spatula — For stirring the berry mixture and the topping.
Aluminum Foil — Optional, for covering the top if it browns too quickly. I rarely need this, but it’s good to have on hand.
How to Make It: Step-by-Step
Alright, let’s make this! I’m walking you through exactly how I do it, including the little tricks I’ve picked up over the years. It’s straightforward, but there are a few key moments to watch.
Step 1: Prep Your Oven and Dish (5 minutes)
Preheat your oven to 375°F (190°C). Grease your 9×13 inch baking dish with butter or non-stick spray. This prevents sticking and adds flavor. I like to use a little butter for the greasing because it complements the biscuit topping.
Step 2: Make the Berry Filling (5 minutes)
In a large bowl, combine the mixed berries, granulated sugar, cornstarch, lemon juice, lemon zest, and vanilla extract. Toss gently until the berries are evenly coated. The cornstarch will start to thicken the juices immediately. Pour the mixture into your prepared baking dish and spread it out evenly. This should take about 5 minutes. Don’t worry about breaking the berries a little; it helps them release their juices.
Step 3: Prepare the Biscuit Topping (10 minutes)
In a medium bowl, whisk together the flour, baking powder, salt, and granulated sugar. Make sure there are no lumps of baking powder. Using a pastry blender or a fork, cut in the cold, cubed butter. You want the mixture to look like coarse crumbs with some pea-sized pieces of butter remaining. This is crucial for a flaky texture. Don’t overmix here. If the butter melts before it hits the oven, you’ll lose that flakiness.
Gradually stir in the cold heavy cream. Mix just until the dough comes together. It will look shaggy and uneven. That’s okay. Do not overmix, or the biscuits will be tough. Gently drop spoonfuls of the dough over the berry mixture. Don’t try to make perfect balls; rustic is the goal here. You want gaps between the dough so the fruit can bubble up.
Step 4: Bake Until Golden (45-50 minutes)
Place the baking dish in the preheated oven. Bake for 45-50 minutes. The topping should be golden brown and puffy, and the berry filling should be bubbling vigorously around the edges. If the topping starts to brown too quickly (after about 30 minutes), loosely tent it with aluminum foil. This prevents burning while the inside finishes cooking.
Step 5: Cool and Serve (15 minutes)
Remove from the oven and let it cool for at least 15 minutes. This allows the filling to thicken slightly so it’s not soupy when you scoop it. Serve warm, preferably with a scoop of vanilla ice cream or a dollop of whipped cream. The contrast of hot cobbler and cold cream is heaven.
Expert Tips & Tricks
Here’s everything I’ve learned from making this dozens of times. These tips will save you from my mistakes and ensure your cobbler is perfect every time.
- Keep Everything Cold — This is the #1 tip for the biscuit topping. Cold butter and cold cream create steam pockets that make the topping light and fluffy. If your kitchen is hot, put your butter and cream in the fridge for 10 minutes before starting. I’ve made this with warm butter once, and the result was dense and cakey. Don’t make that mistake.
- Don’t Skip the Zest — The lemon zest is not just for show. It adds a bright, aromatic flavor that cuts through the sweetness of the berries and the richness of the butter. I’ve tried it without zest, and it just tastes… flat. Please, use the zest.
- Let It Bubble — When you pull the cobbler out of the oven, you should see vigorous bubbling around the edges. If it’s not bubbling, it needs more time. Undercooked cornstarch tastes chalky, so make sure the filling is thick and bubbly.
- Use Fresh Berries When Possible — Fresh berries have better texture and flavor. Frozen berries work, but they release more water, so you might need an extra teaspoon of cornstarch. Also, don’t thaw frozen berries before adding them; it makes them mushy.
- Brush with Butter — Brushing the tops with melted butter before baking ensures a golden, crispy crust. It’s a small step that makes a big visual and textural difference. I always do this.
- Be Patient with Cooling — It’s tempting to dig in immediately, but let it cool for 15 minutes. The filling needs time to set. If you cut into it hot, it will be runny. Patience pays off.
Variations & Substitutions
Once you’ve nailed the basic version, here’s how you can mix it up. I’ve tried all of these, and they all work beautifully.
Single-Berry Variations
Strawberry Cobbler — Use 5 cups of hulled and sliced strawberries. Strawberries are juicier, so add an extra teaspoon of cornstarch. Add a pinch of cardamom for a classic twist.
Blueberry Cobbler — Use 5 cups of blueberries. They’re less juicy, so the filling will be thicker. Add a teaspoon of lemon zest and a pinch of nutmeg for a cozy flavor.
Raspberry Cobbler — Use 5 cups of raspberries. They’re tart and delicate. Add a tablespoon more sugar to balance the tartness. Be gentle when mixing to avoid crushing them.
Fruit Swaps
Peach Cobbler — Use 5 cups of sliced peaches. Peel them if you prefer a smoother texture. Add a teaspoon of cinnamon and a pinch of ginger. This pairs beautifully with the biscuit topping.
Cherry Cobbler — Use 5 cups of pitted cherries. Add a tablespoon of almond extract instead of vanilla for a sophisticated flavor. Cherries are tart, so you might need a bit more sugar.
Dietary Modifications
Gluten-Free — Use a 1:1 gluten-free flour blend. The texture will be slightly different but still delicious. Make sure your baking powder is gluten-free.
Dairy-Free — Use vegan butter (cold and cubed) and coconut cream or oat milk. The topping will be slightly denser but still tasty. Use coconut sugar instead of regular sugar for a caramel note.
Vegan — Combine the dairy-free modifications above. The fruit filling is naturally vegan. Just ensure your sugar is vegan (some white sugar is processed with bone char).
Spice Variations
Spiced Berry — Add 1 teaspoon of cinnamon and ¼ teaspoon of nutmeg to the berry filling. It adds warmth and depth.
Lavender Berry — Add 1 teaspoon of culinary lavender to the berry filling. It’s floral and elegant, perfect for special occasions.
Serving & Storage
How to Serve — I usually serve this straight from the baking dish at the dinner table. It looks rustic and stays warm. But here are other ways I’ve enjoyed it:
- With Vanilla Ice Cream — The classic choice. The cold ice cream melts into the hot cobbler, creating a sauce.
- With Whipped Cream — Lighter than ice cream, but still rich and creamy.
- With Cheesecake — For a decadent twist, serve a slice of cheesecake alongside the cobbler.
Side Dishes — This cobbler pairs well with grilled meats like the brown sugar bourbon glazed grilled ribs or game day buffalo chicken sliders. The sweetness of the cobbler balances the savory, spicy flavors of the main dishes.
Storage Instructions
Refrigerator — Store leftovers in an airtight container for up to 3 days. The topping will soften, but the flavor remains good.
Reheating — Best method: Preheat oven to 350°F (175°C) and heat for 10-15 minutes until warm. This restores the crispness of the topping. Microwave method: Heat in 30-second intervals, but the topping will get soggy. I prefer the oven method.
Freezing — This doesn’t freeze well because the biscuit topping becomes soggy when thawed. It’s best made fresh. If you must freeze, freeze the unbaked cobbler. Cover tightly and freeze for up to 1 month. Thaw in the fridge overnight and bake as directed.
Pro Tip — If you’re serving this for a party, make it the night before and reheat it in the oven. It actually tastes better the next day as the flavors meld. Just add a little extra time to the baking if it’s cold from the fridge.
Nutrition Information
I’m not a nutritionist, but here’s the breakdown if you’re tracking. This is a treat, so enjoy it in moderation.
Per Serving (based on 12 servings):
| Nutrient | Amount |
|---|---|
| Calories | 280 |
| Protein | 4g |
| Carbs | 45g |
| Fiber | 3g |
| Sugar | 22g |
| Fat | 10g |
| Saturated Fat | 6g |
| Cholesterol | 25mg |
| Sodium | 250mg |
What’s Good: Berries provide antioxidants and fiber. It’s a reasonable portion size for a dessert.
What to Know: Higher in sugar and carbs due to the fruit and biscuit topping. Contains dairy and gluten.
My Take: Look, this is comfort food. It’s not a diet recipe. But it’s way better than store-bought desserts, and I know exactly what’s in it. When I want to make it lighter, I use less sugar in the topping and load up on berries. But usually? I just eat a reasonable portion and enjoy it.
Final Thoughts
So that’s my go-to berry cobbler with golden biscuit topping! I’ve probably talked your ear off at this point, but when you make a recipe this often, you have a lot to say about it. This has saved my Labor Day desserts more times than I can count. It’s my answer to “what’s for dessert” when I’m tired, don’t want takeout, and still want something that tastes really good. My family is happy, my guests are happy, and I’m happy because I’m not stressed about cooking.
Make it yours! Try different berries, add spices, or swap in your favorite cream. The best recipes are the ones you adapt to your family’s tastes. If you make this, drop a comment and let me know what you think! I love hearing how recipes turn out in your kitchen. And if something doesn’t work, tell me that too—I’m here to help troubleshoot.
Happy cooking! And I hope your kitchen smells half as good as mine does right now. This cobbler is waiting for you.
Frequently Asked Questions
Can I use frozen berries instead of fresh?
Yes, you can! Just don’t thaw them first. Frozen berries release more water, so you might need an extra teaspoon of cornstarch. Also, add 5-10 minutes to the baking time. The cobbler will take longer to bubble through. I use frozen berries in the winter when fresh ones are expensive, and they work great.
Why did my topping turn out dense and cakey?
This usually happens if the butter or cream was too warm, or if you overmixed the dough. Cold butter is key for a flaky topping. Also, mix the dough just until it comes together. Overmixing develops gluten, which makes the biscuits tough. Keep everything cold and mix gently.
Can I make this ahead of time?
You can make the berry filling ahead and store it in the fridge for up to 24 hours. Prepare the topping just before baking. If you bake it fully and reheat it, the topping will lose its crispness. For best results, assemble and bake on the day of serving.
How do I know when the cobbler is done?
The topping should be golden brown and puffy. The berry filling should be bubbling vigorously around the edges. If you’re unsure, insert a knife into the center; it should come out clean (mostly). If the topping is browning too fast, tent it with foil.
Can I use self-rising flour instead of all-purpose flour?
If you use self-rising flour, omit the baking powder and salt in the recipe. Self-rising flour already contains leavening and salt. However, I prefer using all-purpose flour because I can control the leavening. If you use self-rising, the topping might rise too much and collapse.
What’s the best way to reheat leftovers?
The oven is best. Preheat to 350°F (175°C) and heat for 10-15 minutes. This restores the crispness of the topping. Microwave heating works but makes the topping soggy. If you must use the microwave, heat in short bursts and add a splash of water to the bowl to create steam.
Can I add nuts to the topping?
Yes! Chopped pecans or walnuts add a nice crunch and flavor. Sprinkle them on top of the biscuit dough before baking. They toast in the oven and add a beautiful texture. I love adding pecans to my strawberry cobbler.
Pin This Recipe!
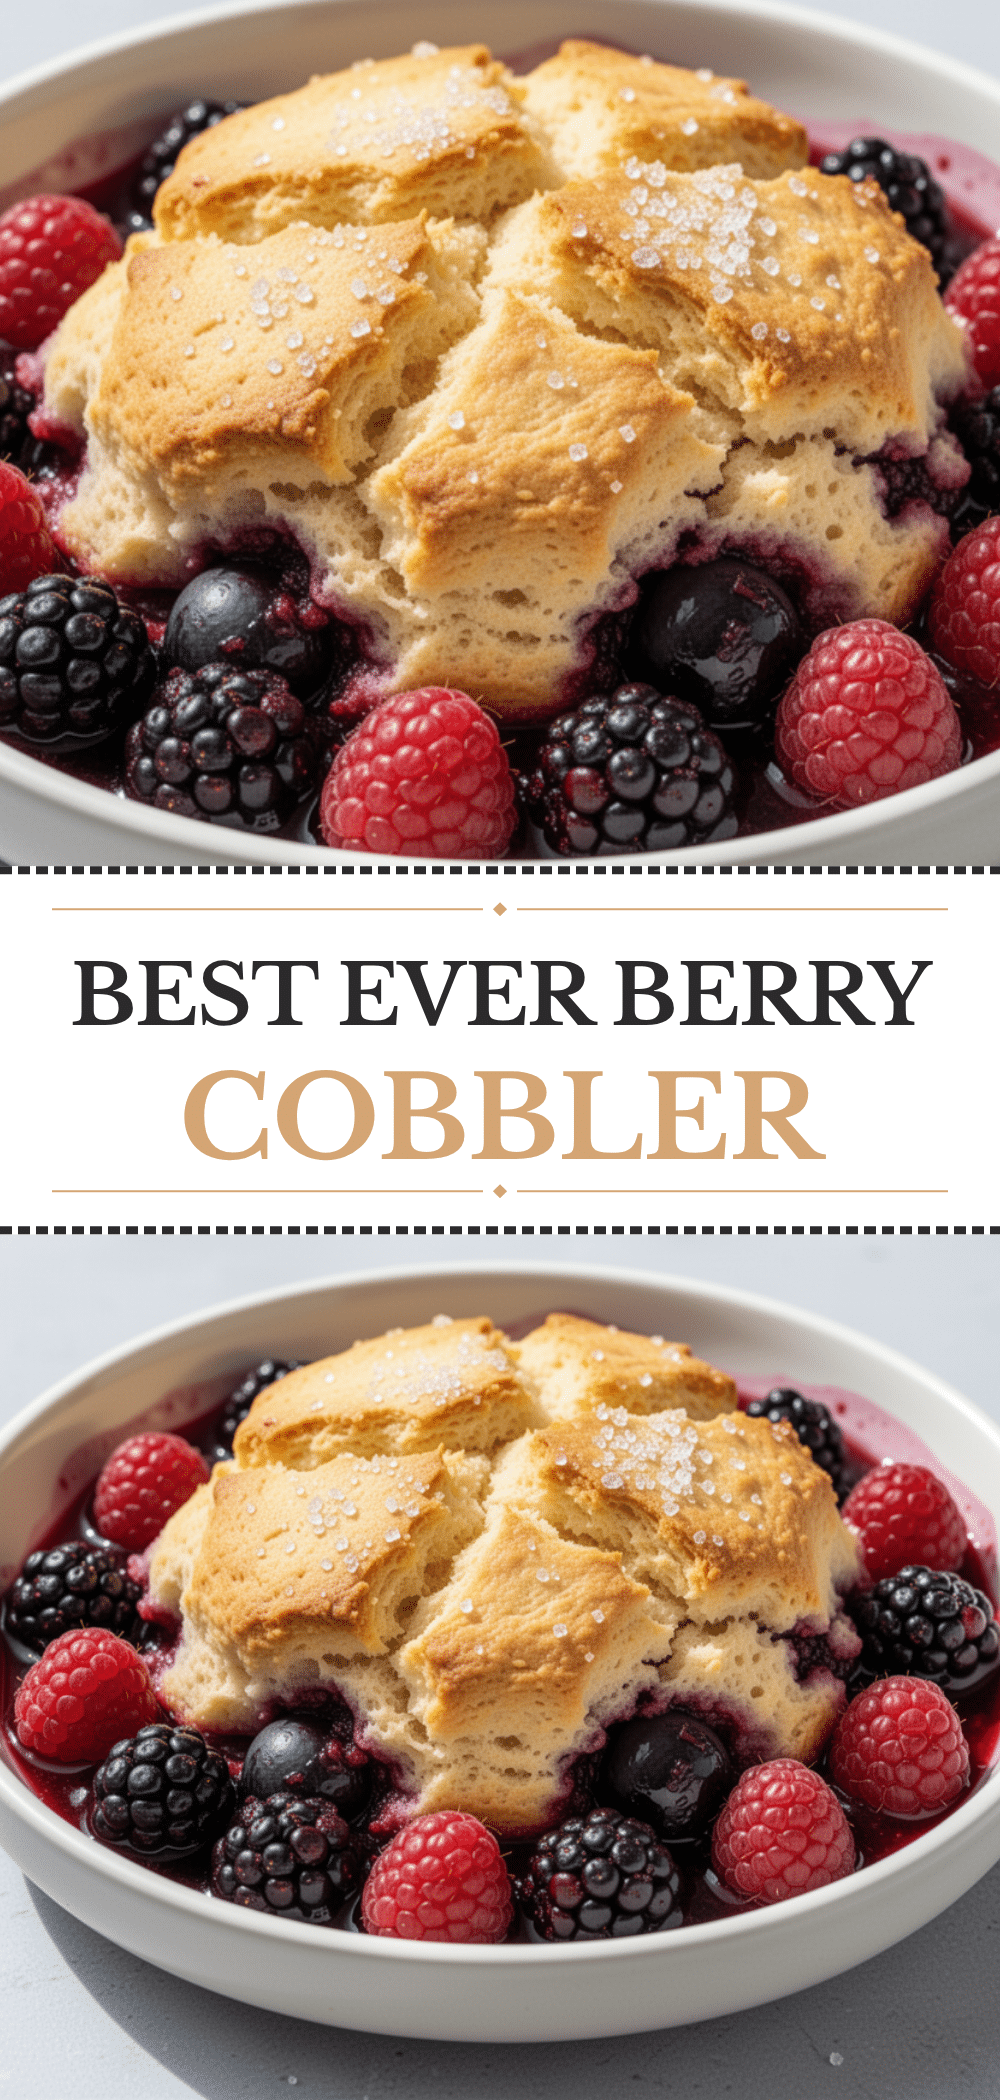
Berry Cobbler Recipe: Easy 1-Hr Labor Day Dessert
- Total Time: 1 hour 5 minutes
- Yield: 12 servings 1x
Description
A rustic, easy-to-make berry cobbler with a golden, flaky biscuit topping. This dessert balances sweet and tart berries with a buttery crust, requiring minimal prep time and no special skills.
Ingredients
- 5 cups mixed berries (strawberries, blueberries, raspberries)
- 1/2 cup granulated sugar (for filling)
- 2 tablespoons cornstarch
- 1 tablespoon lemon juice
- 1 teaspoon lemon zest
- 1 teaspoon vanilla extract
- 2 cups all-purpose flour
- 1 tablespoon baking powder
- 1 teaspoon salt
- 1/4 cup granulated sugar (for topping)
- 1/2 cup unsalted butter, cold and cubed
- 3/4 cup heavy cream, cold
- 2 tablespoons melted butter (for brushing)
- 1 tablespoon coarse sugar (for sprinkling)
Instructions
- Preheat oven to 375°F (190°C) and grease a 9×13 inch baking dish with butter or non-stick spray.
- In a large bowl, toss mixed berries with 1/2 cup sugar, cornstarch, lemon juice, lemon zest, and vanilla extract until evenly coated. Pour into the prepared baking dish.
- In a medium bowl, whisk together flour, baking powder, salt, and 1/4 cup sugar.
- Cut in the cold, cubed butter using a pastry blender or fork until the mixture resembles coarse crumbs with pea-sized butter pieces.
- Gradually stir in the cold heavy cream just until the dough comes together. Do not overmix.
- Drop spoonfuls of the biscuit dough over the berry mixture, leaving gaps for fruit to bubble up.
- Brush the tops with melted butter and sprinkle with coarse sugar.
- Bake for 45-50 minutes until the topping is golden brown and the filling is bubbling vigorously. Tent with foil if browning too quickly.
- Cool for at least 15 minutes before serving to allow the filling to thicken.
Notes
Keep all ingredients for the topping (butter and cream) cold to ensure a flaky texture. If using frozen berries, do not thaw them first and add 5-10 minutes to baking time. The cobbler tastes even better the next day as flavors meld. For reheating, use an oven at 350°F to restore crispness; microwaving will make the topping soggy.
- Prep Time: 20 minutes
- Cook Time: 45-50 minutes
- Category: Dessert
- Cuisine: American
Nutrition
- Serving Size: 1 slice
- Calories: 280
- Sugar: 22
- Sodium: 250
- Fat: 10
- Saturated Fat: 6
- Carbohydrates: 45
- Fiber: 3
- Protein: 4
Keywords: berry cobbler, labor day dessert, easy cobbler recipe, biscuit topping, summer dessert, gluten-free option, dairy-free option


