
Last Thursday, I was standing in the checkout line at my local grocery store, clutching a small basket that contained exactly one zucchini, a box of breadcrumbs, and a jar of marinara sauce. I looked at the total: $8.45. Then I looked at the snack aisle to my left. A single bag of tortilla chips was $4.50. A bag of pretzels? $4.20. A bag of those fancy “baked” veggie straws that taste like cardboard? $5.99.
I felt that familiar pinch in my stomach—not from hunger, but from the financial anxiety that comes with eating alone on a tight budget. When you live solo, grocery shopping is tricky. You buy things for one, but you pay full price for everything. If I buy a bag of frozen fries, I’ll eat them in two days, and then I’m staring at an empty freezer again. If I buy a bag of chips, they’re gone in a week, and I’m still hungry and broke.
I went home, frustrated, and decided to stop buying snacks that cost more than my hourly wage. That night, I pulled out that lone zucchini and decided to make Budget-Friendly Healthy Baked Zucchini Fries. I wasn’t expecting much. Zucchini is watery. It’s mushy. It’s the vegetable that ruins soups if you don’t drain it right. But I had nothing to lose except another $5 I didn’t have.
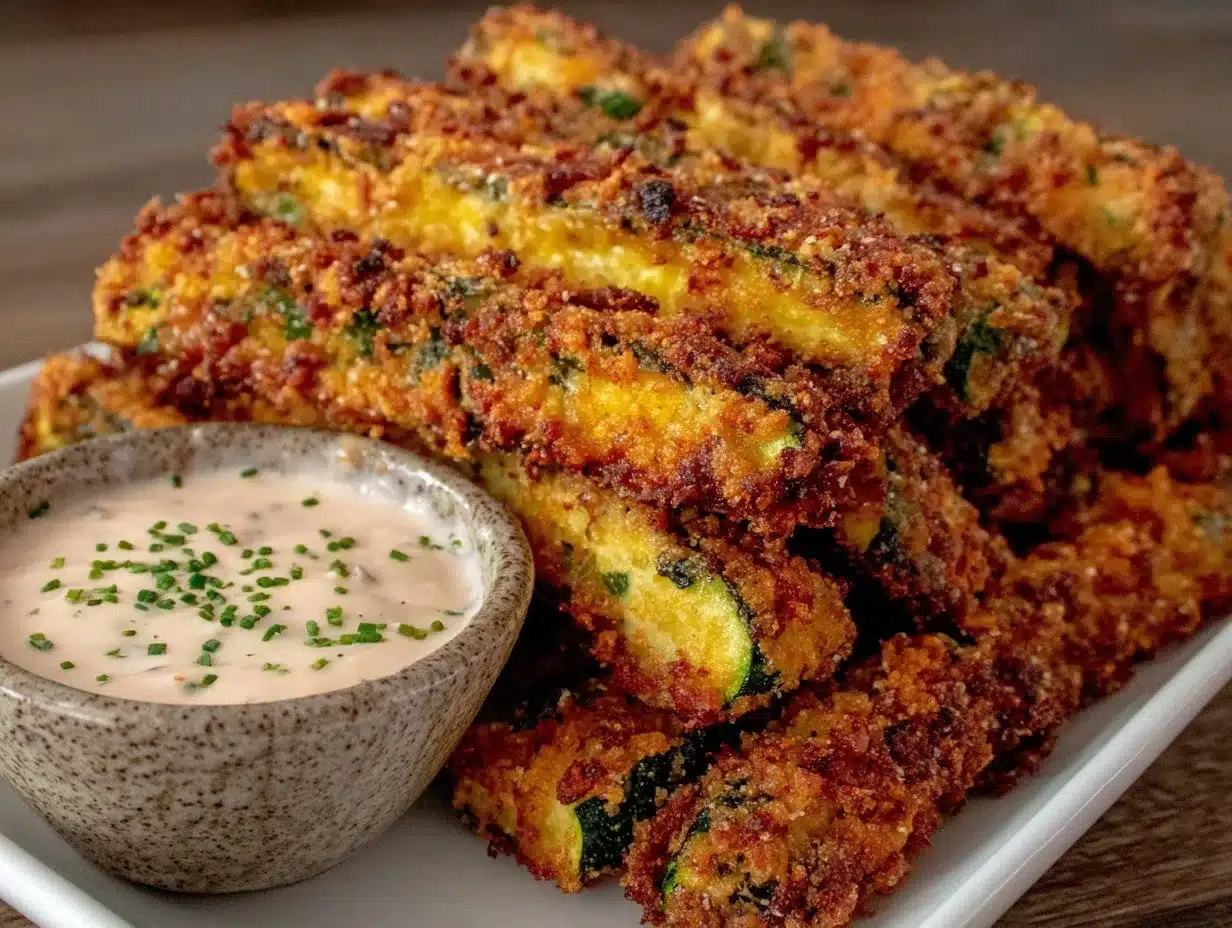
Thirty minutes later, I was sitting on my couch, dipping those golden, crispy sticks into a little cup of spicy mayo, and I had to admit: this was better than chips. It was crunchy. It was savory. And it cost me about $1.20 to make a whole plate. I’ve made this Budget-Friendly Healthy Baked Zucchini Fries recipe at least ten times since then. It’s become my secret weapon for when I want something crunchy without wrecking my weekly meal plan or my bank account.
If you’re tired of overpriced, empty-calorie snacks that leave you feeling guilty and poor, this is your sign to try it. It’s cheap, it’s healthy, and it actually tastes good.
Why You’ll Love This Snack
Real talk: most “healthy” snacks are a scam. They’re expensive, they taste like diet food, and they don’t satisfy that craving for something salty and crunchy. This recipe changes the game. Here’s why this Budget-Friendly Healthy Baked Zucchini Fries has earned a permanent spot in my rotation:
- It Costs Pennies Per Serving — Zucchini is one of the cheapest vegetables you can buy, especially in bulk. One medium zucchini costs about $0.80 at my store. With basic pantry staples, a whole batch costs less than $3. That’s roughly $0.60 per fry if you count them out, or maybe $1.50 per serving if you’re generous. Compare that to $6 for a bag of chips, and the math is obvious.
- It Uses Pantry Staples — You probably already have most of what you need. Flour, eggs, breadcrumbs, and spices. You don’t need to buy specialized “baking mixes” or expensive almond flour (which is a budget killer). This recipe respects what’s already in your cupboard.
- It’s Actually Crunchy — I know what you’re thinking. “Zucchini fries are soggy.” They are, if you don’t do it right. The secret is salting the zucchini first to draw out the water, and using a double-dip breading method. The result? Crispy edges that stay crisp even after sitting out for 20 minutes. It’s not just a veggie stick; it’s a snack that feels like a treat.
- It’s Low-Calorie but Satisfying — I’m not counting every calorie, but I do like knowing that I’m eating something that won’t weigh me down. These fries are light. You can eat a whole plate and still feel light enough to go for a walk. It’s guilt-free snacking without the blandness of plain boiled veggies.
- It’s Ready in 25 Minutes — I make this after work when I’m tired and don’t want to cook a full dinner. Prep takes 10 minutes. Bake takes 15. It’s faster than waiting for delivery, and it’s healthier than ordering takeout. It’s the perfect bridge between “I’m hungry now” and “I’m too tired to cook.”
This is my go-to when I need a snack that works for my wallet and my health. It’s simple, effective, and delicious.
Key Ingredients for Budget Baking
Let’s talk about what goes into this Budget-Friendly Healthy Baked Zucchini Fries. I’ve kept the list short on purpose. Long lists mean more trips to the store, and more trips mean more money spent on gas and impulse buys. Here’s exactly what you need, with exact measurements so you don’t waste a drop.
Medium Zucchini (2 large / approx. 600g total)
Yes, two large zucchini. You need them because zucchini loses about 30% of its weight when you bake it. If you use small ones, you’ll end up with a sad plate. Look for firm zucchini that feels heavy for its size. Avoid the ones that are soft or have wrinkles—they’re old and watery. I usually buy two medium-to-large ones for about $1.50 total. That’s your base.
Plain Dry Bread Crumbs (1 cup / 100g)
Do not buy the seasoned ones. Seasoned breadcrumbs are expensive and often taste artificial. Buy the plain, dry Italian or yellow breadcrumbs from the baking aisle. They’re cheaper and you control the salt. If you have stale bread, you can pulse it in a food processor, but store-bought is fine and consistent. Just check the price per ounce—sometimes the larger boxes are a better deal.
Large Egg (1 large / approx. 50g)
This is your binder. It holds the breadcrumbs to the zucchini. One egg is enough for two zucchini. If you have leftover egg white, freeze it for smoothies. Don’t waste it. If you’re vegan, you can use a flax egg (1 tbsp ground flaxseed + 3 tbsp water), but the texture is slightly different. I stick to regular eggs for the best crunch.
All-Purpose Flour (1/2 cup / 65g)
This is the first layer of defense. It helps the egg stick to the wet zucchini. Use regular white flour. Whole wheat flour can make the coating too dense and heavy. You need about half a cup. If you’re out, you can use cornstarch, but flour gives a better crisp.
Garlic Powder (1 tsp / 3g)
This is where the flavor comes from. Fresh garlic burns in the oven and tastes bitter. Garlic powder is cheap, shelf-stable, and gives that savory punch. Don’t skip it. It makes the zucchini taste like it’s been seasoned properly, not just baked plain.
Smoked Paprika (1 tsp / 2g)
This is the secret weapon. It adds a smoky, slightly spicy depth that makes the fries taste “fried” even though they’re baked. It costs about $3 for a jar that will last you a year. It’s worth every penny for the flavor boost. If you don’t have it, regular paprika works, but it lacks that smoky kick.
Salt (1/2 tsp / 3g) and Black Pepper (1/4 tsp / 0.5g)
Season your breadcrumbs. Most people season the zucchini, but the seasoning needs to be in the crust too. Mix these directly into the breadcrumbs before you dip. It ensures every bite is flavorful.
Non-Stick Cooking Spray (0 calories)
You need this for the baking sheet. Oil spray is cheaper than pouring oil, and it gives an even coat. I use a generic brand. It doesn’t matter. Just make sure you spray the breadcrumbs lightly after they’re on the zucchini. That’s what makes them golden.
Tools Needed
You don’t need fancy equipment. Here’s what I use, and what you can skip.
Large Baking Sheet — I use a standard 13×18 inch sheet. It needs to be big enough to hold the fries in a single layer. If you crowd them, they steam instead of bake. Steam = soggy. I line mine with parchment paper for easy cleanup. Aluminum foil works too, but parchment prevents sticking better.
Three Shallow Bowls — You need a three-step breading station. One for flour, one for egg, one for breadcrumbs. I use small cereal bowls or pie plates. They’re shallow so you can dip easily. If you don’t have three bowls, use three plates. Just keep them separate.
Cheese Grater or Knife — I prefer a knife for uniform sticks. But if you have a box grater, you can cut them quickly. Just be careful. A sharp knife is safer and gives you better control over the thickness. Aim for sticks that are about 1/4 inch thick. Thinner than that, they burn. Thicker, they’re doughy inside.
Clean Kitchen Towel or Paper Towels — This is crucial. You need to pat the zucchini dry after salting. A dry zucchini equals crispy fries. If you skip this step, you’re making steamed zucchini sticks. Don’t skip it.
How to Make Budget-Friendly Healthy Baked Zucchini Fries
Here is the step-by-step. I’ve timed it so you know exactly how long this takes. It’s faster than you think.
Step 1: Prep the Zucchini (10 minutes)
Wash your two zucchini. Trim off the ends. Cut them in half lengthwise, then cut each half into sticks about 1/4 inch thick. You should get about 20-24 sticks total. Place them in a colander in the sink. Sprinkle them generously with salt. I use about 1 teaspoon of salt total, spread evenly. Let them sit for 10 minutes. This draws out the moisture. You’ll see water pooling in the colander. This is good. This is what makes them crispy later.
Step 2: Dry and Preheat (5 minutes)
While the zucchini sits, preheat your oven to 400°F (200°C). Line your baking sheet with parchment paper. Set it aside. After 10 minutes, take your zucchini sticks out of the colander. They will be limp and wet. Lay them on a clean kitchen towel or paper towels. Pat them dry. Seriously, dry them. Press down with another towel to soak up the water. If they’re still wet, they’ll slide around on the baking sheet and get soggy. You want them dry to the touch.
Step 3: Set Up the Breading Station (5 minutes)
Get your three bowls. In the first bowl, add the 1/2 cup flour. In the second bowl, whisk the 1 large egg with a pinch of salt. In the third bowl, mix the 1 cup breadcrumbs, 1 tsp garlic powder, 1 tsp smoked paprika, 1/2 tsp salt, and 1/4 tsp black pepper. Mix the spices into the breadcrumbs with a fork. Make sure it’s even.
Step 4: Bread the Sticks (5 minutes)
Take a dry zucchini stick. Dip it in the flour, shaking off any excess. Then dip it in the egg, letting the excess drip off. Finally, press it into the breadcrumb mixture. Use your fingers to press the crumbs onto the zucchini. Make sure it’s fully coated. Place it on the baking sheet. Repeat with all sticks. Don’t crowd them. Leave space between each stick. If they touch, they’ll stick together and get soft.
Step 5: Bake Until Golden (15-18 minutes)
Spray the tops of the fries lightly with non-stick cooking spray. This helps them brown. Put the sheet in the oven. Bake for 15 minutes. Then, take the sheet out and flip each fry. Spray the other side lightly. Bake for another 5-8 minutes. They’re done when they’re golden brown and crispy to the touch. They should sound slightly crunchy when you tap them with a fork. Do not underbake. Underbaked zucchini fries are mushy. Overbaked ones are just dried-out zucchini. Aim for golden.
Total Time: 35 minutes (10 min prep, 10 min salting, 5 min setup, 15 min bake).
Expert Tips from a Budget Cook
I’ve made this too many times to count. Here’s what I’ve learned the hard way.
Don’t Skip the Salting Step
This is the #1 mistake. People skip it to save time. Don’t. Zucchini is mostly water. If you don’t remove that water, it turns to steam in the oven. Steam makes bread soggy. Salting draws the water out. It takes 10 minutes, but it’s the difference between a fry and a mush stick. I learned this after burning through three zucchini in one week trying to make them crisp without salting. Never again.
Press the Breadcrumbs
When you dip the zucchini in the crumbs, don’t just roll it. Press. Use your fingers to push the crumbs into the surface. Zucchini is slippery. If the crumbs just sit on top, they’ll fall off in the oven. Pressing creates a mechanical bond. It’s small, but it matters.
Use a Wire Rack if You Have One
If you have a wire cooling rack that fits on your baking sheet, use it. Place the fries on the rack. This allows air to circulate underneath. It makes them crispier on the bottom. If you don’t have a rack, just flip them halfway through, like I said in the steps. It’s not as good, but it works.
Storage Reality Check
These fries are best eaten immediately. They lose crunch after an hour. If you have leftovers, store them in the fridge for up to 2 days. Reheat them in an air fryer or toaster oven at 375°F for 5 minutes. Do not microwave them. Microwaving makes them rubbery. I’ve tried it. It’s a tragedy.
Recipe Variations
Once you’ve nailed the basic version, here’s how to mix it up without spending more money.
Spicy Kick
Add 1/2 tsp cayenne pepper to the breadcrumb mix. It adds heat without adding cost. I love this version with a spicy mayo dip. It tastes like restaurant appetizers but costs a fraction of the price.
Cheesy Crust
Mix 2 tbsp grated parmesan into the breadcrumbs. Parmesan is expensive, so use it sparingly. Just a little adds a huge flavor boost. If parmesan is too pricey, use a cheap cheddar powder or skip it. The garlic powder still works.
Herb Garden
Add 1 tbsp dried parsley or oregano to the breadcrumbs. Dried herbs are cheap and last forever. It adds freshness and color. It makes the fries look more professional, which is nice for impressing guests (or just yourself).
Gluten-Free Option
Swap the flour and breadcrumbs for gluten-free versions. Note: GF breadcrumbs are more expensive. To save money, buy a large box of plain GF panko and use it for multiple recipes. The texture will be slightly different—crunchier but more fragile. It still works.
Vegan Version
Skip the egg. Use 1/4 cup plant milk mixed with 1 tbsp vinegar as a binder. Dip the floured zucchini in the milk mixture, then into the crumbs. It holds okay, but the crunch isn’t as strong. I still make it, but I prefer the egg version for texture.
Serving & Storage
Serving Suggestions
I serve these with a simple dipping sauce. Mix 2 tbsp mayo with 1 tsp lemon juice and a pinch of garlic powder. It’s cheap and creamy. You can also use ketchup, or marinara sauce if you’re feeling Italian. I pair them with a simple green salad or leftover grilled chicken. They’re versatile.
Storage
Room Temp: Don’t leave them out for more than 2 hours. Zucchini is perishable.
Refrigerator: Store in an airtight container for up to 2 days. They will soften. Reheat in the oven or air fryer to restore crunch.
Freezer: I don’t recommend freezing these. The zucchini releases more water when thawed, and the texture becomes mushy. They don’t freeze well. Make fresh batches instead.
Nutrition Information
I’m not a nutritionist, but here’s the breakdown per serving (approx. 6 fries).
| Nutrient | Amount |
|---|---|
| Calories | 120 |
| Protein | 4g |
| Carbs | 12g |
| Fiber | 2g |
| Fat | 5g |
| Sodium | 250mg |
My Take: This is a healthy snack. It’s low calorie, has some fiber, and uses whole ingredients. It’s not a meal replacement, but it’s a great alternative to chips. It’s better than takeout and I know exactly what’s in it. It’s comfort food without the guilt.
Final Thoughts
Eating on a budget doesn’t mean eating boring food. It means being creative with what you have. This Budget-Friendly Healthy Baked Zucchini Fries recipe is proof that you can eat well, save money, and still enjoy a crispy, savory snack. It’s changed how I think about vegetables. They’re not just side dishes; they’re the star of the show.
If you make this, drop a comment! I love hearing how it turns out in your kitchen. Did you add extra spice? Did you use the air fryer? Let me know. And if you’re looking for more cheap, easy recipes, check out my vegan mango turmeric smoothie bowl for a quick breakfast, or try the labor day charred corn and black bean dip for a filling snack that stretches your dollars.
Happy cooking!
FAQs
Can I use small zucchini?
You can, but the yield will be lower. Small zucchini have less flesh, so you’ll get fewer fries. Also, small zucchini can be seedy. If you use them, scoop out the seeds before cutting. It works, but large zucchini give you more value for your money.
Why are my zucchini fries soggy?
It’s almost always the water. Did you salt them for 10 minutes? Did you pat them completely dry? If you skip either step, the fries will steam instead of bake. Also, make sure your oven is fully preheated. A cold oven leads to soggy results.
Can I make these ahead of time?
You can prep them and store them in the fridge for up to 4 hours before baking. Just keep them covered. But do not bake them ahead and reheat. They lose their crunch. Bake them right before you want to eat them for the best texture.
Is this recipe gluten-free?
The base recipe is not. It uses flour and regular breadcrumbs. To make it gluten-free, swap both for gluten-free alternatives. As mentioned in the variations, GF breadcrumbs are pricier, so buy in bulk to save money.
Can I air fry these?
Yes! Air frying is actually better for crispiness. Cook at 375°F for 10-12 minutes, shaking the basket halfway through. You may need less oil spray since air fryers circulate heat so well. Check them at 8 minutes to avoid burning.
What if I don’t have smoked paprika?
Use regular paprika or chili powder. It won’t have the smoky flavor, but it will still add color and a little heat. Or just skip it. The garlic powder and salt are the main flavor drivers. It will still be good.
Pin This Recipe!


Budget-Friendly Healthy Baked Zucchini Fries
- Total Time: 35 minutes
- Yield: 4 servings 1x
Description
A cheap, healthy, and crispy baked zucchini fry snack that uses pantry staples and costs less than $3 to make. Perfect for budget-conscious home cooks looking for a guilt-free alternative to chips.
Ingredients
- 2 large zucchini (approx. 600g total)
- 1/2 cup all-purpose flour
- 1 large egg
- 1 cup plain dry breadcrumbs
- 1 tsp garlic powder
- 1 tsp smoked paprika
- 1/2 tsp salt (plus extra for salting zucchini)
- 1/4 tsp black pepper
- Non-stick cooking spray
Instructions
- Wash zucchini, trim ends, and cut into 1/4 inch thick sticks (about 20-24 sticks).
- Place zucchini sticks in a colander, sprinkle generously with salt, and let sit for 10 minutes to draw out moisture.
- Preheat oven to 400°F (200°C) and line a large baking sheet with parchment paper.
- Pat zucchini sticks completely dry with a clean kitchen towel or paper towels.
- Set up a breading station with three shallow bowls: one with flour, one with whisked egg, and one with breadcrumbs mixed with garlic powder, smoked paprika, salt, and pepper.
- Dip each dry zucchini stick in flour, shaking off excess, then dip in egg, letting excess drip off.
- Press the stick firmly into the breadcrumb mixture to ensure full coating.
- Place coated sticks on the baking sheet in a single layer, ensuring they do not touch.
- Lightly spray the tops of the fries with non-stick cooking spray.
- Bake for 15 minutes, then flip each fry and spray the other side lightly.
- Bake for another 5-8 minutes until golden brown and crispy.
- Serve immediately with dipping sauce of choice.
Notes
Salting and drying the zucchini is crucial to prevent sogginess. For best results, eat immediately as they lose crunch after an hour. Leftovers can be stored in the fridge for up to 2 days and reheated in an air fryer or toaster oven. Do not microwave. For a vegan version, substitute the egg with plant milk and vinegar. For gluten-free, swap flour and breadcrumbs for GF alternatives.
- Prep Time: 10 minutes
- Cook Time: 15 minutes
- Category: Snack
- Cuisine: American
Nutrition
- Serving Size: Approximately 6 frie
- Calories: 120
- Sugar: 3
- Sodium: 250
- Fat: 5
- Saturated Fat: 1
- Carbohydrates: 12
- Fiber: 2
- Protein: 4
Keywords: zucchini fries, baked zucchini, healthy snack, budget recipes, cheap snacks, gluten-free option, vegan option, crispy vegetables


