It was supposed to be a disaster. That’s the honest truth. I had planned to make my usual lemon bars—the kind with the crisp shortbread crust and the tart, set filling—but I ran out of cornstarch. Not just “ran out,” but I had checked the pantry twice, asked my roommate, and even checked the neighbor’s garage. Nothing.
I was staring at a bowl of melted butter and flour, feeling that specific brand of panic that only happens at 7 PM on a Tuesday when guests are arriving in an hour. I needed a thickener. I needed it fast. And I needed something that wouldn’t ruin the bright, zesty flavor I was chasing.
So, I did something reckless. I grabbed a can of sweetened condensed milk. It sounded weird. Like, “why would you put sweetened condensed milk in a lemon bar” weird. But I mixed it with the lemon juice, the eggs, and a whole lot of hope, and poured it over the crust. I threw it in the oven and held my breath.
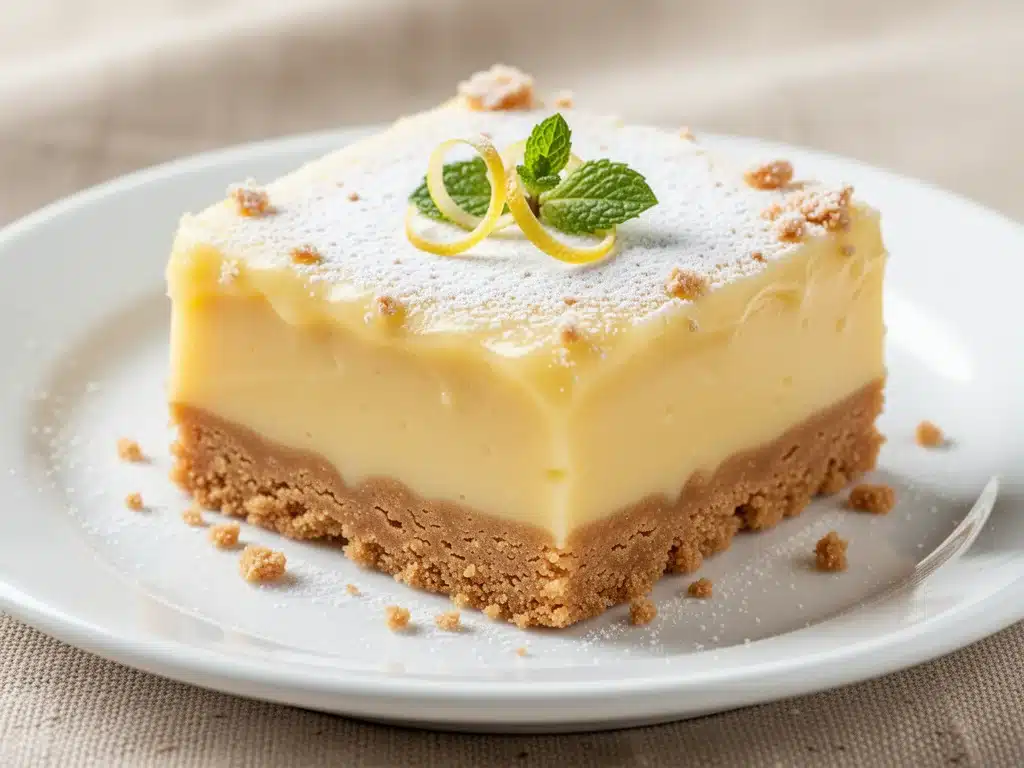
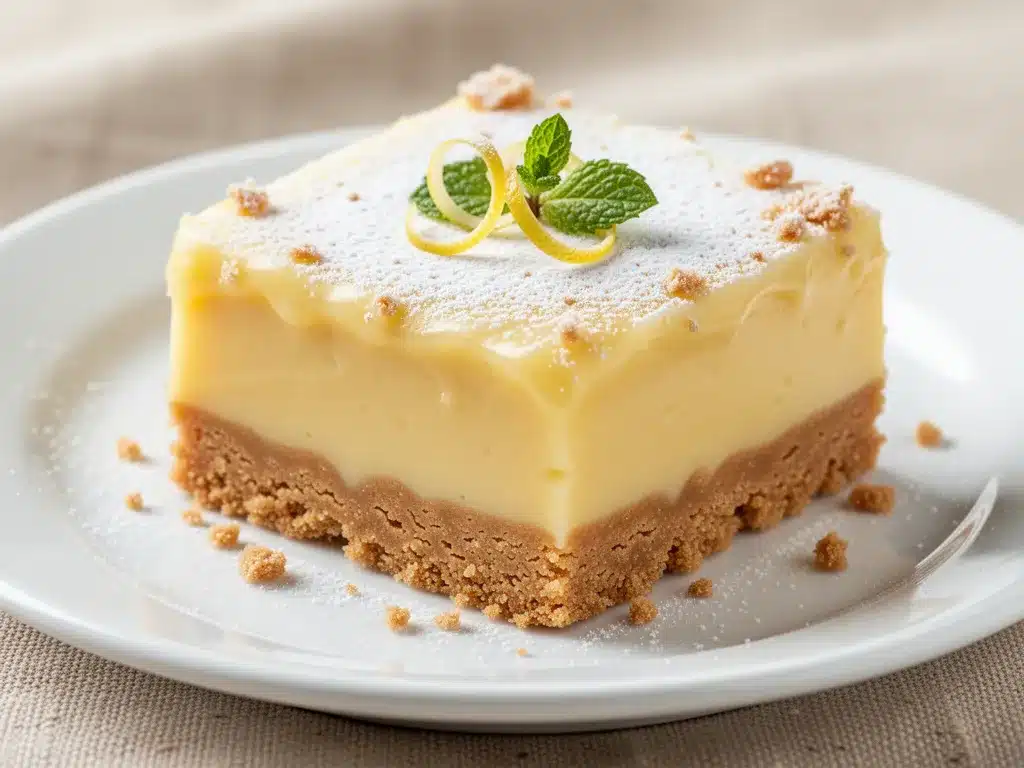
When I pulled it out 30 minutes later, it wasn’t just set. It was silky. Smooth. The kind of creamy, tangy treat that makes you close your eyes and sigh. It wasn’t the traditional lemon bar I intended to make, but it was infinitely better. It was rich without being heavy, tart without being sour, and it had this incredible custard-like texture that just melts on your tongue.
That accidental batch became the most requested dessert at every gathering since. Friends ask, “What is that magic?” I tell them it’s just a little improvisation and a whole lot of lemon. If you’ve ever felt like your baking is too stiff or your desserts lack that luxurious mouthfeel, you need to try these creamy lemon dessert bars. They’re easier than pie, faster than a cake, and they taste like summer in a bite.
Why You’ll Love This Creamy Lemon Dessert
There are about a dozen reasons I keep making these bars, but let’s be real—you’re here because you want dessert that’s impressive but doesn’t require three hours of your life. Here’s why this recipe has earned a permanent spot in my rotation, right next to my grilled peach cobbler for when I want something warm and rustic.
Zero Crust Stress — Seriously. You can make the crust in the microwave if you want to be lazy (though the oven version is worth the extra 5 minutes). No rolling pins, no chilling time, no cracking crusts. Just press it in, bake it, and move on. It’s the ultimate low-effort, high-reward move.
That Texture Though — I’m obsessed with the custard-like filling. It’s not just “wet” lemon bars; it’s actually creamy, like a lemon cheesecake bar but lighter. The sweetened condensed milk changes the game completely. It adds this rich, caramelized sweetness that balances the sharp lemon perfectly. It’s the kind of texture people comment on. “Is this store-bought?” they ask. No, it’s homemade magic.
Tartness That Actually Tastes Like Lemon — A lot of lemon desserts taste like lemon extract and sugar. These taste like actual lemons. I use both fresh juice and zest because the oils in the zest carry the flavor. You’ll smell this baking from the other room, and it will wake up your entire house. It’s aromatic, bright, and energizing.
Make-Ahead Friendly — This is my secret weapon for parties. These bars actually get better after sitting in the fridge for 24 hours. The flavors meld, the texture sets firmly, and they’re much easier to cut into neat squares. I made a batch for a Labor Day party last year, and they were the only thing left by midnight. (Don’t judge me.)
Budget-Friendly — You don’t need expensive ingredients. No cream cheese, no heavy whipping cream (unless you want to top it). Just butter, flour, sugar, eggs, lemons, and condensed milk. It feeds a crowd for less than $10. That’s cheaper than buying a dozen cupcakes from the grocery store, and way fresher.
Gluten-Free Option — If you’re feeding friends with sensitivities, swap the all-purpose flour for a 1:1 gluten-free blend. The texture holds up surprisingly well. I’ve made this for my celiac sister, and she didn’t even notice the difference. That’s a win in my book.
This is the dessert I make when I want to feel like a pro baker but only have 20 minutes of active time. It’s reliable, it’s delicious, and it’s guaranteed to disappear.
Ingredients You’ll Need
Here’s the best part: you probably have most of this already in your kitchen. This isn’t a recipe that requires a trip to three different specialty stores. It’s simple, honest ingredients that shine because of how they’re combined.
For the Crust:
Unsalted butter (1/2 cup / 113g) — Melted. I use high-quality butter here because it’s the base of the crust. If your butter is cheap or rancid, you’ll taste it. Salted butter works too, just reduce any added salt in the filling.
All-purpose flour (1 cup / 125g) — Standard stuff. If you’re doing gluten-free, use a measure-for-measure blend. Don’t use almond flour unless you want a very different texture (it works, but it’s more crumbly).
Granulated sugar (1/4 cup / 50g) — Just a little bit to sweeten the crust and help it crisp up. You don’t want a sweet cookie base; you want it to contrast with the tart filling.
For the Filling:
Sweetened condensed milk (1 can / 14oz / 397g) — This is the star. Do not use evaporated milk. They are not the same. Sweetened condensed milk is thick, syrupy, and sugary. It’s what gives these bars their creamy, fudge-like texture.
Fresh lemons (3-4 large lemons) — You’ll need about 1/2 cup of juice and 2 tablespoons of zest. Buy organic if you can, since you’re using the zest. If your lemons are small, you might need a fourth one. Squeeze them by hand! Bottled lemon juice tastes flat and metallic. It ruins the vibe.
Large eggs (3 large) — Room temperature is ideal. If you’re in a rush, just drop them in warm water for 5 minutes. Cold eggs can sometimes cause the filling to curdle slightly, though it’s rare.
Granulated sugar (1/2 cup / 100g) — Yes, more sugar. The lemons are tart, and the condensed milk is sweet, but you need this balance to get that perfect sweet-tangy profile.
Vanilla extract (1 teaspoon) — Just a hint. It rounds out the lemon flavor without making it taste like lemon vanilla cake. Don’t skip it.
Optional but recommended:
Whipped cream — For serving. Or a dollop of Greek yogurt if you want to lighten it up. I usually just eat them plain, but the cream adds a nice visual contrast.
Lemon zest — For garnish. A little extra zest on top looks pretty and gives a fresh pop of aroma when you take the first bite.
Equipment Needed
You don’t need fancy gadgets for this. Here’s what I actually use:
8×8 inch baking pan — Line it with parchment paper. Do not skip this. These bars stick if you don’t line the pan. Leave an overhang on the sides so you can lift the whole block out once it’s cooled. It makes cutting so much easier.
Mixing bowls — Two medium bowls. One for the crust, one for the filling. You can use one if you wash it in between, but two is less messy.
Whisk — For the filling. You need to emulsify the eggs and lemon juice well so it’s smooth. A fork works in a pinch, but a whisk is better.
Microplane or grater — For the lemon zest. A microplane gets the fine, fluffy zest without the bitter white pith. If you use a regular grater, be careful not to get the white part.
Measuring cups and spoons — Standard stuff. Accuracy matters a bit more here than in bread baking, so don’t eyeball the flour.
Oven — Obviously. Preheated to 350°F (175°C).
How to Make It: Step-by-Step
Alright, let’s make these creamy lemon dessert bars! I’m walking you through exactly how I do it, including the little tricks I’ve picked up over the years.
Step 1: Prep Your Pan and Oven (2 minutes)
Preheat your oven to 350°F (175°C). Line your 8×8 inch baking pan with parchment paper, leaving an overhang on the short sides. This is your handle for lifting the bars out later. Spray it lightly with cooking spray if you want extra insurance, but the butter in the crust usually does the job.
Step 2: Make the Crust (5 minutes)
In a medium bowl, mix the melted butter, flour, and 1/4 cup sugar until it looks like wet sand. It should clump together when you squeeze it. Press this mixture firmly and evenly into the bottom of your prepared pan. Use the bottom of a measuring cup to pack it down tight. You want a solid base, not a loose crumble.
Step 3: Blind Bake the Crust (10-12 minutes)
Bake the crust for 10-12 minutes until it’s lightly golden around the edges. It won’t be fully brown, just set and slightly colored. Remove it from the oven and leave it there. You’ll pour the filling over the hot crust. This helps set the bottom layer and prevents a soggy crust.
Step 4: Make the Filling (5 minutes)
While the crust bakes, zest your lemons. Then, juice them until you have 1/2 cup of fresh juice. In a large bowl, whisk the eggs until they are light and frothy. Add the sweetened condensed milk, the fresh lemon juice, the lemon zest, the 1/2 cup sugar, and the vanilla. Whisk vigorously until everything is completely combined and smooth. There should be no lumps of sugar or streaks of egg.
Step 5: Assemble and Bake (30 minutes)
Pour the filling over the hot crust. It will bubble a bit—that’s normal. Smooth the top with a spatula. Return the pan to the oven and bake for 30 minutes. The edges should be set and slightly puffed, and the center should still have a slight jiggle. It will firm up as it cools, so don’t overbake it. If it’s fully firm in the oven, it’ll be dry and crumbly when cool.
Step 6: Cool Completely (Crucial Step!)
Let the bars cool in the pan on a wire rack for at least 30 minutes. Then, refrigerate them for at least 2 hours, preferably overnight. This is non-negotiable. The filling needs to set completely to get that creamy, sliceable texture. If you cut them warm, they’ll be a mushy mess.
Step 7: Slice and Serve
Once chilled, lift the bars out of the pan using the parchment paper. Use a sharp knife to cut into squares. Wipe the knife clean between cuts for neat edges. Garnish with extra lemon zest or a dollop of whipped cream if you’re feeling fancy.
Expert Tips & Tricks
Here’s everything I’ve learned from making these dozens of times. These tips will save you from my mistakes.
Zest First, Juice Second
Always zest your lemons before you juice them. If you juice first, the lemons roll around and are slippery, making zesting a nightmare. Also, roll the lemons firmly on the counter before cutting them. This breaks the internal membranes and gives you more juice.
Don’t Skip the Chill Time
I know it’s tempting to eat them right out of the oven. They smell amazing. But resist the urge. The filling is essentially a custard. It needs time to set. If you cut it too soon, it won’t hold its shape. Patience pays off with a perfect slice.
Room Temperature Eggs
If you add cold eggs to the warm condensed milk, you might get little curds of cooked egg white. It’s not dangerous, but it looks ugly and affects texture. Let your eggs sit out for 15-20 minutes before starting.
Use a Sharp Knife
A dull knife will crush the bars. A sharp chef’s knife or a serrated knife works best. Dip it in hot water and wipe it dry between cuts for the cleanest edges.
Adjusting for Sweetness
If you love super tart lemon bars, use 4 lemons instead of 3. If you have a sweet tooth, you can add an extra tablespoon of sugar, but I find the balance is perfect as written. The condensed milk is very sweet, so don’t go overboard.
Variations & Substitutions
Once you’ve nailed the basic version, here’s how you can mix it up. I’ve tried all of these.
Blueberry Lemon Bars
Fresh blueberries! Toss 1 cup of blueberries in 1 tablespoon of flour (to prevent sinking) and press them into the crust before pouring the filling. Bake as usual. The berries burst and create little pockets of jammy sweetness. It’s like summer in every bite.
Lavender Lemon Bars
Add 1 teaspoon of culinary lavender to the crust mixture. It gives a floral, sophisticated twist. Great for spring gatherings or bridal showers.
Coconut Lemon Bars
Replace half the flour in the crust with shredded coconut. And use coconut cream instead of some of the condensed milk for a tropical vibe. It pairs beautifully with the citrus.
Gluten-Free
Use a 1:1 gluten-free flour blend in the crust. The filling is naturally gluten-free, so you’re good to go. The texture is nearly identical to the original.
Dairy-Free Option
This is trickier because of the condensed milk. Use a dairy-free sweetened condensed milk (coconut-based ones exist now) and dairy-free butter. The flavor will be slightly different, but still delicious.
Serving & Storage
How to Serve:
I usually serve these straight from the fridge. They’re best cold, like a lemon bar cheesecake. Pair them with a cup of hot tea or coffee to cut through the richness. They’re also fantastic with a splash of sparkling water and a mint leaf for a refreshing dessert drink accompaniment.
Side Dishes:
These bars are rich, so I don’t usually serve them with a heavy meal. They’re perfect after a light lunch or as a dessert after a simple dinner. If you’re hosting a game day party, these are a great sweet contrast to spicy wings and sliders.
Storage Instructions:
Refrigerator: Store in an airtight container for up to 5 days. They actually get firmer and tastier after day 2. Layer them between parchment paper if you stack them to prevent sticking.
Freezer: Yes, you can freeze these! Wrap individual squares tightly in plastic wrap, then put them in a freezer bag. They’ll last for 2 months. Thaw in the fridge overnight. The texture holds up well, though the crust might get slightly softer. It’s still good.
Reheating: Don’t reheat these. They’re best served cold. Microwaving will melt the filling and make the crust soggy. Just eat them cold.
Nutrition Information
I’m not a nutritionist, but here’s the breakdown if you’re tracking. Keep in mind that these are rich, sweet bars, so portion control is key.
Per Serving (based on 16 bars):
- Calories: 280
- Protein: 4g
- Carbs: 42g
- Fiber: 0g
- Sugar: 35g
- Fat: 12g
- Saturated Fat: 7g
What’s Good:
- They’re gluten-free friendly (if you use GF flour).
- Vegetarian.
- Quick to make, so less temptation to overeat while baking.
What to Know:
- High in sugar due to the condensed milk and added sugar.
- Contains dairy and eggs.
- Not suitable for vegans or those with nut/dairy allergies (unless modified).
My Take:
Look, these are dessert. They’re meant to be indulgent. The creamy texture comes from the sugar and fat, which is exactly what makes them taste so good. Enjoy them as a special treat, not a daily snack. I usually have one square with my morning coffee or as a post-dinner bite. It’s satisfying without feeling like you need a nap afterward.
Final Thoughts
So that’s my go-to creamy lemon dessert bars! I’ve probably talked your ear off at this point, but when you make a recipe this often, you have a lot to say about it. These bars have saved me more times than I can count. They’re my answer to “I need to bring something to the potluck” or “I want to treat myself but don’t want to bake a whole cake.”
They’re bright, they’re creamy, and they’re incredibly easy. My friends always ask for the recipe, and I’m always happy to share. It’s one of those recipes that feels sophisticated but is actually just a few simple ingredients coming together.
Make it yours! Try adding berries, swap the crust for graham crackers, or just enjoy them plain. The best recipes are the ones you adapt to your tastes. If you make these, drop a comment and let me know what you think! I love hearing how recipes turn out in your kitchen. And if something doesn’t work, tell me that too—I’m here to help troubleshoot.
Happy baking! And I hope your kitchen smells half as good as mine does right now.
Frequently Asked Questions
Can I use bottled lemon juice?
You can, but I strongly recommend against it. Bottled lemon juice often has preservatives that give it a metallic or flat taste. Fresh lemon juice has a brightness and acidity that bottled juice just can’t match. If you’re in a real pinch, use the best bottled juice you can find, but fresh is always better for this recipe.
Why is my filling runny?
This usually happens for two reasons: either you didn’t bake it long enough, or you didn’t chill it long enough. The filling needs to cool completely to set. If you cut it warm, it will be soft. Also, make sure you’re using the correct amount of eggs. Too many eggs can make it runny, too few can make it dense. Follow the recipe closely.
Can I make these ahead of time?
Yes! In fact, they’re better made ahead. You can make them up to 3 days in advance. Store them in the fridge. If you’re making them for a party, make them the night before. This gives the flavors time to meld and ensures they’re fully set.
Can I freeze the crust before baking?
Yes, you can. Press the crust into the pan, wrap it tightly in plastic wrap, and freeze it for up to a month. When you’re ready to bake, let it thaw slightly, then add the filling and bake as directed. You might need to add 2-3 minutes to the baking time since the crust will be cold.
Why did my crust get soggy?
Make sure you’re baking the crust (blind baking) before adding the filling. Also, let the crust cool for a minute before pouring the filling over it. If the filling is too hot when it hits the crust, it can steam it and make it soggy. But usually, the main issue is not chilling the finished bars long enough.
Can I use a 9×13 pan?
You can, but you’ll need to double the recipe. The baking time will be similar, but keep an eye on it. These bars are meant to be made in an 8×8 pan for that perfect thickness. If you use a larger pan, they’ll be thinner and might bake faster.
What’s the best way to cut clean squares?
Use a sharp knife. Dip it in hot water and wipe it dry between each cut. This prevents the filling from sticking to the knife and tearing the bars. Also, make sure the bars are fully chilled. Cold bars cut much cleaner than room-temperature ones.
Pin This Recipe!


Creamy Lemon Dessert Bars
- Total Time: 1 hour 5 minutes
- Yield: 16 servings 1x
Description
An accidental discovery of silky, custard-like lemon bars made with sweetened condensed milk for a rich, tangy flavor and luxurious texture that is easier than pie and perfect for make-ahead entertaining.
Ingredients
- 1/2 cup (113g) unsalted butter, melted
- 1 cup (125g) all-purpose flour
- 1/4 cup (50g) granulated sugar
- 1 can (14oz / 397g) sweetened condensed milk
- 3–4 large lemons (about 1/2 cup juice and 2 tbsp zest)
- 3 large eggs, room temperature
- 1/2 cup (100g) granulated sugar
- 1 teaspoon vanilla extract
- Optional: Whipped cream or Greek yogurt for serving
- Optional: Extra lemon zest for garnish
Instructions
- Preheat oven to 350°F (175°C). Line an 8×8 inch baking pan with parchment paper, leaving an overhang on the short sides for easy removal.
- In a medium bowl, mix melted butter, flour, and 1/4 cup sugar until it resembles wet sand. Press firmly and evenly into the bottom of the prepared pan.
- Blind bake the crust for 10-12 minutes until lightly golden around the edges. Remove from oven and leave it there.
- While the crust bakes, zest and juice the lemons. In a large bowl, whisk eggs until light and frothy.
- Add sweetened condensed milk, fresh lemon juice, lemon zest, 1/2 cup sugar, and vanilla to the eggs. Whisk vigorously until completely smooth with no lumps.
- Pour the filling over the hot crust. Bake for 30 minutes until edges are set and slightly puffed, but the center still has a slight jiggle.
- Cool in the pan on a wire rack for at least 30 minutes.
- Refrigerate for at least 2 hours, preferably overnight, to allow the filling to set completely.
- Lift bars out using parchment paper. Cut into squares with a sharp knife, wiping the knife between cuts for clean edges.
- Serve chilled, optionally topped with whipped cream or extra zest.
Notes
For best results, use fresh lemon juice and zest rather than bottled. Ensure eggs are at room temperature to prevent curdling. The bars must be chilled completely before cutting to achieve the proper texture. They can be stored in the refrigerator for up to 5 days or frozen for up to 2 months.
- Prep Time: 20 minutes
- Cook Time: 45 minutes
- Category: Dessert
- Cuisine: American
Nutrition
- Serving Size: 1 bar
- Calories: 280
- Sugar: 35
- Fat: 12
- Saturated Fat: 7
- Carbohydrates: 42
- Protein: 4
Keywords: lemon bars, creamy lemon dessert, sweetened condensed milk, easy dessert, make-ahead dessert, gluten-free option, summer dessert


