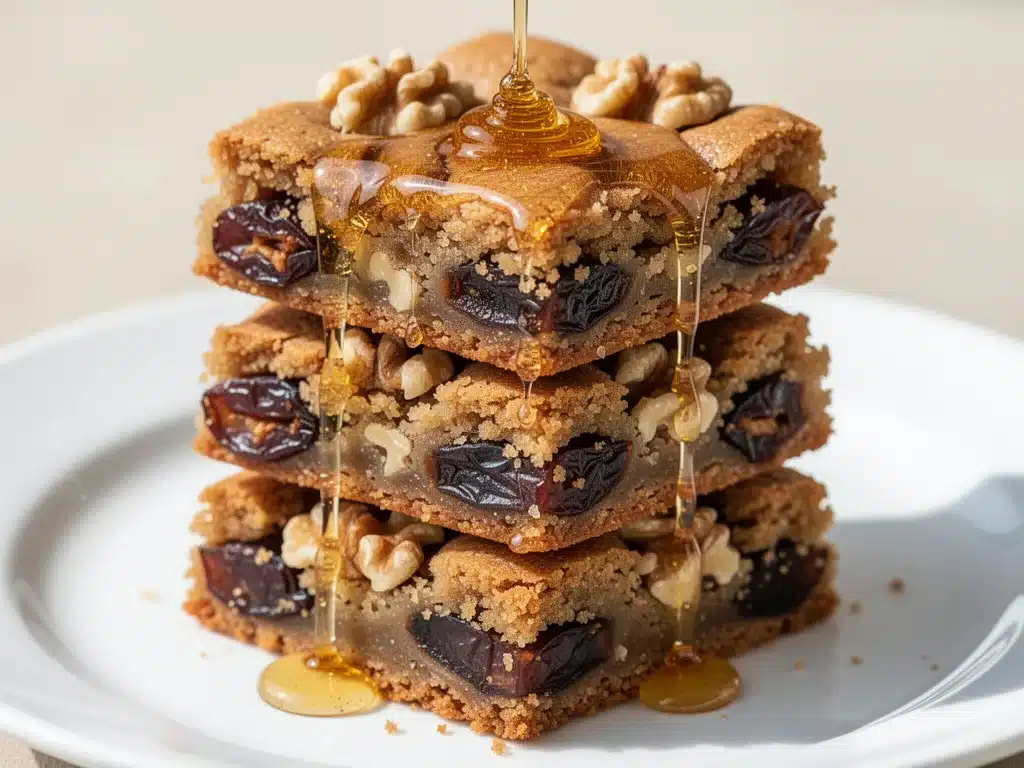
Last Saturday, I was standing in the dessert aisle of a grocery store, staring at a plastic-wrapped tray of “premium” date and walnut bars. They cost $8.99. Eight dollars and ninety-nine cents for six sad, dry squares that tasted like cardboard and regret. I put them back. Immediately.
I went home and raided my pantry. I had a bag of Medjool dates that were getting a little sticky, a jar of walnuts that had been sitting there since Thanksgiving, and a bottle of honey that smelled like spring. I figured, what’s the worst that could happen? Worst case scenario, I feed it to the birds.
Best case scenario? I made the most incredible, chewy, sticky, naturally sweet dessert bars I’ve ever tasted. And they only have four ingredients.
That’s right. Four. Not ten. Not twelve with obscure spices. Four. This dates and walnut dessert bars recipe has become my secret weapon for when I need to impress guests without spending hours in the kitchen. It’s also my go-to when I’m craving something sweet but want to avoid the refined sugar crash. The texture is like a rich, chewy brownie but with a deeper, caramel-like flavor from the dates. The honey drizzle on top? That’s the cherry on top. Or should I say, the honey drizzle on top.
I’ve made these at least a dozen times since that grocery store epiphany. I’ve tweaked the ratios, tested different types of walnuts, and even tried swapping honey for maple syrup (more on that later). Every single time, the result is the same: empty plate, satisfied guests, and a whole lot of “how did you make this?” questions.
If you’re tired of complicated dessert recipes that require a stand mixer and a trip to the specialty store, you’re going to love this. It’s simple, it’s wholesome, and it tastes like it came from a high-end bakery. But it’s actually easier than making toast.
Why You’ll Love This Dates and Walnut Dessert Bars Recipe
There are about ten reasons I keep making these bars, but here are the big ones that keep me coming back to the oven.
Stupid Simple
Seriously, if you can use a food processor and press dough into a pan, you can make this. I’ve walked my teenage son through it over FaceTime while he was at college. He messaged me afterward saying, “Mom, I made dessert. I am a functioning adult.” These bars are that easy. No creaming butter. No whipping egg whites. Just blend, press, bake.
Only Four Ingredients
Okay, technically you could count the honey drizzle as a fifth, but let’s be real—honey is just honey. The base is dates, walnuts, and a tiny bit of butter or oil. That’s it. This means you don’t need to run to the store. You probably have everything in your kitchen right now. I keep dates and walnuts stocked specifically so I can throw these together on a whim.
Naturally Sweetened
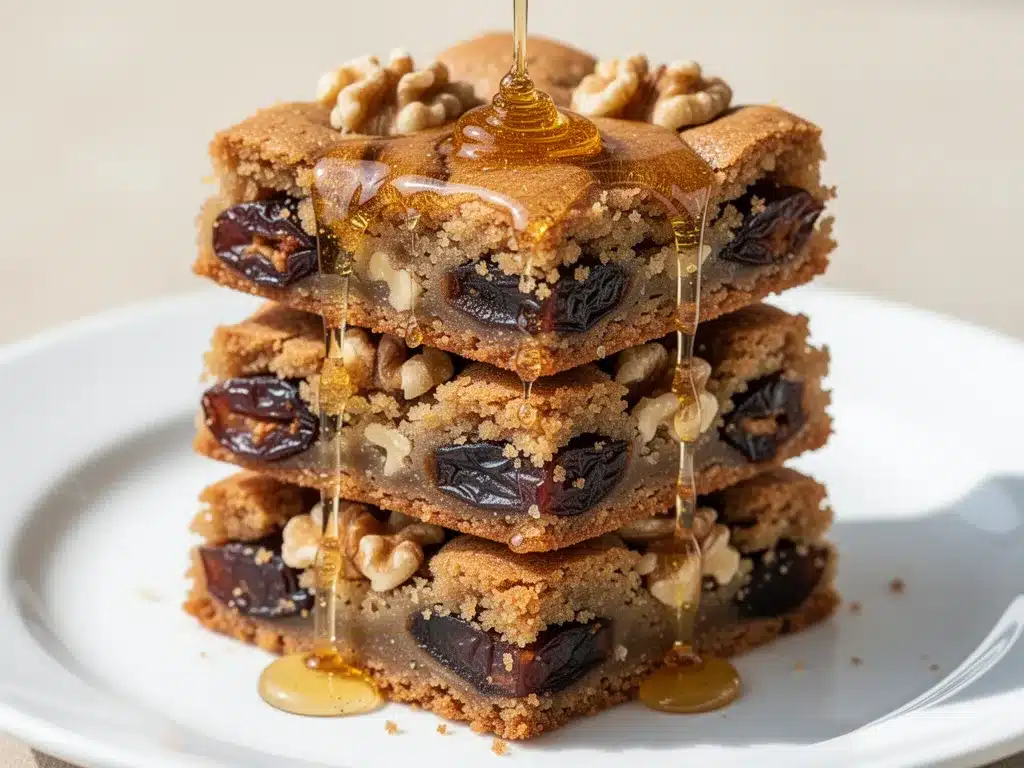
This is the biggest selling point for me. There’s no white sugar, no brown sugar, no maple syrup in the base (though you can use it). The sweetness comes entirely from the Medjool dates. They’re nature’s candy. They’re chewy, they’re sweet, and they’re packed with fiber. My kids don’t even realize they’re eating something “healthy” until I tell them. Then they act surprised, like I’ve tricked them. Which, in a way, I have.
Texture Heaven
Most date bars are either too dry or too gooey. This recipe hits the sweet spot. The walnuts add a crucial crunch that contrasts with the soft, sticky date mixture. After baking, they set up just enough to hold their shape but stay chewy. They’re not hard like a biscuit, and they’re not liquid like a custard. Perfect.
Makes Amazing Leftovers
These bars actually taste better the next day. The flavors meld together, and the dates soften even more. I deliberately make a full pan so I have dessert ready for the next three days. They store beautifully in the fridge, and they travel well to potlucks or office parties. I’ve taken these to work, and people always ask for the recipe. It’s become my unofficial office currency.
Budget-Smart
Feeds 12-16 people for under $10. Dates and walnuts are affordable, especially if you buy them in bulk. That’s less than $1 per serving. Compare that to $8.99 for the grocery store version, and you’re saving serious money. Plus, you’re making something from scratch that tastes 100 times better.
This is my go-to when I need a dessert to just work. No complicated techniques, no weird ingredients, just reliable, delicious food that makes everyone happy. And it’s ready in under an hour.
Ingredients You’ll Need
Here’s the best part: you probably have most of this already. This dates and walnut dessert bars recipe relies on whole, simple ingredients. I’m particular about three things here, and I’ll tell you exactly why.
For the Base:
Medjool Dates (1.5 cups, pitted / about 300g) — This is the star. Do not use Deglet Noor dates. They’re too small, too dry, and too hard to blend into a smooth paste. Medjool dates are large, soft, and naturally sticky. Look for them in the produce section or the dried fruit aisle. If they’re a bit dry, soak them in warm water for 10 minutes, then drain well. I always buy the big bags of Medjool dates—they’re worth the extra cost.
Walnuts (1.5 cups, chopped / about 180g) — Walnuts add the necessary crunch and earthy flavor. Toasting them first is optional but recommended. It brings out their oils and makes them more flavorful. I like to chop them roughly; you don’t want tiny pieces, you want bits you can chew. Pecans work too, but walnuts are traditional and have a better texture for this.
Butter (2 tablespoons / 30g) — I use unsalted butter. It adds richness and helps bind the dates and walnuts together. Melted butter works best. If you’re dairy-free, you can use coconut oil, but it will change the flavor slightly. Olive oil works too, but it’s a bit too savory for my taste. Stick with butter or coconut oil for the best results.
Vanilla Extract (1 teaspoon) — Just a splash. It rounds out the flavors and adds a subtle warmth. Don’t skip it. It makes a difference.
For the Honey Drizzle:
Honey (3-4 tablespoons / 45-60ml) — This is for the topping. Use good quality honey if you can. Local honey is great because it has more flavor. If you don’t have honey, you can use maple syrup, but the consistency will be thinner. Agave nectar is another option, but again, it’s less sticky. The honey drizzle is what makes these bars look fancy and taste even sweeter.
Salt (a pinch) — I add a tiny pinch of flaky sea salt to the honey drizzle. It cuts the sweetness and makes the flavors pop. It’s a small detail, but it elevates the whole bar.
Optional Add-ins:
- Shredded Coconut (for garnish) — I sprinkle this on top after drizzling. It adds a nice visual contrast and a bit of tropical flavor.
- Crushed Walnuts (for garnish) — More walnuts on top for extra crunch. I like to press them into the drizzle while it’s still wet.
- Dark Chocolate Chips — If you’re a chocoholic, sprinkle these over the bars before baking. They’ll melt slightly and create little pockets of chocolate. Delicious.
Personal Tips:
- Date Substitution: If you can’t find Medjool dates, you can use regular dates, but you’ll need to soak them longer and blend them with a bit more liquid.
- Walnut Substitution: Pecans or almonds work, but walnuts are the best match for the texture. Cashews won’t work—they’re too soft.
- Honey Tip: If your honey is crystallized, warm it up in a bowl of hot water for a few minutes. It’ll be easier to drizzle.
Equipment Needed
You don’t need fancy equipment for this. Here’s what I actually use.
Food Processor — This is essential. You need to blend the dates into a smooth paste. A blender might work, but it’s harder to get everything smooth. I use my Cuisinart food processor—it’s been with me for years and it’s still the best. If you don’t have one, you can chop the dates very finely and mix them by hand, but it will take forever and your arms will hurt.
8×8 Inch Baking Pan — A square pan works best for these bars. You can use a 9×9 pan, but the bars will be thinner and might dry out. I use an 8×8 pan and line it with parchment paper. This is crucial for easy removal. Grease the parchment lightly with butter or oil.
Parchment Paper — Don’t skip this. These bars are sticky. Without parchment, you’ll be scraping them out of the pan forever. Line the pan with enough parchment to overhang the sides so you can lift the whole block out after baking.
Small Saucepan or Microwave-Safe Bowl — For melting the butter and warming the honey. I usually microwave the honey for 15 seconds to make it runnier.
Sharp Knife — For chopping the walnuts and cutting the bars. A serrated knife works best for cutting through the sticky bars without squishing them.
Measuring Cups and Spoons — Standard stuff. Dollar store versions work fine.
How to Make It: Step-by-Step
Alright, let’s make this! I’m walking you through exactly how I do it, including the little tricks I’ve picked up.
Step 1: Prep Your Pan and Oven (5 minutes)
Preheat your oven to 350°F (175°C). Line your 8×8 inch baking pan with parchment paper. Leave an overhang on the long sides so you can lift the bars out later. Lightly grease the parchment with butter or cooking spray. This ensures nothing sticks.
Step 2: Toast the Walnuts (5 minutes)
While the oven heats, toast the walnuts. You can do this in a dry skillet over medium heat for 3-4 minutes, stirring frequently, until they smell fragrant. Or, spread them on a baking sheet and toast in the oven for 5-7 minutes. Let them cool completely, then chop them roughly. Don’t make them too fine—you want chunks.
Step 3: Blend the Dates (3-5 minutes)
Add the pitted Medjool dates to your food processor. Pulse until they break down into a coarse meal. Then, run the processor continuously until a smooth paste forms. This might take a minute or two. Scrape down the sides as needed. If the dates are very dry, add a teaspoon of water at a time until they blend smoothly. The paste should be sticky and hold together when you pinch it.
Step 4: Mix the Dough (2 minutes)
Add the chopped walnuts, melted butter, and vanilla extract to the date paste. Pulse a few times to combine. You don’t want to over-process this, or the walnuts will turn into dust. You want distinct pieces of walnut throughout. The mixture should look like a thick, chunky dough.
Step 5: Press into Pan (3 minutes)
Transfer the mixture to your prepared pan. Use your hands or the back of a spoon to press it firmly and evenly into the pan. This is important—if it’s too loose, the bars won’t hold together. Press it down hard. I usually use my fingers to get it into the corners and edges. It should be compact and smooth.
Step 6: Bake (20-25 minutes)
Bake in the preheated oven for 20-25 minutes. The edges should turn golden brown, and the center should feel set but still slightly soft. Don’t overbake them, or they’ll become hard. They will firm up as they cool.
Step 7: Cool and Drizzle (15 minutes + cooling time)
Remove the pan from the oven and let the bars cool in the pan for 15 minutes. While they cool, warm the honey in the microwave for 15-20 seconds until it’s runny. Drizzle the honey over the warm bars. Use a fork or a spoon to create a zigzag pattern. Sprinkle with a pinch of flaky sea salt if desired.
Step 8: Cut and Serve
Let the bars cool completely in the pan. This is the hardest part. Once cooled, lift the entire block out of the pan using the parchment overhang. Place on a cutting board and slice into 12-16 squares. Use a sharp knife. For clean cuts, wipe the knife between slices. Serve and enjoy!
Total Time: About 45 minutes (10 minutes active, 35 minutes mostly hands-off)
Built-in Troubleshooting:
- Mixture too dry? Add a teaspoon of water or more melted butter.
- Mixture too wet? Add more chopped walnuts or a tablespoon of almond flour.
- Bars won’t hold together? You didn’t press them down hard enough, or you didn’t let them cool completely.
Expert Tips & Tricks
Here’s everything I’ve learned from making these dozens of times. These tips will save you from my mistakes.
Use Medjool Dates
I can’t stress this enough. Regular dates are too dry and hard to blend. Medjool dates are large, soft, and naturally sticky. They blend into a smooth paste easily. If you use other dates, soak them in hot water for 20 minutes first, then drain very well.
Toast Your Walnuts
This is a game-changer. Raw walnuts are fine, but toasted walnuts have a deeper, richer flavor. It takes two minutes and makes the bars taste like they came from a bakery. Just keep an eye on them so they don’t burn.
Press Firmly
The key to good bars is compression. Press the mixture down hard. If it’s loose, it will crumble when you cut it. I usually press with my fingers, then use a flat-bottomed glass to smooth the top.
Don’t Overbake
These bars continue to cook as they cool. If you bake them until they’re hard in the oven, they’ll be rock-hard when cool. Remove them when the edges are golden but the center still looks slightly soft.
Warm the Honey
Cold honey is thick and gloopy. Warm it up for 15 seconds in the microwave. It’ll drizzle beautifully and create thin, elegant lines. If it’s too thick, add a teaspoon of warm water to thin it out.
Cool Completely
I know it’s tempting to cut into them warm, but wait. The bars need to set. If you cut them too soon, they’ll be messy and sticky. Let them cool in the pan for at least 15 minutes, preferably 30.
Variations & Substitutions
Once you’ve nailed the basic version, here’s how you can mix it up. I’ve tried all of these.
Pecan Date Bars
Swap the walnuts for pecans. It’s a classic combination, especially in the South. Pecans are sweeter and softer than walnuts, so the texture will be slightly different. Still delicious.
Almond Date Bars
Use almonds instead of walnuts. For extra flavor, use almond extract instead of vanilla. It tastes like an almond joy bar. My kids love this version.
Coconut Date Bars
Add ½ cup of shredded coconut to the date mixture. Top with more coconut after drizzling. It adds a tropical twist and a nice chewy texture.
Chocolate Date Bars
Stir ½ cup of dark chocolate chips into the date mixture before pressing into the pan. Or, drizzle melted chocolate over the honey drizzle. Double chocolate date bars. Indulgent.
Maple Syrup Drizzle
Replace the honey with maple syrup. It’s less sweet and has a deeper flavor. Use pure maple syrup, not the syrupy stuff. It works well, especially in the fall.
Dairy-Free
Replace the butter with coconut oil. It’s solid at room temperature, so it works the same way. The bars will be slightly more delicate, but still tasty.
Gluten-Free
This recipe is naturally gluten-free. Just make sure your dates and walnuts are certified gluten-free if you have celiac disease. Cross-contamination is rare but possible.
Vegan
Use coconut oil instead of butter and maple syrup or agave instead of honey. The base is already vegan. The only non-vegan ingredient is the honey.
Serving & Storage
How to Serve:
I usually serve these bars at room temperature. They’re perfect with a cup of coffee or tea. I also like to serve them with a dollop of whipped cream or a scoop of vanilla ice cream. It’s a nice contrast to the chewy bars. For holidays, I arrange them on a platter with fresh berries. They look beautiful.
Side Dishes:
These bars are a standalone dessert. They’re rich and sweet, so they don’t need much else. But if you’re having a dinner party, they pair well with a light fruit salad or a cheese board. I’ve served them alongside grilled peach cobbler for a double dessert situation, and it was a hit.
Toppings Bar:
When I have guests, I put out: extra honey, flaky sea salt, crushed walnuts, shredded coconut, and chocolate chips. Everyone customizes their bar. It’s fun and interactive.
Storage Instructions:
Refrigerator: Store in an airtight container for up to 1 week. The bars will firm up in the fridge, which I actually prefer. They’re easier to cut and less sticky. Line the layers with parchment paper to prevent sticking.
Freezer: These bars freeze well. Wrap individual bars in plastic wrap, then place in a freezer bag. They’ll last for up to 3 months. Thaw in the fridge overnight. They taste just as good as fresh.
Room Temperature: You can store them at room temperature for 2-3 days, but they will get sticky in the heat. I prefer the fridge anyway.
Pro tip: If the bars get too sticky, chill them for 10 minutes before cutting. The cold helps the butter and honey set, making clean cuts possible.
Nutrition Information
I’m not a nutritionist, but here’s the breakdown if you’re tracking.
Per Serving (based on 12 servings):
- Calories: 180
- Protein: 3g
- Carbs: 22g
- Fiber: 2g
- Sugar: 18g
- Fat: 10g
- Saturated Fat: 2g
- Cholesterol: 5mg
- Sodium: 10mg
- Calcium: 30mg
What’s Good:
- High in fiber from the dates
- Good source of healthy fats from walnuts
- No refined sugar
- Gluten-free and vegan options available
What to Know:
- Higher in sugar than you might think, but it’s natural sugar from dates
- Calorie-dense due to nuts and dates
- Contains tree nuts
My Take:
Look, these are dessert bars. They’re sweet and rich. But they’re made with whole foods, so they’re not empty calories. The fiber from the dates and the healthy fats from the walnuts help balance the sugar. I eat one or two at a time. It’s a treat, not a meal. But it’s a much healthier treat than a cupcake or a cookie.
Final Thoughts
So that’s my dates and walnut dessert bars recipe! I’ve probably talked your ear off at this point, but when you make a recipe this often, you have a lot to say about it.
This has saved me from buying overpriced, dry dessert bars so many times. It’s my answer to “what’s for dessert?” when I want something sweet but healthy. My kids are happy, my husband is happy, and I’m happy because I’m not stressed about cooking.
Make it yours! Try different nuts, swap the honey for maple syrup, add chocolate chips. The best recipes are the ones you adapt to your family’s tastes. And if you’re looking for more easy dessert ideas, check out my grilled peach cobbler—it’s another simple, seasonal favorite.
If you make this, drop a comment and let me know what you think! I love hearing how recipes turn out in your kitchen. And if something doesn’t work, tell me that too—I’m here to help troubleshoot.
Happy baking! And I hope your kitchen smells half as good as mine does right now.
Frequently Asked Questions
Can I use Deglet Noor dates instead of Medjool?
You can, but the texture will be different. Deglet Noor dates are smaller, drier, and harder. You’ll need to soak them in warm water for 20-30 minutes before blending, then drain them very well. Medjool dates are soft and sticky, so they blend easier. If you use Deglet Noor, you might need to add a teaspoon of water or butter to help it blend.
Why did my bars fall apart?
This usually happens if you didn’t press the mixture down firmly enough, or if you cut them while they were still warm. The bars need to set. Press the mixture down hard into the pan, and let them cool completely in the pan before cutting. If they’re too loose, you might need a bit more butter or a tablespoon of almond flour to help bind them.
Can I make these ahead of time?
Absolutely. These bars actually taste better the next day. You can make them up to 3 days ahead and store them in the fridge. Or, you can freeze them for up to 3 months. I usually make a double batch on Sunday so I have dessert ready for the week.
Can I freeze the honey drizzle?
The honey itself doesn’t freeze well—it becomes grainy. But the bars freeze well. If you want to freeze them, drizzle the honey after they’re thawed. Or, just skip the honey drizzle until serving time.
Are these bars gluten-free?
Yes, this recipe is naturally gluten-free. Just make sure your dates and walnuts are certified gluten-free if you have celiac disease. Cross-contamination is rare, but it’s good to be safe.
Can I use almond butter instead of walnuts?
You can, but the texture will be different. Almond butter will make the bars smoother and more fudgy. I recommend using a mix—half almond butter, half chopped walnuts. It gives you the best of both worlds.
How do I store these bars?
Store them in an airtight container in the fridge for up to 1 week. They’ll firm up in the fridge, which I prefer. You can also freeze them for up to 3 months. Wrap individual bars in plastic wrap, then place in a freezer bag.
Pin This Recipe!
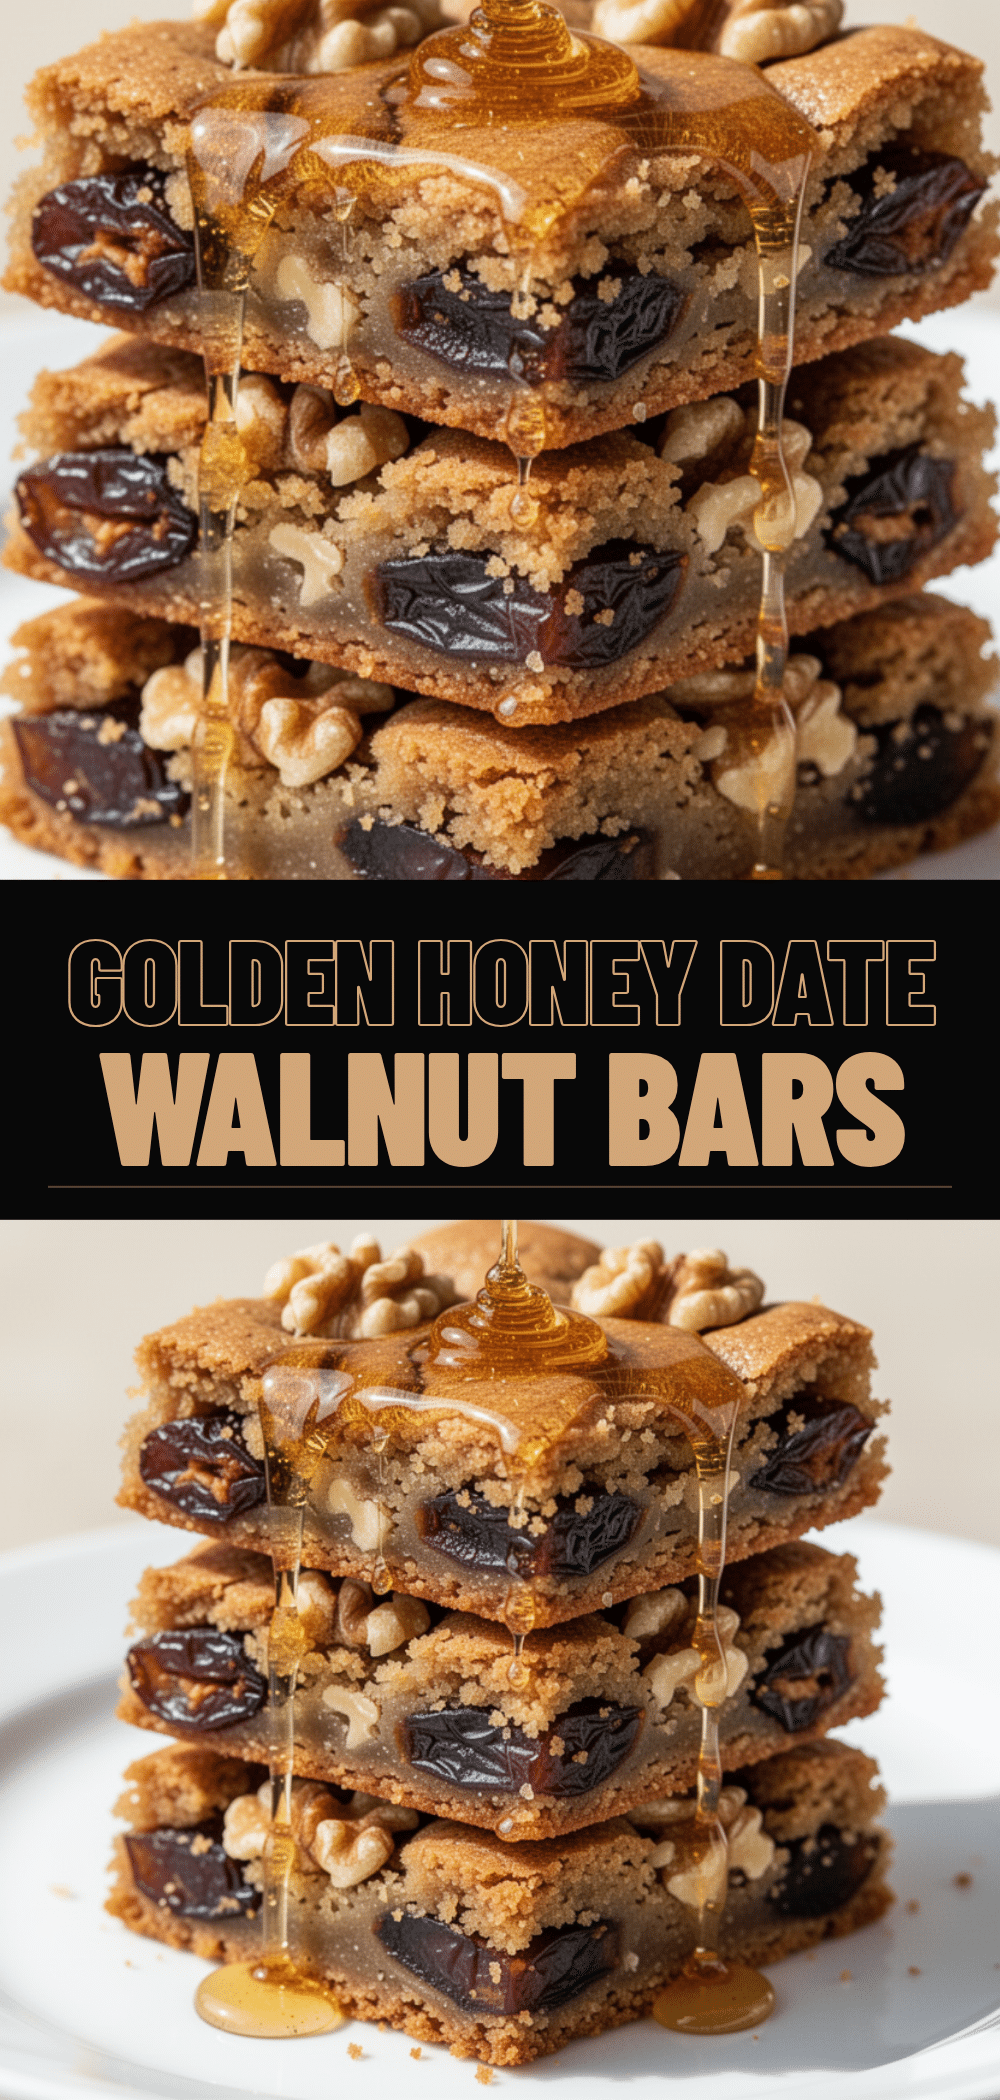
Dates and Walnut Dessert Bars: Best Easy 4-Ingredient Recipe
- Total Time: 45 minutes
- Yield: 12-16 servings 1x
Description
These chewy, naturally sweet dessert bars require only four simple ingredients: Medjool dates, walnuts, butter, and vanilla. They are easy to make, budget-friendly, and taste like a high-end bakery treat without the refined sugar.
Ingredients
- 1.5 cups Medjool dates, pitted (about 300g)
- 1.5 cups walnuts, chopped (about 180g)
- 2 tablespoons unsalted butter, melted
- 1 teaspoon vanilla extract
- 3–4 tablespoons honey (for drizzle)
- Pinch of flaky sea salt (for drizzle)
Instructions
- Preheat oven to 350°F (175°C). Line an 8×8 inch baking pan with parchment paper, leaving an overhang on the long sides, and lightly grease the parchment.
- Toast the walnuts in a dry skillet over medium heat for 3-4 minutes or in the oven for 5-7 minutes until fragrant. Let cool completely, then chop roughly.
- Add the pitted Medjool dates to a food processor and pulse until they break down into a coarse meal. Run continuously until a smooth, sticky paste forms. If dry, add a teaspoon of water at a time.
- Add the chopped walnuts, melted butter, and vanilla extract to the date paste. Pulse a few times to combine, ensuring distinct walnut pieces remain.
- Transfer the mixture to the prepared pan. Press firmly and evenly into the pan using your hands or the back of a spoon to ensure the bars hold together.
- Bake for 20-25 minutes until the edges are golden brown and the center feels set but slightly soft.
- Remove from oven and let cool in the pan for 15 minutes. Meanwhile, warm the honey in the microwave for 15-20 seconds until runny.
- Drizzle the warm honey over the warm bars in a zigzag pattern and sprinkle with a pinch of flaky sea salt.
- Let the bars cool completely in the pan (at least 30 minutes) to set. Lift out using the parchment overhang, place on a cutting board, and slice into 12-16 squares.
Notes
Use Medjool dates for best texture; regular dates may require soaking. Toasting walnuts enhances flavor. Press the mixture firmly into the pan to prevent crumbling. Cool completely before cutting for clean slices. Store in the fridge for up to 1 week or freeze for up to 3 months.
- Prep Time: 10 minutes
- Cook Time: 25 minutes
- Category: Dessert
- Cuisine: American
Nutrition
- Serving Size: 1 bar
- Calories: 180
- Sugar: 18
- Sodium: 10
- Fat: 10
- Saturated Fat: 2
- Carbohydrates: 22
- Fiber: 2
- Protein: 3
Keywords: dates, walnuts, dessert bars, healthy dessert, gluten-free, vegan option, easy recipe, no-bake base, natural sweetener


