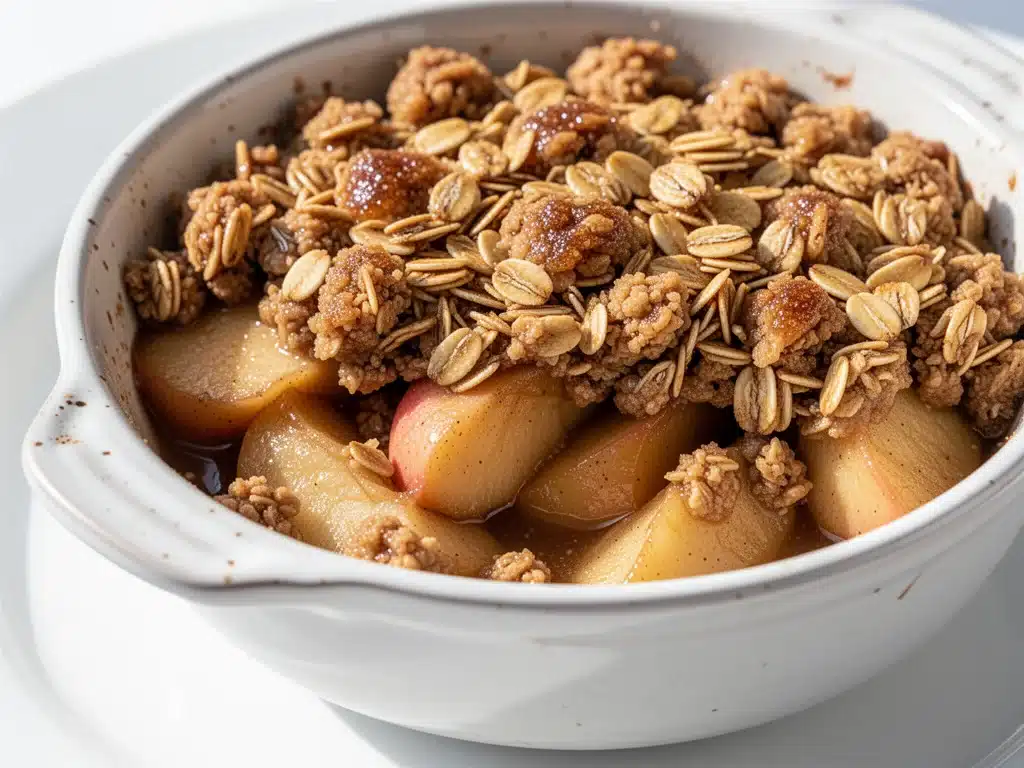
Last October, I was standing in my kitchen at 9 PM on a Tuesday, feeling that specific kind of exhaustion that comes from trying to be a productive adult. The house was quiet. The leaves were turning that perfect shade of burnt orange outside my window. And I had zero energy to bake a complicated pie with a flaky crust that might or might not hold together. I just wanted something warm. Something that smelled like my grandmother’s house. Something that tasted like fall.
So I threw together what I thought would be a mediocre oatmeal crumble. I grabbed some apples I’d been meaning to use up, threw in some brown sugar, and topped it with a mix of oats and butter. I didn’t measure much. I just cooked it. Thirty minutes later, the entire house smelled like caramelized apples and cinnamon. I took a spoonful out, waited for it to cool, and took a bite.
It was perfect.
That accidental Tuesday night dessert became my obsession. I’ve made this easy fall apple crisp at least forty times in the last two years. I’ve tested it with Honeycrisp, Granny Smith, Fuji, and even some weird local variety I found at a farm stand. I’ve tried gluten-free oats, vegan butter, and coconut sugar. Through all the experiments, one thing has stayed constant: this is hands-down the best warm autumn dessert recipe I’ve ever created. It’s forgiving, it’s delicious, and it requires zero special skills. Just chop, mix, and bake.
If you’ve ever been intimidated by the idea of making a dessert from scratch, or if you’re looking for a cozy treat to share with friends after a game day buffalo chicken sliders dinner, this is it. It’s the recipe that turns a regular Tuesday into a special occasion. Let me show you how to make it.
Why You’ll Love This Recipe
There are a lot of apple crisp recipes out there. Some are too sweet. Some have soggy bottoms. Some require you to make a pastry dough that takes forever. This one? It’s different. Here’s why I keep coming back to it:
Stupid Simple — Seriously, if you can peel an apple, you can make this. There’s no rolling dough. No complex techniques. Just tossing fruit in a bowl and sprinkling a crumble on top. I’ve walked my teenage nephew through it over FaceTime, and he nailed it on the first try.
Lightning Fast — From peel to plate, this takes about 45 minutes. But only 15 of those minutes are active work. The rest is just the oven doing its job. I make this on weeknights when I want dessert but don’t want to spend the evening in the kitchen.
Uses What You Have — You probably have most of the topping ingredients already. Flour, oats, brown sugar, butter, cinnamon. The apples are the only “fresh” item, and you can use whatever is in season or on sale. This is my go-to for using up apples before they go bad.
Perfect Texture Contrast — This is the big one. I’ve spent years tweaking the ratio of oats to flour to butter to get that perfect crunch. The topping stays crisp even as it sits, while the apples underneath become tender and juicy. It’s the kind of texture that makes people close their eyes and sigh.
Makes Amazing Leftovers — Actually tastes better the next day. The flavors meld together, and the apples get even softer. I deliberately make extra for breakfast. Serve it warm with a scoop of vanilla ice cream, and you’ll understand why this is my favorite comfort food.
This is my answer to “what’s for dessert?” when I need something that just works. No fancy gadgets, no weird ingredients, just reliable, delicious food that makes everyone happy.
Ingredients You’ll Need
Here’s the best part: you probably have most of this already in your pantry. The beauty of an apple crisp is its simplicity. I’m particular about three ingredients here, and I’ll tell you exactly why.
For the Apples
Apples (6-7 medium, about 3 pounds / 1.4 kg) — This is the star. I recommend a mix of tart and sweet for the best flavor. My favorite combo is 3 Honeycrisp (for sweetness and crunch) and 3 Granny Smith (for tartness and structure). Avoid Red Delicious—they turn to mush. You want apples that hold their shape but get tender. Peel them? Yes, please. The skin can get chewy in a crisp. Core them and slice them into ½-inch thick wedges.
Lemon juice (1 tablespoon / 15ml) — A squeeze of fresh lemon prevents the apples from browning while you prep. It also adds a little brightness that cuts through the sweetness. Fresh is best, but bottled works in a pinch.
Granulated sugar (2 tablespoons / 25g) — Just a little bit to help the apples release their juices and start caramelizing. Don’t skip this, even if you’re using sweet apples.
Cinnamon (1 teaspoon / 2g) — Ground cinnamon. The classic apple flavor. If you’re feeling fancy, add a pinch of nutmeg or allspice, but keep it simple.
Vanilla extract (1 teaspoon / 5ml) — Adds depth. Real vanilla, not imitation. It makes the apples taste richer.
For the Crisp Topping
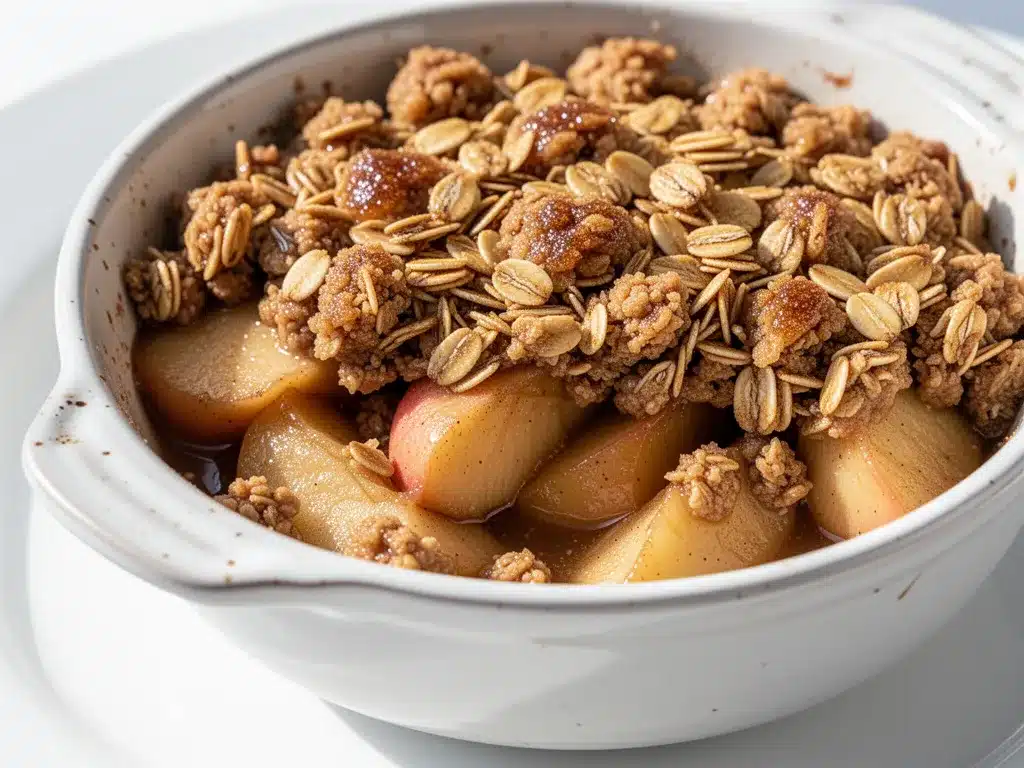
Old-fashioned rolled oats (1 cup / 90g) — Not instant oats, not steel-cut. Rolled oats give that classic chewy-crunchy texture. They absorb moisture without turning into paste. I buy the big canister—oats are cheap and last forever.
All-purpose flour (1 cup / 125g) — This binds the topping together so it forms clumps. If you want to make this gluten-free, swap this for a 1:1 gluten-free flour blend. I’ve tested King Arthur Measure for Measure, and it works perfectly.
Brown sugar (1 cup / 200g, packed) — This is non-negotiable. Brown sugar adds molasses flavor and moisture. Light or dark brown sugar both work, but dark has a deeper, more caramel-like taste. I prefer dark brown sugar for fall vibes.
Unsalted butter (½ cup / 115g, cold and cubed) — Cold butter is the secret to a crisp topping. When the cold butter hits the hot oven, it melts slowly, creating steam pockets that make the topping flaky and crunchy. Use real butter, not margarine. It makes a huge difference in flavor.
Cinnamon (1 teaspoon / 2g) — For the topping too. Double the cinnamon love.
Nutmeg (¼ teaspoon / 0.5g) — Just a pinch. It adds warmth and complexity. Don’t overdo it, or it’ll taste like pumpkin pie.
Salt (¼ teaspoon / 1.5g) — Salt is crucial. It balances the sweetness and makes the cinnamon pop. Don’t skip it.
Optional Add-ins:
I love adding ½ cup of chopped pecans or walnuts to the topping. They add a nice earthy crunch. I also occasionally stir in ¼ cup of raisins or dried cranberries into the apple layer for a chewy surprise. It’s my way of keeping it interesting.
Equipment Needed
You don’t need fancy equipment for this. Here’s what I actually use:
9×13-inch baking dish — A standard glass or ceramic dish works best. It distributes heat evenly. I use a Pyrex dish because I can see the browning on the bottom. Metal pans work too but can brown the edges too quickly. If you only have an 8×8 dish, you’ll need to double the recipe or it will overflow.
Large mixing bowl — For tossing the apples. I use a big stainless steel bowl. It’s easy to wash and doesn’t tip over.
Medium mixing bowl — For the topping. Just something big enough to mix the flour, oats, and butter.
Peeler — A Y-peeler is faster than a knife. I use my OXO peeler—it’s sharp and comfortable. If you don’t have one, a sharp knife works fine.
Knife and cutting board — For slicing the apples. I like a chef’s knife for control.
Pastry cutter or fork — To cut the butter into the dry ingredients. I use my hands—it’s faster and warms the butter slightly, which helps it mix. But a fork or pastry cutter works if you prefer.
Measuring cups and spoons — Standard stuff. Dollar store versions work fine.
Optional but nice:
– Food processor — If you’re making a large batch, you can pulse the topping ingredients in a food processor for 10 seconds. It’s faster than mixing by hand.
– Wire rack — For cooling the crisp. It prevents the bottom from getting soggy.
How to Make It: Step-by-Step
Alright, let’s make this! I’m walking you through exactly how I do it, including the little tricks I’ve picked up over the years.
Step 1: Prep the Oven and Pan (5 minutes)
Preheat your oven to 375°F (190°C). Grease your 9×13-inch baking dish with a little butter or cooking spray. I use butter because it adds flavor. If you’re using a glass dish, you don’t strictly need to grease it, but it helps with cleanup. Set the dish aside.
Step 2: Prep the Apples (10 minutes)
Wash, peel, core, and slice your apples. I slice them into ½-inch thick wedges. They don’t need to be perfect—rustic slices are fine. Toss the apple slices with lemon juice, granulated sugar, 1 teaspoon cinnamon, and vanilla extract. Mix until the apples are evenly coated. The lemon juice keeps them from turning brown while you work. If you’re adding raisins or nuts to the bottom layer, stir them in now.
Step 3: Spread the Apples
Pour the apple mixture into the prepared baking dish. Spread them out evenly. They should form a single layer, but don’t stress if they pile up a little. The heat will soften them down.
Step 4: Make the Topping (5 minutes)
In a medium bowl, whisk together the rolled oats, all-purpose flour, brown sugar, 1 teaspoon cinnamon, nutmeg, and salt. Add the cold, cubed butter. Now, here’s the trick: use your fingers to rub the butter into the dry ingredients. Pinch and squeeze until the mixture looks like coarse crumbs with some pea-sized clumps. You want some larger chunks for crunch and smaller bits for texture. If you’re using a food processor, pulse 5-7 times until you reach this consistency.
Step 5: Assemble and Bake (35-40 minutes)
Spread the topping evenly over the apples. Don’t press it down—let it sit loosely on top. This ensures it gets crispy. Place the dish in the preheated oven and bake for 35-40 minutes. You’ll know it’s done when the topping is golden brown and the apples are bubbling around the edges. If the topping starts browning too quickly, cover it loosely with foil for the last 10 minutes.
Step 6: Cool and Serve
Remove the crisp from the oven and let it cool for at least 15 minutes. This is the hardest part, I know. But cooling allows the juices to thicken slightly, so you don’t get a soupy dessert. Serve warm with a scoop of vanilla ice cream or whipped cream. The contrast of hot crisp and cold ice cream is heaven.
Total Time: About 45 minutes (15 minutes active, 30 minutes baking)
Expert Tips & Tricks
Here’s everything I’ve learned from making this dozens of times. These tips will save you from my mistakes.
Choose the Right Apples
This is the #1 tip. Use apples that hold their shape. Honeycrisp, Granny Smith, Braeburn, and Pink Lady are all great choices. Avoid Red Delicious or McIntosh—they turn to mush and release too much water, making the crisp soggy. I learned this the hard way with a batch of Red Delicious that looked like applesauce by the time it cooled.
Keep the Butter Cold
For the topping, cold butter is essential. If your butter is soft or melted, the topping will be more like a cake than a crisp. Cube the butter and put it back in the fridge for 10 minutes before using if you’re in a hurry. I keep a stick of butter in the fridge specifically for baking so it’s always ready.
Don’t Skimp on Cinnamon
Cinnamon is the flavor of fall. Don’t be shy. I use a total of 2 teaspoons (1 for apples, 1 for topping). If you love spice, add a pinch of ginger or cardamom. But cinnamon is the star here.
Let It Cool
I know it’s tempting to dig in right away, but wait. The filling is incredibly hot and runny when it comes out of the oven. Cooling for 15-20 minutes lets the juices set. If you serve it immediately, you’ll get a mess. Patience pays off.
Common Mistakes (and how to avoid them):
Mistake: Soggy bottom
Fix: Make sure your baking dish is the right size. If the apples are too deep, they steam instead of bake. Use a 9×13 dish, not a smaller one. Also, ensure your oven is fully preheated.
Mistake: Topping burns before apples cook
Fix: Cover with foil if the topping gets too dark. Or, bake at 350°F instead of 375°F for a longer, slower bake.
Mistake: Topping is too dry
Fix: You didn’t use enough butter. The topping should be moist enough to clump together but not wet. Add more butter if it looks sandy.
Pro Tricks I’ve Learned:
For Extra Crunch
Add ½ cup of chopped pecans or walnuts to the topping. Toast them in a dry pan for 2 minutes before adding for deeper flavor.
For Better Flavor
Let the apples sit with the sugar and lemon juice for 10 minutes before baking. This draws out some of the moisture and intensifies the apple flavor.
For Restaurant-Quality Finish
Sprinkle a little extra flaky sea salt on top after baking. It highlights the sweetness and adds a sophisticated touch.
Variations & Substitutions
Once you’ve nailed the basic version, here’s how you can mix it up. I’ve tried all of these.
Peach Crisp Variation
Swap the apples for 6-7 pounds of peeled and sliced peaches. Reduce the sugar to 1 tablespoon. Peaches are sweeter, so you don’t need as much. Add a splash of almond extract for a fancy twist. This is my favorite summer version.
Blueberry Crisp
Use 6 cups of fresh blueberries. Add 1 tablespoon of cornstarch to the berries to thicken the juices. The topping stays the same. Serve with lemon curd on the side.
Gluten-Free
Swap the all-purpose flour for a 1:1 gluten-free flour blend. Use certified gluten-free oats. Everything else is naturally gluten-free. I’ve used King Arthur Measure for Measure, and it works perfectly. The texture is slightly denser but still delicious.
Dairy-Free
Replace the butter with cold vegan butter sticks (like Miyoko’s or Earth Balance). Use coconut sugar instead of brown sugar if you want to avoid refined sugar. The topping will be slightly different but still crunchy. My lactose-intolerant friend loves this version.
Lower-Sugar
Reduce the brown sugar to ¾ cup and the granulated sugar to 1 tablespoon. Use apples that are naturally very sweet (like Fuji). You’ll lose some caramelization, but it’s still good. I make this when I’m trying to cut back on sugar.
Spiced Apple Crisp
Add ½ teaspoon of ground ginger, ¼ teaspoon of allspice, and ¼ teaspoon of cloves to the topping. It tastes like apple pie without the crust. Perfect for holidays.
Nutty Apple Crisp
Add 1 cup of chopped pecans or walnuts to the topping. Toast them first for extra flavor. The nuts add a wonderful earthy crunch that complements the apples.
Serving & Storage
How to Serve:
I usually serve this straight from the baking dish at the dinner table—it looks rustic and stays warm. But here are other ways I’ve enjoyed it:
Classic:
Warm crisp with a scoop of vanilla bean ice cream. The melting ice cream creates a sauce that’s irresistible. This is my favorite way.
Breakfast:
Serve a portion with a dollop of Greek yogurt and a drizzle of maple syrup. It’s like a deconstructed apple pie for breakfast. My kids love this.
With Coffee:
Serve a small square with a cup of black coffee or chai tea. It’s a perfect afternoon snack.
Side Dishes:
Apple crisp pairs well with savory dishes. I serve it after brown sugar bourbon glazed grilled ribs for a sweet finish to a smoky meal. It also goes great with roasted pork chops or turkey.
Storage Instructions:
Refrigerator:
Store in an airtight container or cover tightly with plastic wrap for up to 4 days. The topping will soften in the fridge—totally normal. It’s still delicious.
Reheating:
Best method: Reheat in the oven at 350°F for 15-20 minutes. This restores the crispiness of the topping.
Microwave method: Heat in 30-second intervals. It will soften the topping, but it’s fast. Add a splash of milk or cream if you want a saucier texture.
Never works: Trying to reheat in the microwave without covering. It will splatter everywhere. Ask me how I know.
Freezing:
You can freeze baked apple crisp for up to 2 months. Let it cool completely, then wrap tightly in plastic wrap and foil. Thaw in the fridge overnight and reheat in the oven. The texture might be slightly softer, but it’s still good. I don’t recommend freezing unbaked crisp because the apples can get mushy when thawed.
Meal Prep:
Make the crisp on Sunday and store in the fridge. Reheat individual portions during the week. It’s a great way to have dessert ready to go. I portion it into small containers for easy grab-and-go treats.
Nutrition Information
I’m not a nutritionist, but here’s the breakdown if you’re tracking. This is a rich dessert, so portion control is key.
Per Serving (based on 8 servings):
– Calories: 320
– Protein: 3g
– Carbs: 52g
– Fiber: 4g
– Sugar: 32g
– Fat: 12g
– Saturated Fat: 7g
– Cholesterol: 25mg
– Sodium: 180mg
– Calcium: 20mg
What’s Good:
– Decent fiber from the oats and apples
– Antioxidants from the apples
– Can add nuts to boost protein and healthy fats
– More filling than it looks
What to Know:
– Higher in sugar from the brown sugar and apples
– Contains dairy (unless modified)
– Moderate sodium
– Calorie-dense due to butter and sugar
My Take:
Look, this is dessert. It’s sweet, buttery, and comforting. It’s not a health food. But it’s way better than store-bought, costs less, and I know exactly what’s in it. When I want to make it lighter, I reduce the sugar and add more nuts. But usually? I just eat a reasonable portion and enjoy it. Life’s too short to deny yourself apple crisp.
Final Thoughts
So that’s my go-to easy fall apple crisp! I’ve probably talked your ear off at this point, but when you make a recipe this often, you have a lot to say about it.
This has saved dessert nights more times than I can count. It’s my answer to “what’s for dessert?” when I’m tired, don’t want to order out, and still want something that tastes really good. My family is happy, my guests are happy, and I’m happy because I’m not stressed about cooking.
Make it yours! Try different apples, swap in your favorite nuts, adjust the spices. The best recipes are the ones you adapt to your family’s tastes. If you make this, drop a comment and let me know what you think! I love hearing how recipes turn out in your kitchen. And if something doesn’t work, tell me that too—I’m here to help troubleshoot.
Happy baking! And I hope your kitchen smells half as good as mine does right now.
Frequently Asked Questions
Can I use frozen apples?
You can, but thaw them first and drain the excess liquid. Frozen apples release a lot of water, which can make the crisp soggy. If you use frozen apples, reduce the baking time by 5-10 minutes and check for doneness. Fresh apples are always better for texture, but frozen works in a pinch.
Why did my apple crisp turn out soggy?
Usually means you used the wrong apples or didn’t bake it long enough. Use apples that hold their shape, like Honeycrisp or Granny Smith. Also, make sure your oven is fully preheated. If the topping is soggy, you might not have used enough butter or you pressed it down too much. Keep it loose and crumbly.
Can I make this ahead for a dinner party?
Yes! Assemble the crisp the night before and store it in the fridge. Bake it the next day. You might need to add 5-10 minutes to the baking time since it’s starting cold. This is my go-to strategy for holiday dinners. It saves me stress on the day of.
Can I use instant oats instead of rolled oats?
I don’t recommend it. Instant oats are too fine and will turn into a paste. Rolled oats give that classic chewy-crunchy texture. If you only have instant oats, pulse them in a food processor for a few seconds to make them coarser. But rolled oats are best.
How do I reheat leftovers without it getting dry?
Add a splash of milk or cream to a skillet, add your leftover crisp, and heat gently over low heat, stirring frequently. The extra liquid brings back the creamy texture. Oven reheating is best for restoring crispiness. Microwave sort of works but tends to dry it out. If you do microwave, definitely add a splash of liquid first.
Can I double this recipe?
Absolutely! Double everything and use a 9×13 dish or two 8×8 dishes. The cooking times stay the same. I do this when I’m feeding a crowd or meal-prepping. Just make sure your apples are spread evenly so they cook properly.
What’s the best apple for apple crisp?
My top pick is a mix of Honeycrisp and Granny Smith. Honeycrisp adds sweetness and crunch, while Granny Smith adds tartness and structure. Avoid Red Delicious—they turn to mush. Braeburn and Pink Lady are also great choices.
Pin This Recipe!
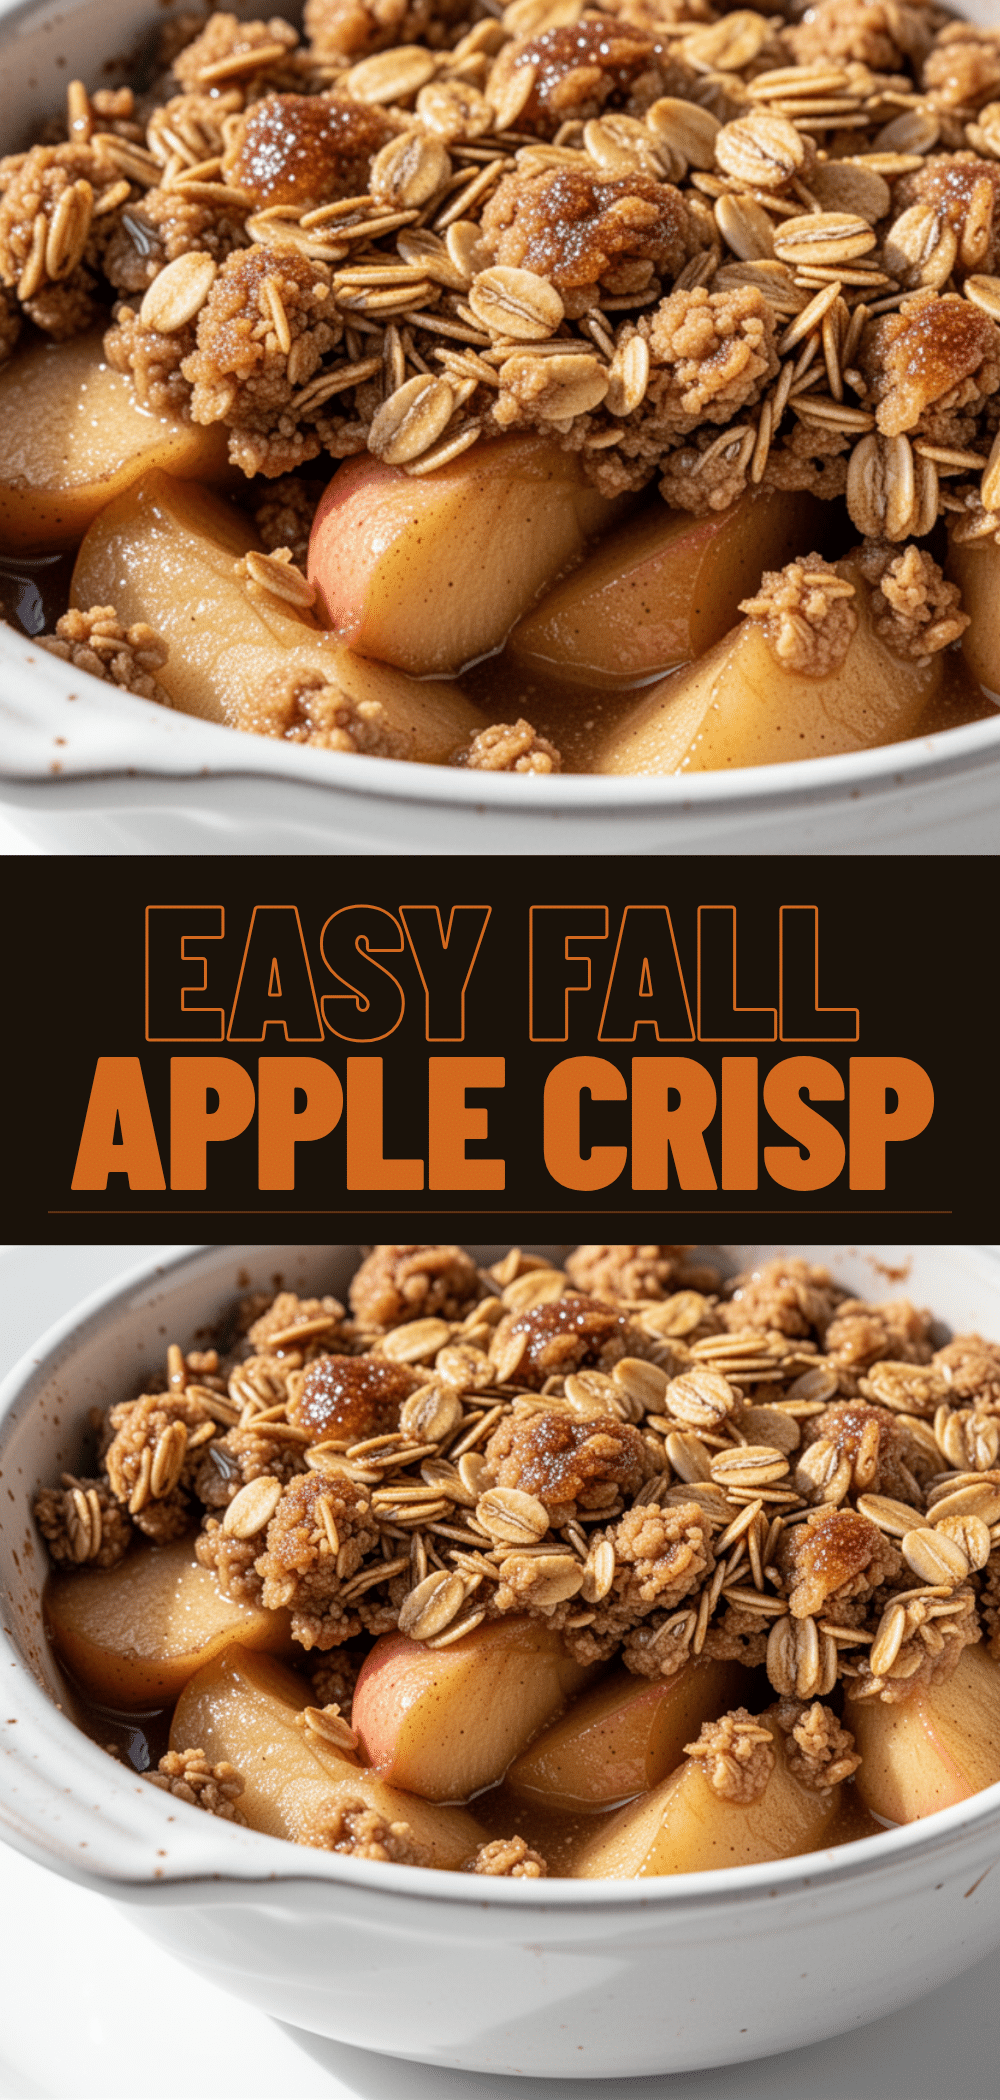
Easy Fall Apple Crisp: Best Warm Autumn Dessert Recipe
- Total Time: 45 minutes
- Yield: 8 servings 1x
Description
A forgiving, delicious, and easy-to-make apple crisp that requires zero special skills. This recipe features tender apples topped with a crunchy oat and butter crumble, perfect for autumn.
Ingredients
- 6–7 medium apples (about 3 lbs), peeled, cored, and sliced into ½-inch wedges (mix of Honeycrisp and Granny Smith recommended)
- 1 tablespoon lemon juice
- 2 tablespoons granulated sugar
- 1 teaspoon ground cinnamon
- 1 teaspoon vanilla extract
- 1 cup old-fashioned rolled oats
- 1 cup all-purpose flour
- 1 cup packed brown sugar
- ½ cup cold unsalted butter, cubed
- 1 teaspoon ground cinnamon
- ¼ teaspoon ground nutmeg
- ¼ teaspoon salt
- Optional: ½ cup chopped pecans or walnuts
- Optional: ¼ cup raisins or dried cranberries
Instructions
- Preheat oven to 375°F (190°C). Grease a 9×13-inch baking dish with butter or cooking spray.
- Wash, peel, core, and slice apples into ½-inch thick wedges.
- In a large bowl, toss apple slices with lemon juice, granulated sugar, 1 teaspoon cinnamon, and vanilla extract until evenly coated.
- Spread the apple mixture evenly into the prepared baking dish.
- In a medium bowl, whisk together rolled oats, all-purpose flour, brown sugar, 1 teaspoon cinnamon, nutmeg, and salt.
- Add the cold, cubed butter to the dry ingredients. Use your fingers to rub the butter into the mixture until it resembles coarse crumbs with some pea-sized clumps.
- Spread the topping evenly over the apples. Do not press it down.
- Bake for 35-40 minutes, or until the topping is golden brown and the apples are bubbling around the edges. If the topping browns too quickly, cover loosely with foil for the last 10 minutes.
- Remove from oven and let cool for at least 15 minutes before serving to allow juices to thicken.
- Serve warm with vanilla ice cream or whipped cream.
Notes
Use apples that hold their shape like Honeycrisp or Granny Smith; avoid Red Delicious. Keep butter cold for a crispier topping. Let the crisp cool for 15 minutes before serving to prevent a soupy texture. Can be made gluten-free by using GF flour and oats, or dairy-free by using vegan butter.
- Prep Time: 15 minutes
- Cook Time: 30 minutes
- Category: Dessert
- Cuisine: American
Nutrition
- Serving Size: 1 slice
- Calories: 320
- Sugar: 32
- Sodium: 180
- Fat: 12
- Saturated Fat: 7
- Carbohydrates: 52
- Fiber: 4
- Protein: 3
Keywords: apple crisp, fall dessert, autumn recipe, easy dessert, oatmeal crumble, comfort food, gluten-free option, vegan option


